-
Outdoor Shower: Getting Started
We have been planning on putting in an outdoor shower, in preparation for summer volunteers. Having friends living on our land with their caravan has pushed us to expedite those plans.
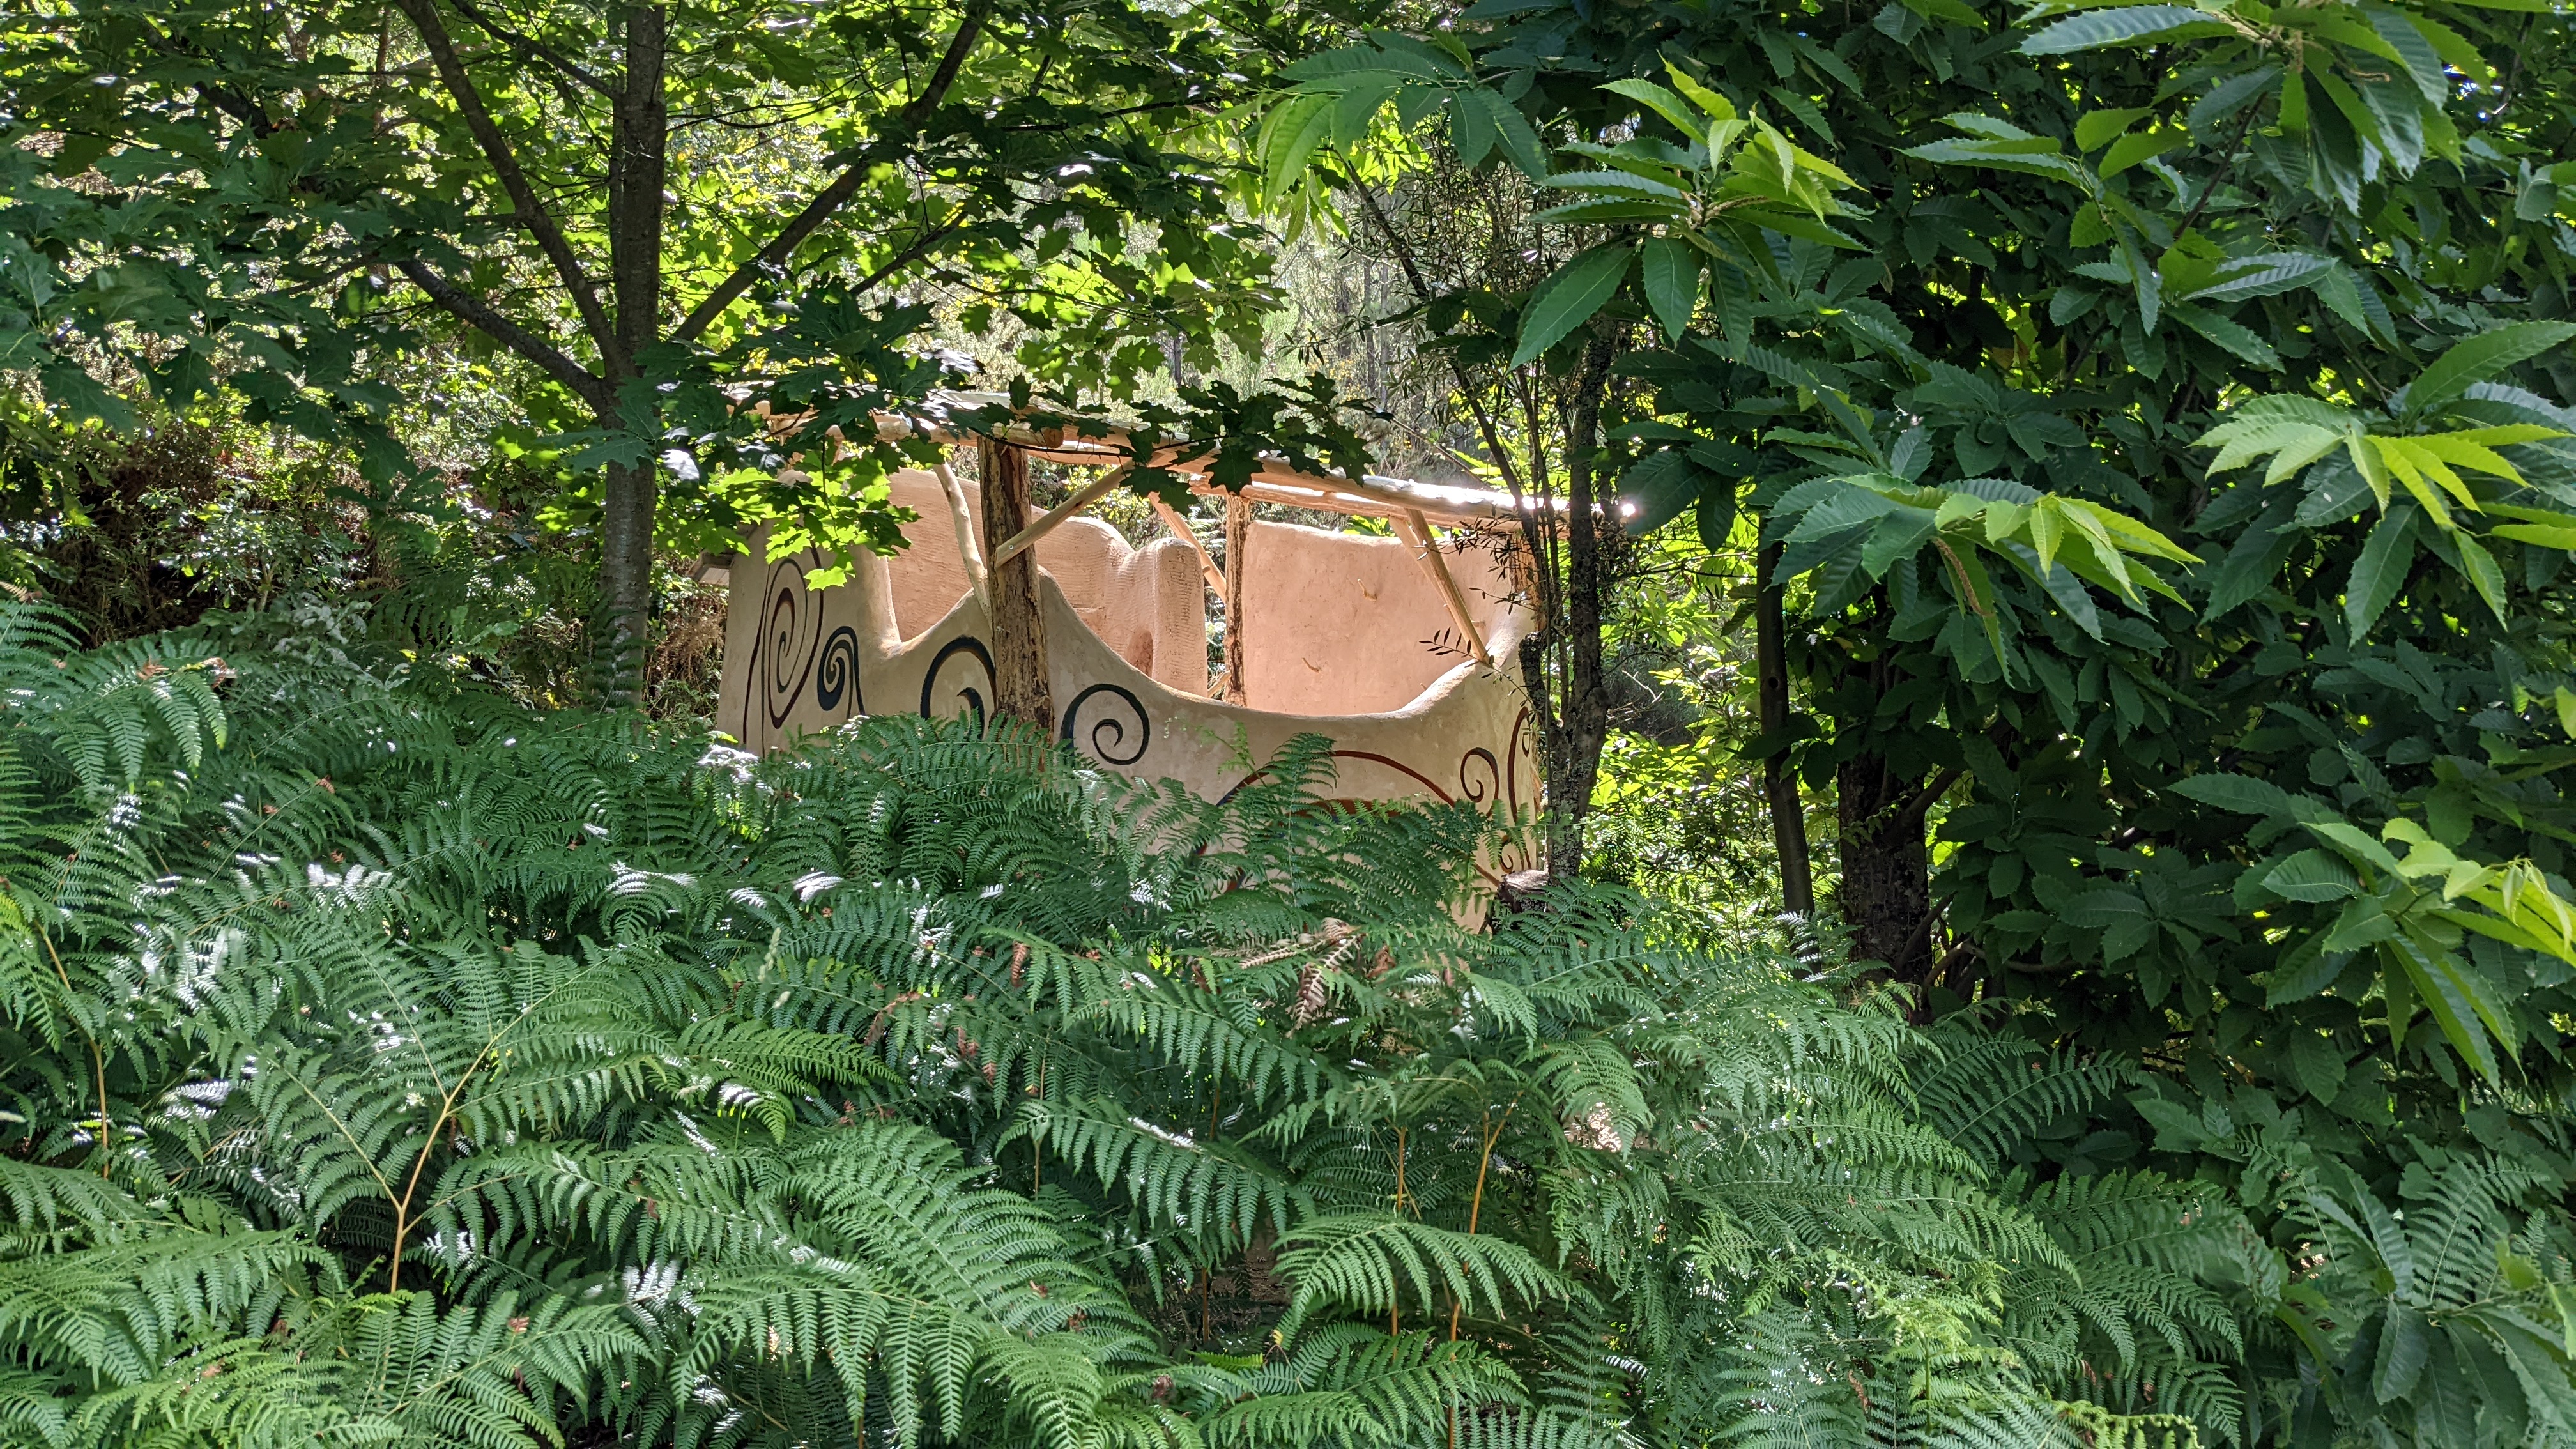
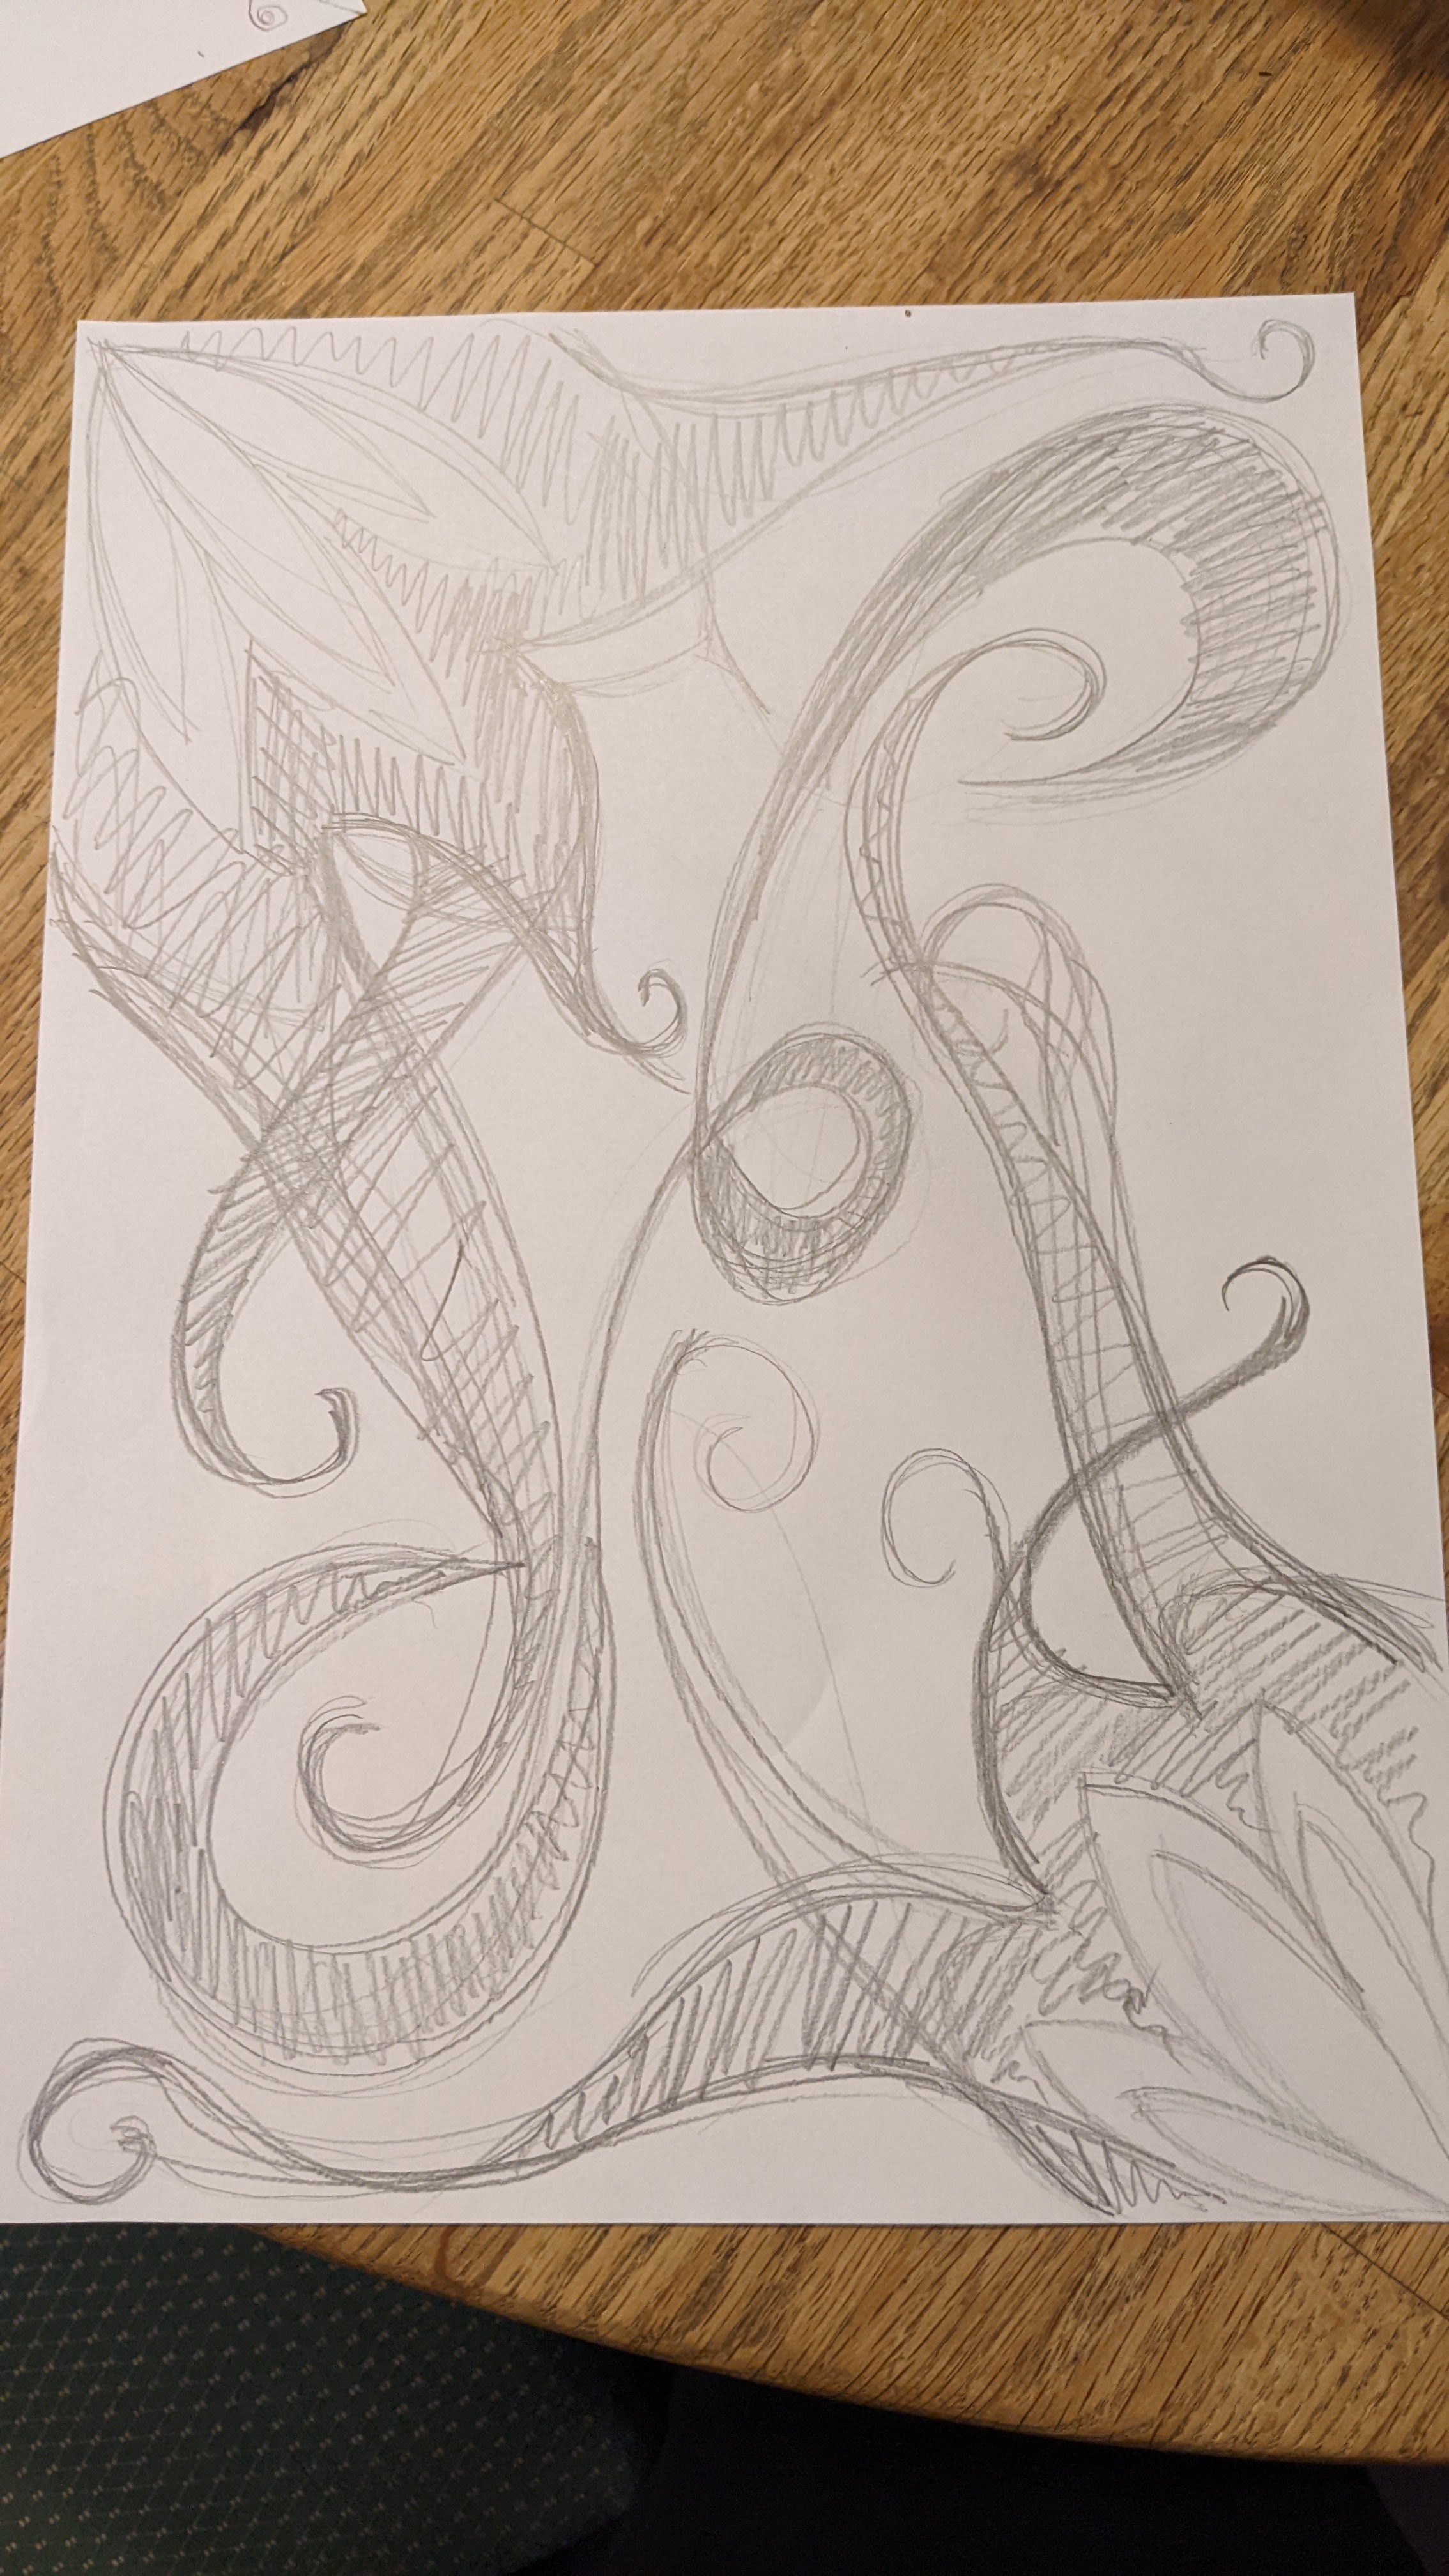
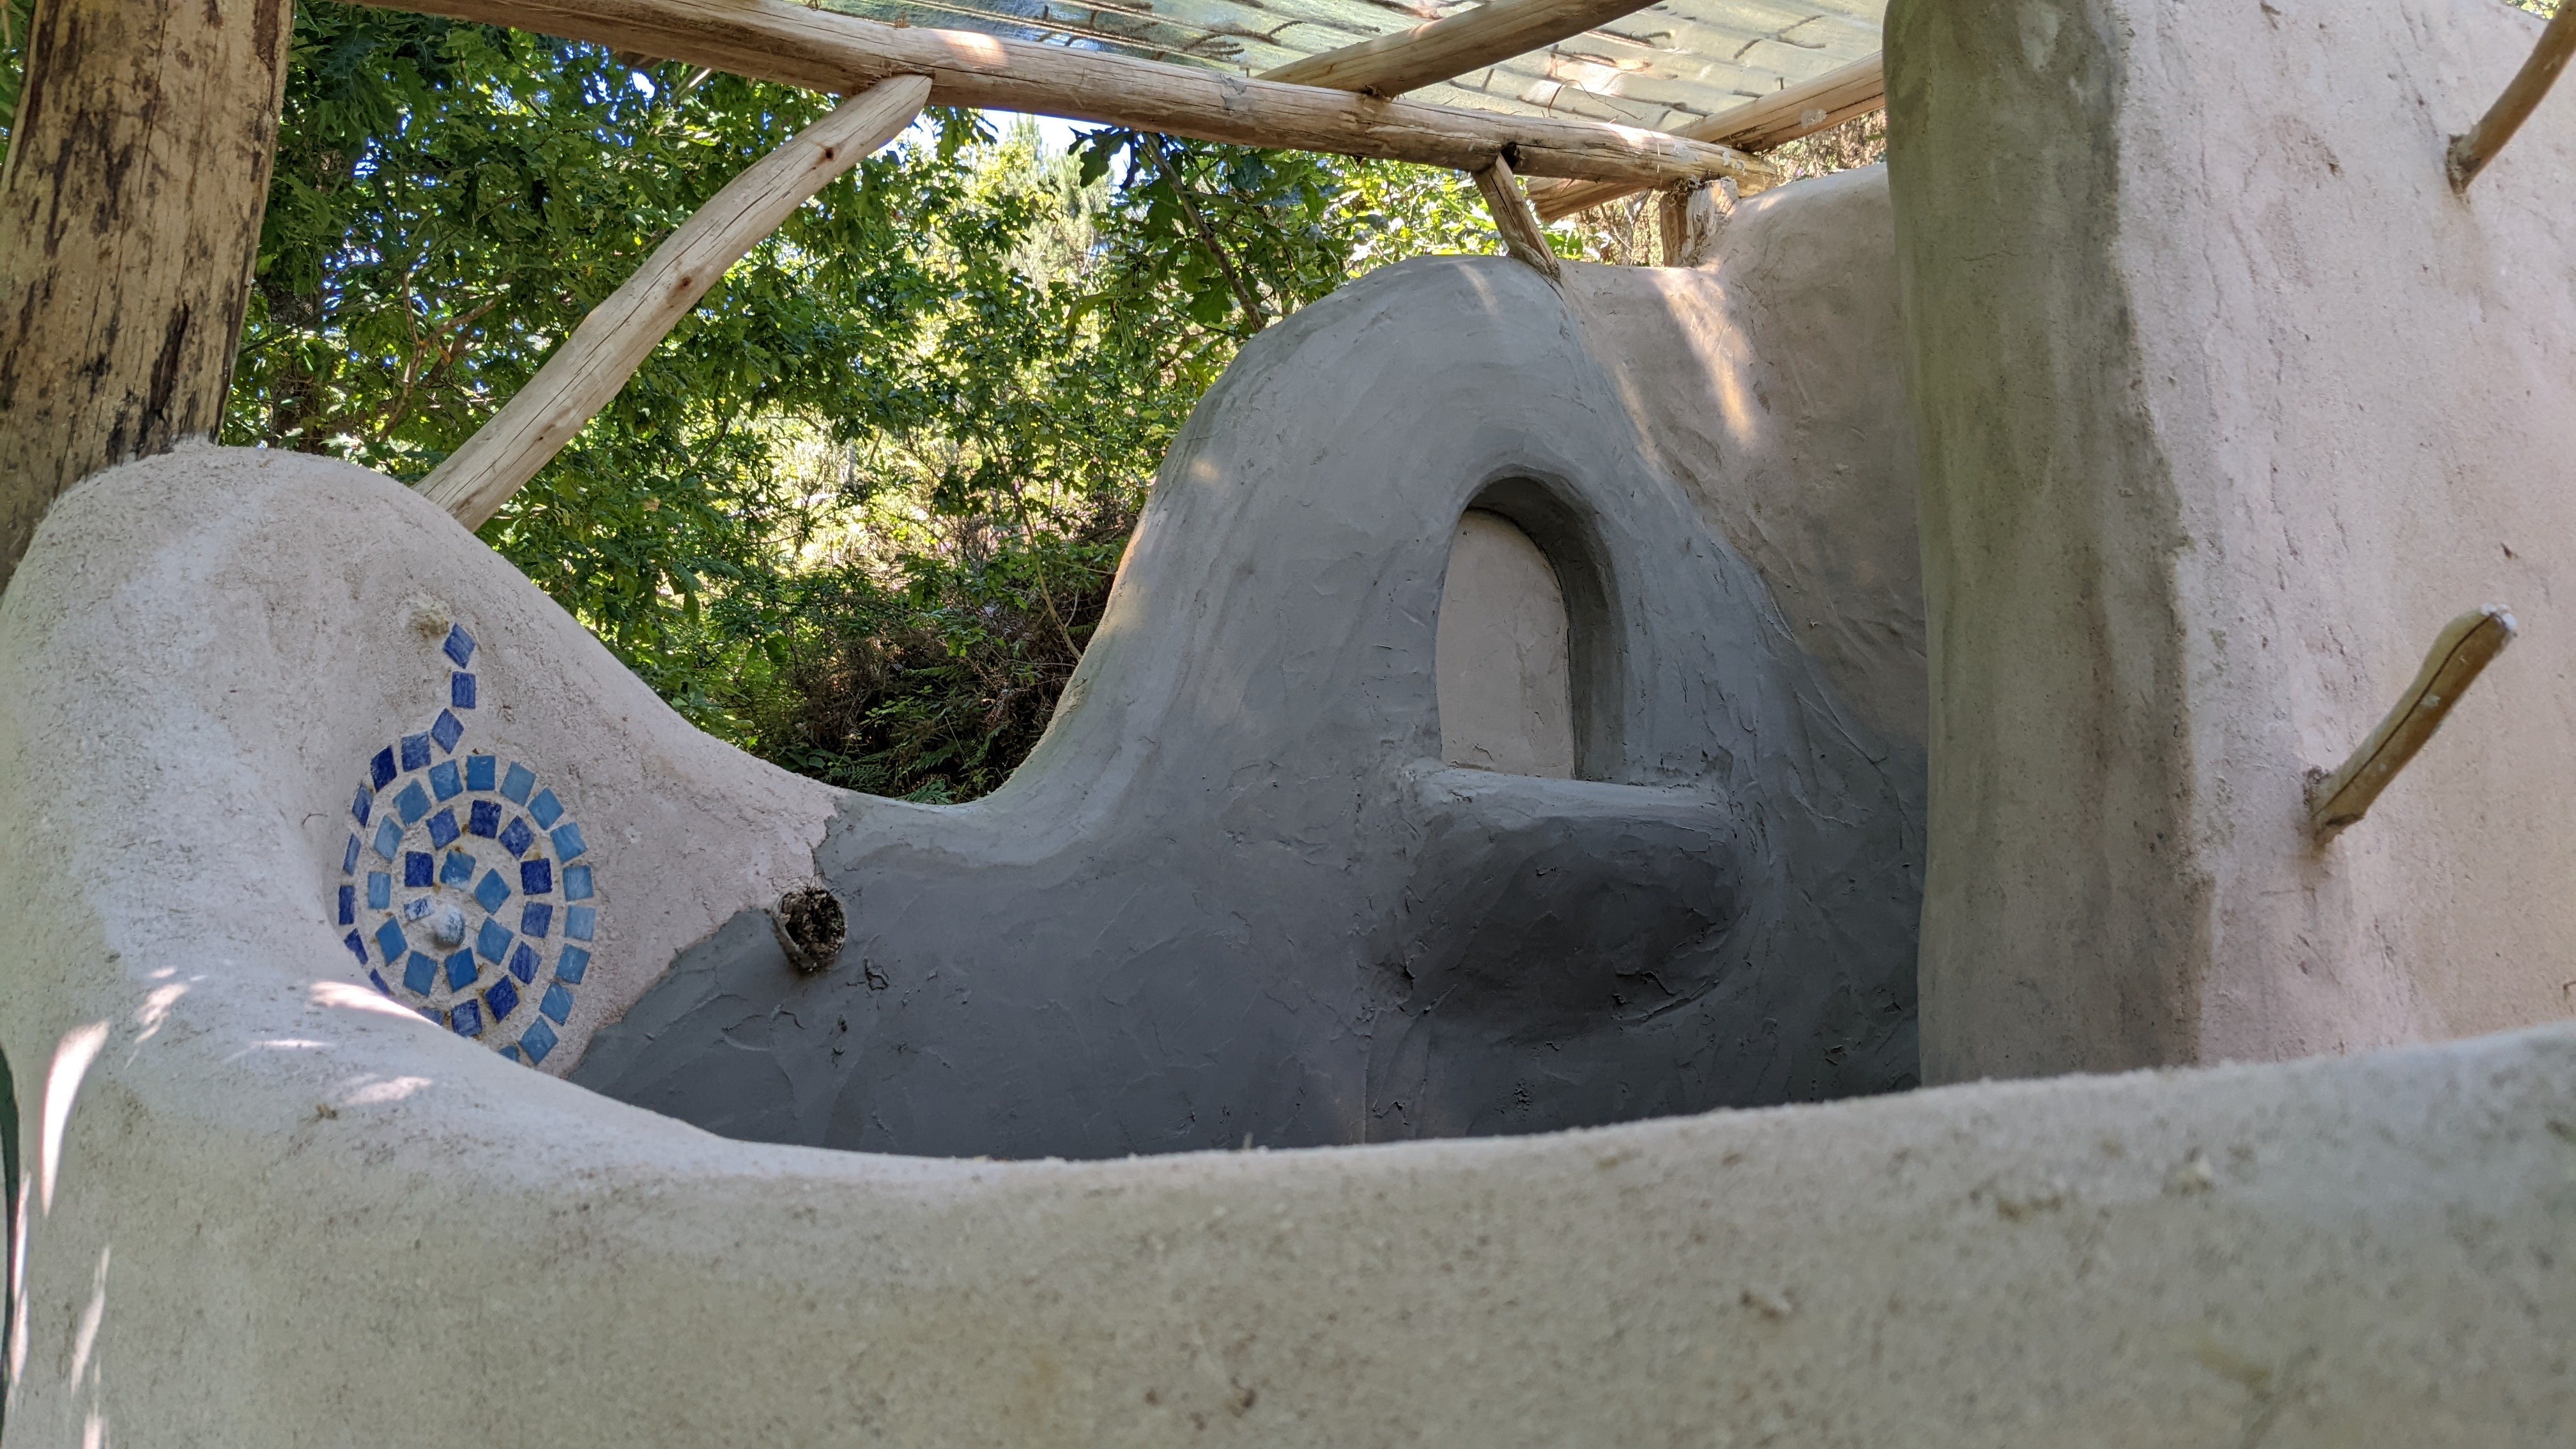
We decided to build a cob shower, in order to gain some experience with tadelakt water-resistant plaster. It is spiral-shaped, Fibonacci inspired.
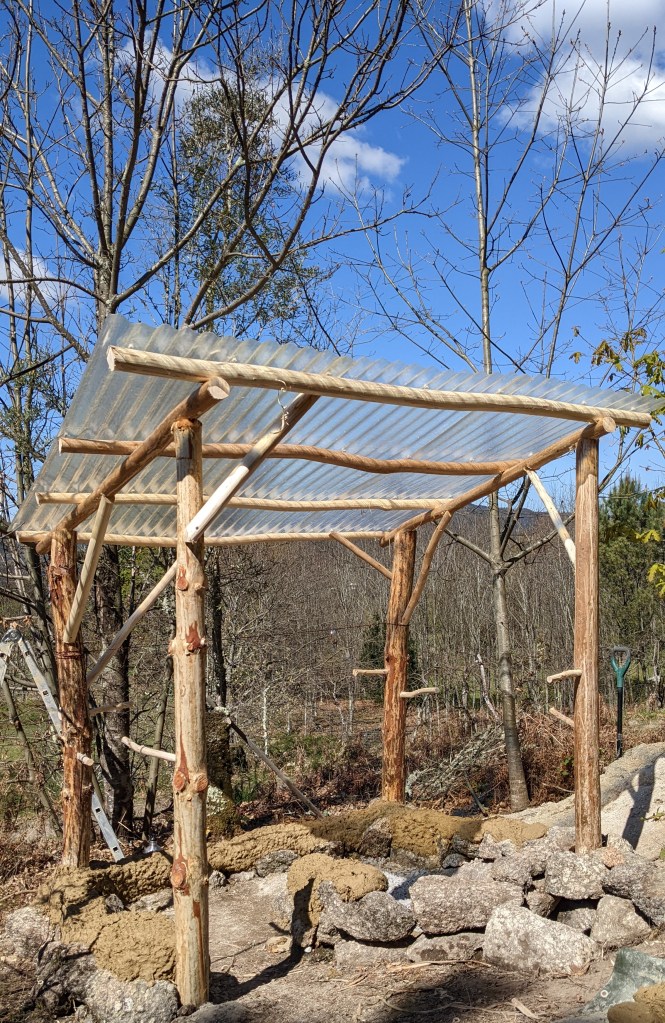
I started by digging a 1-meter deep hole, and filled it with crushed rock. That way, the water gets filtered by the rocks and can infiltrate the subsoil. The intention is to only use ecological and biodegradable soap, in order to keep the soil clean.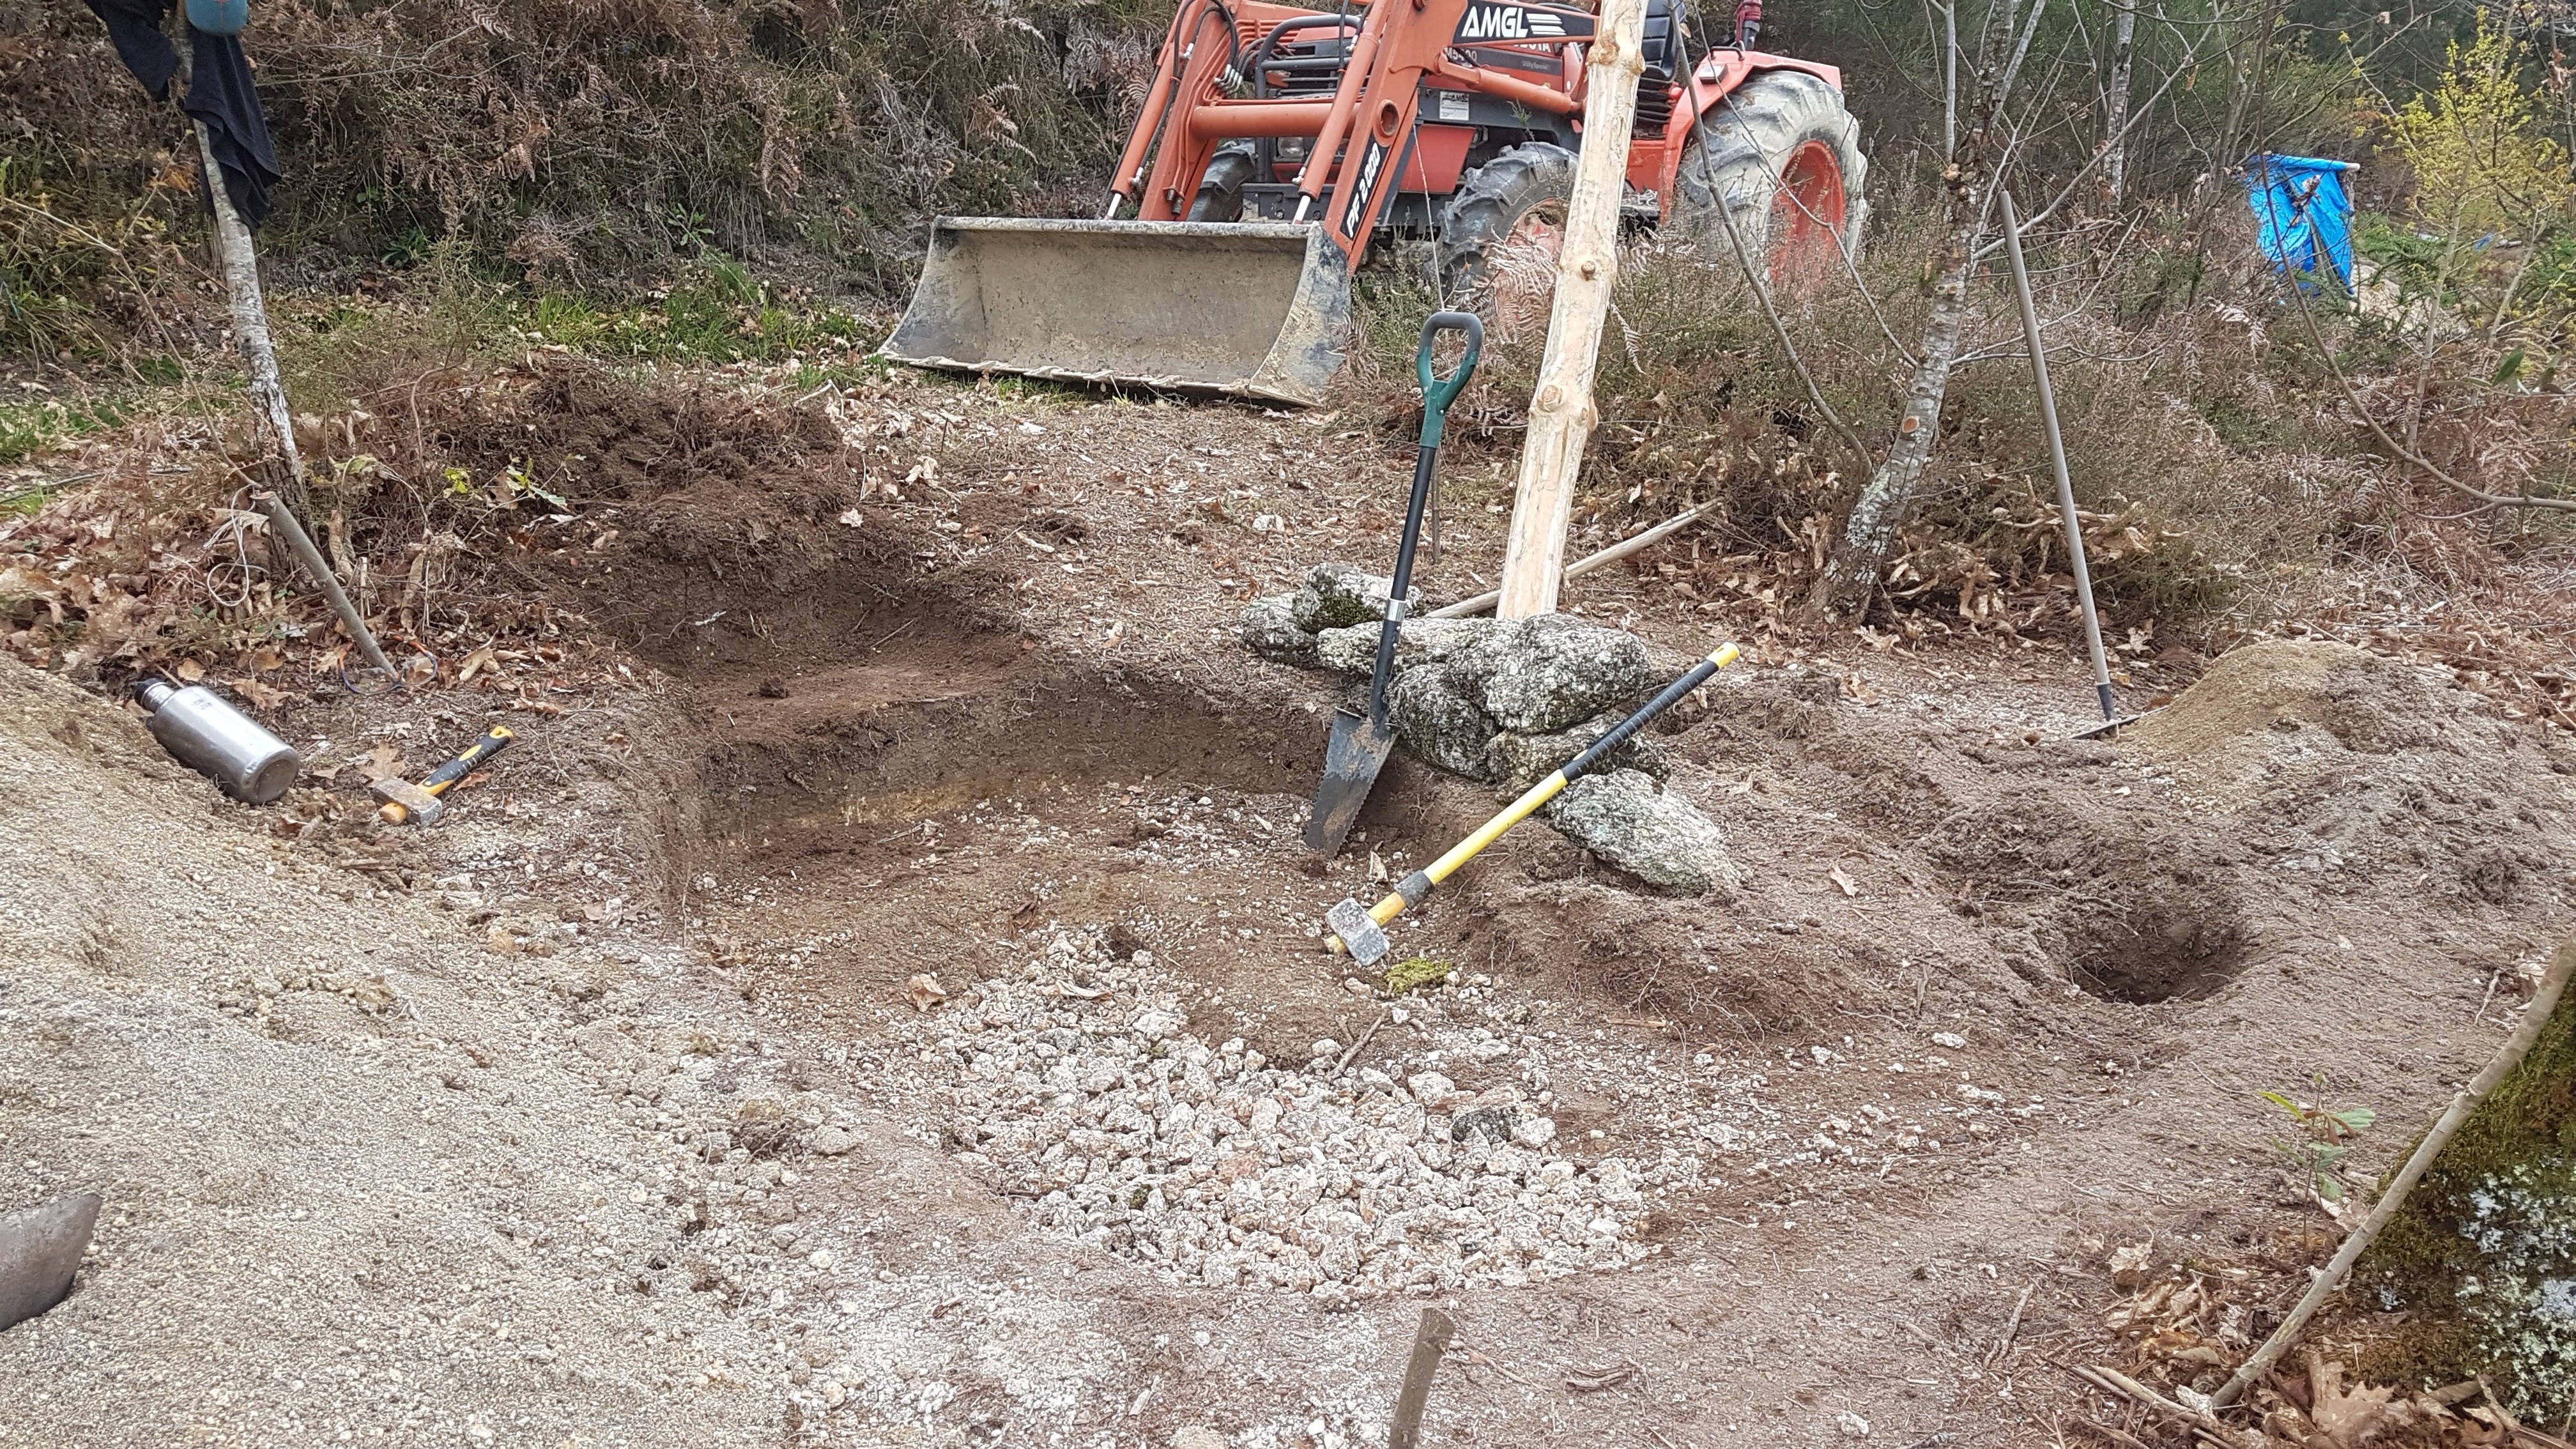
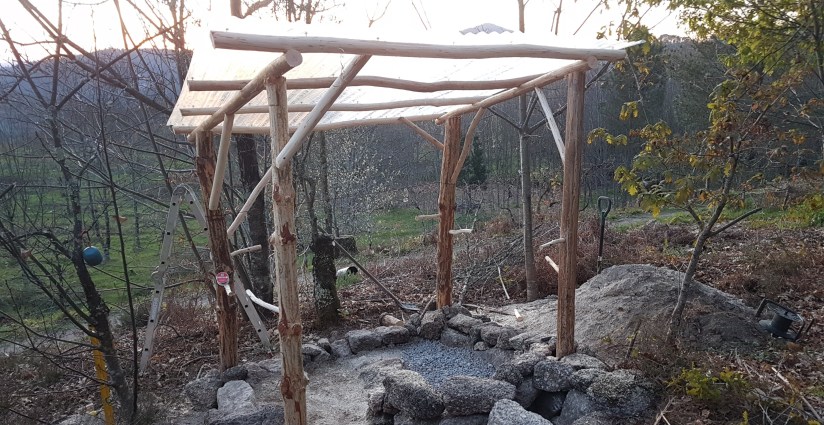
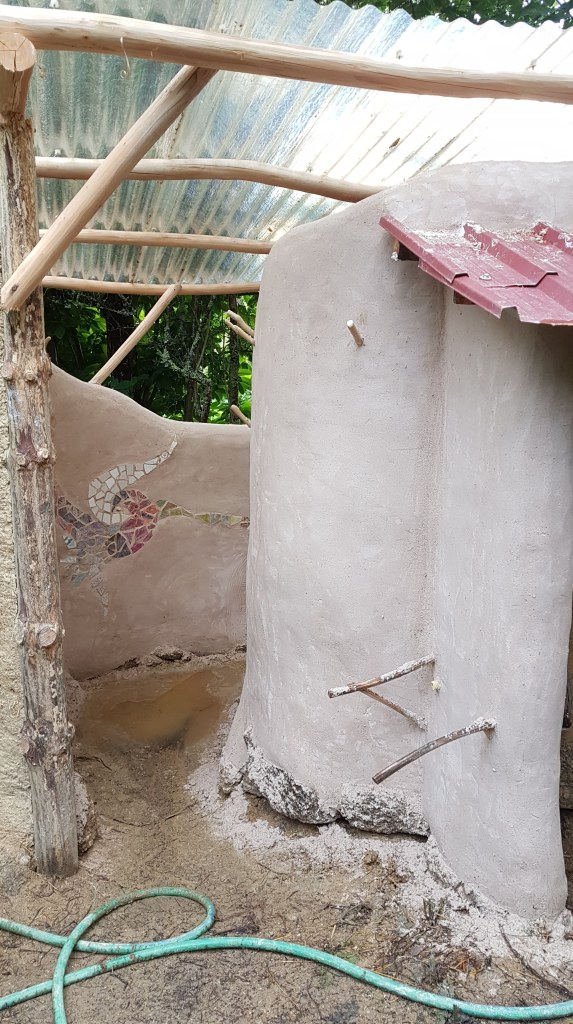
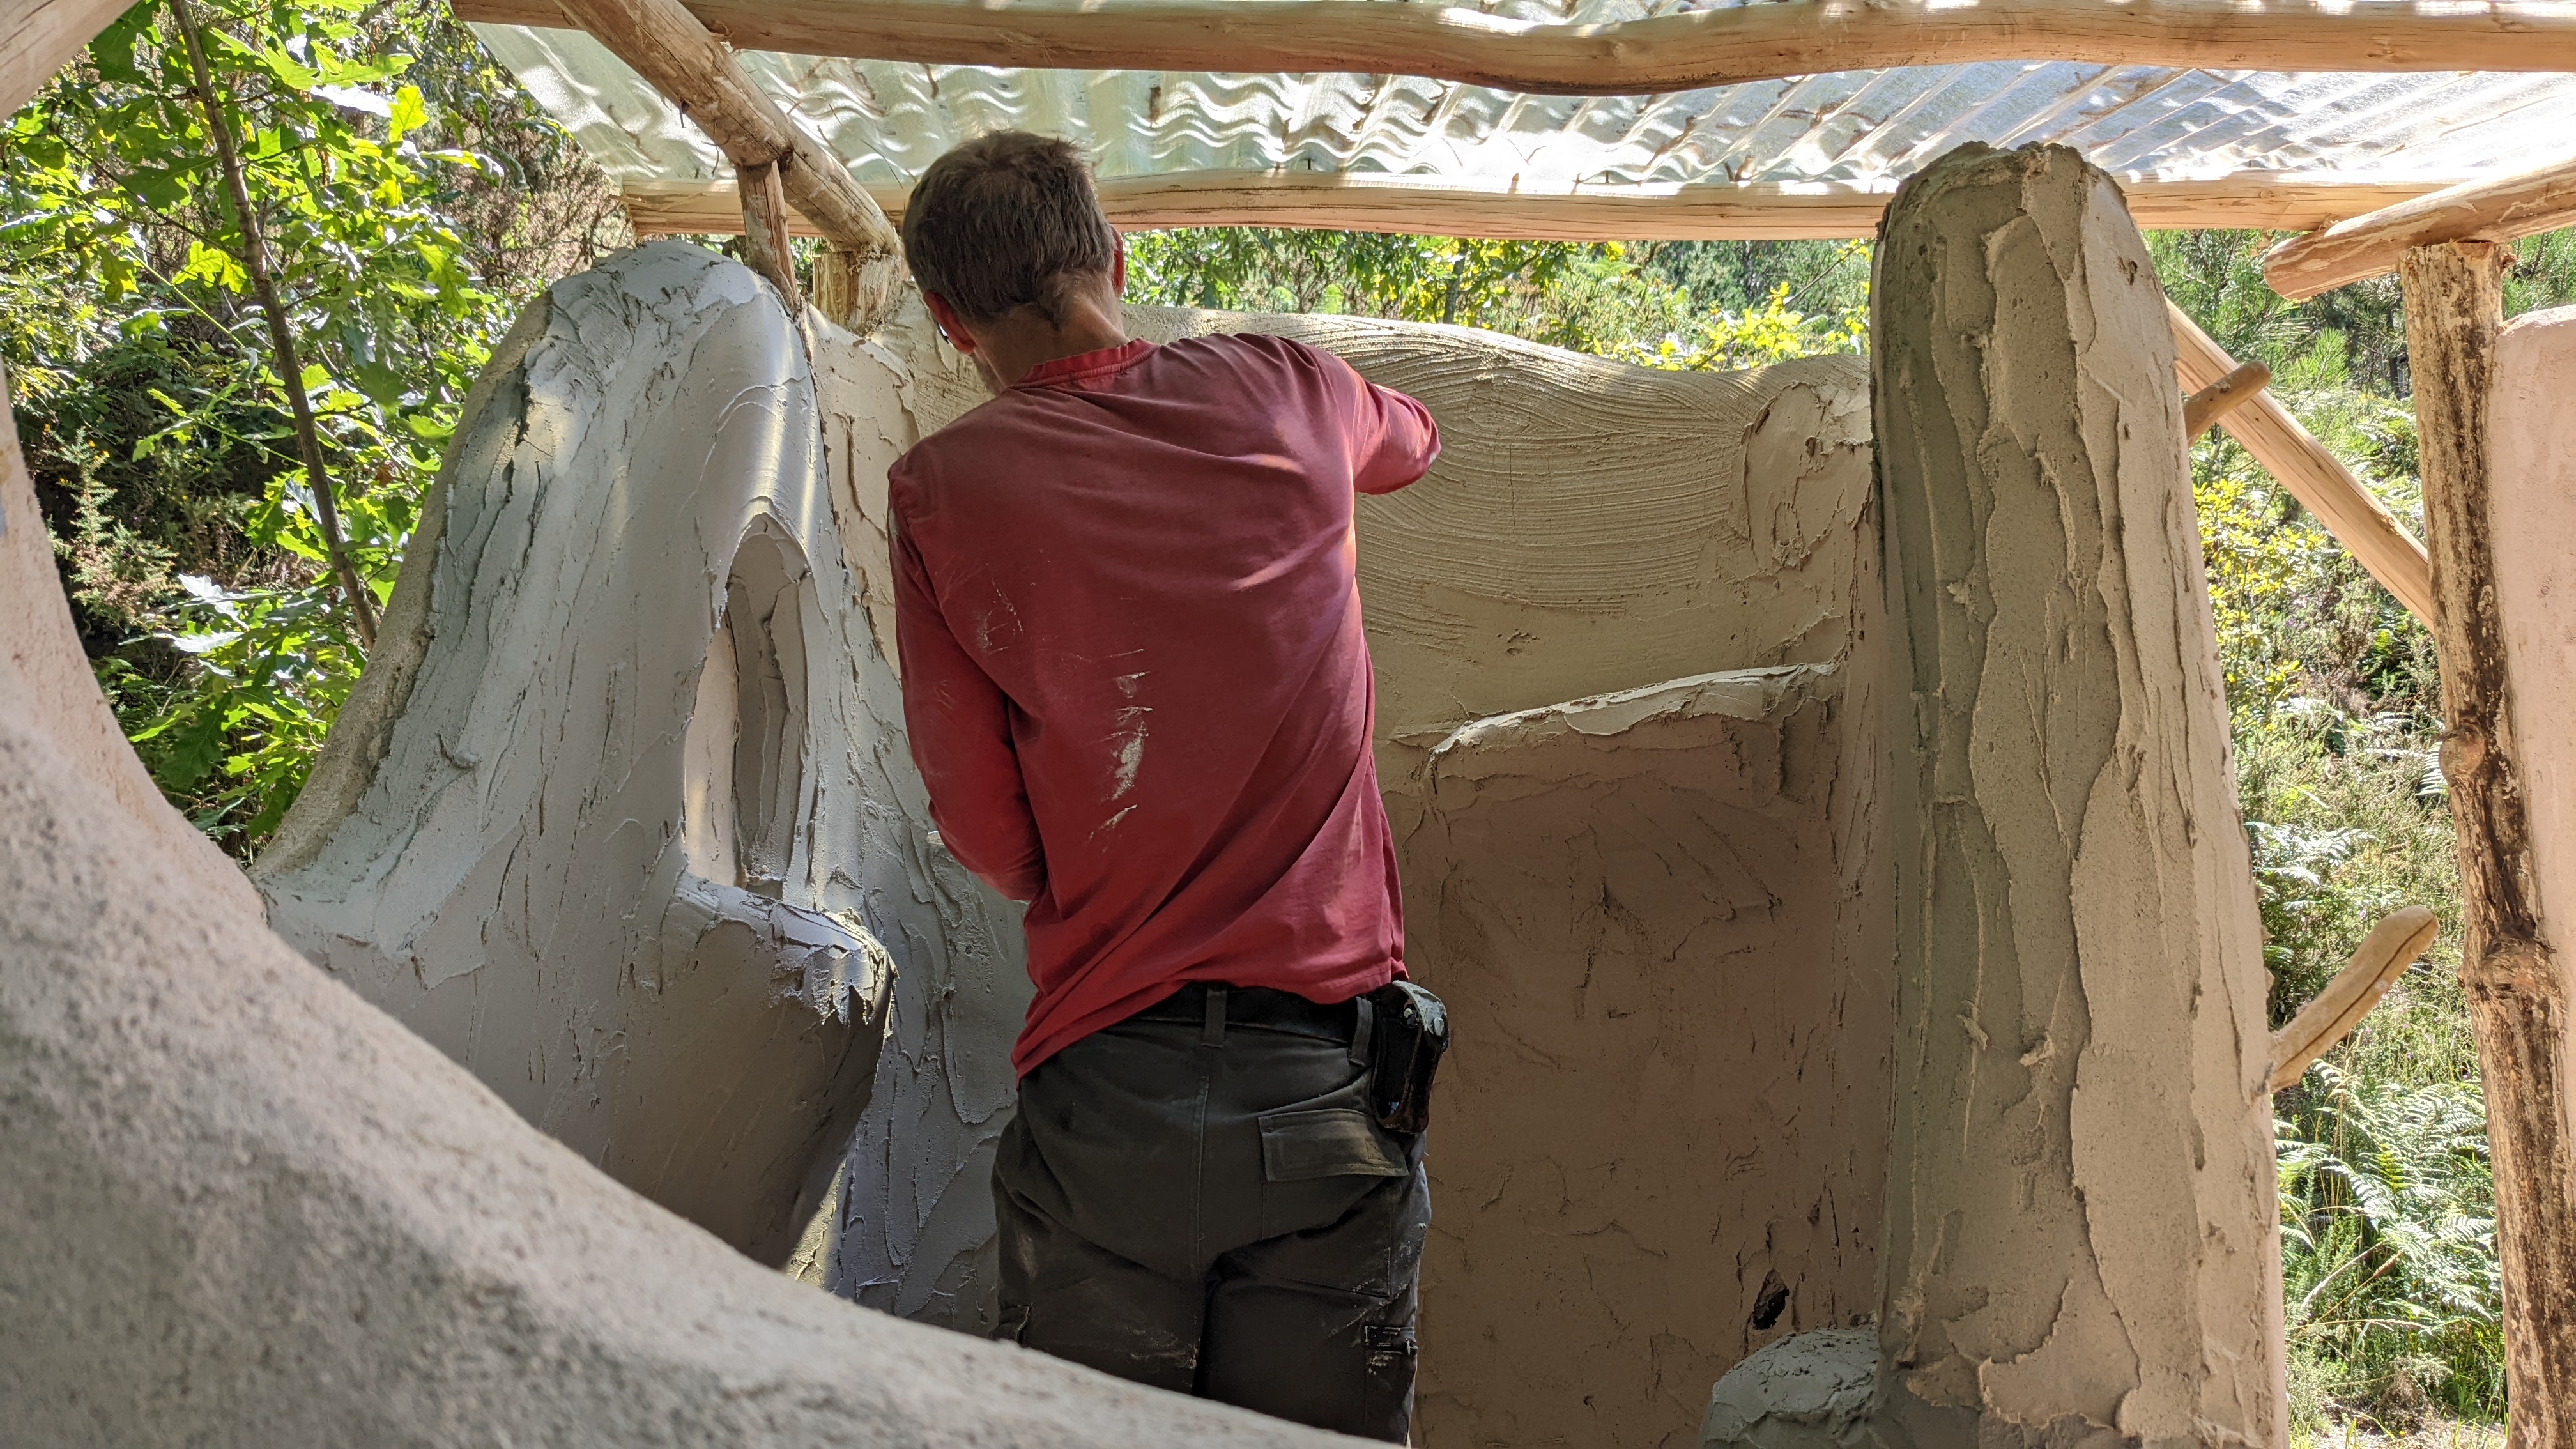
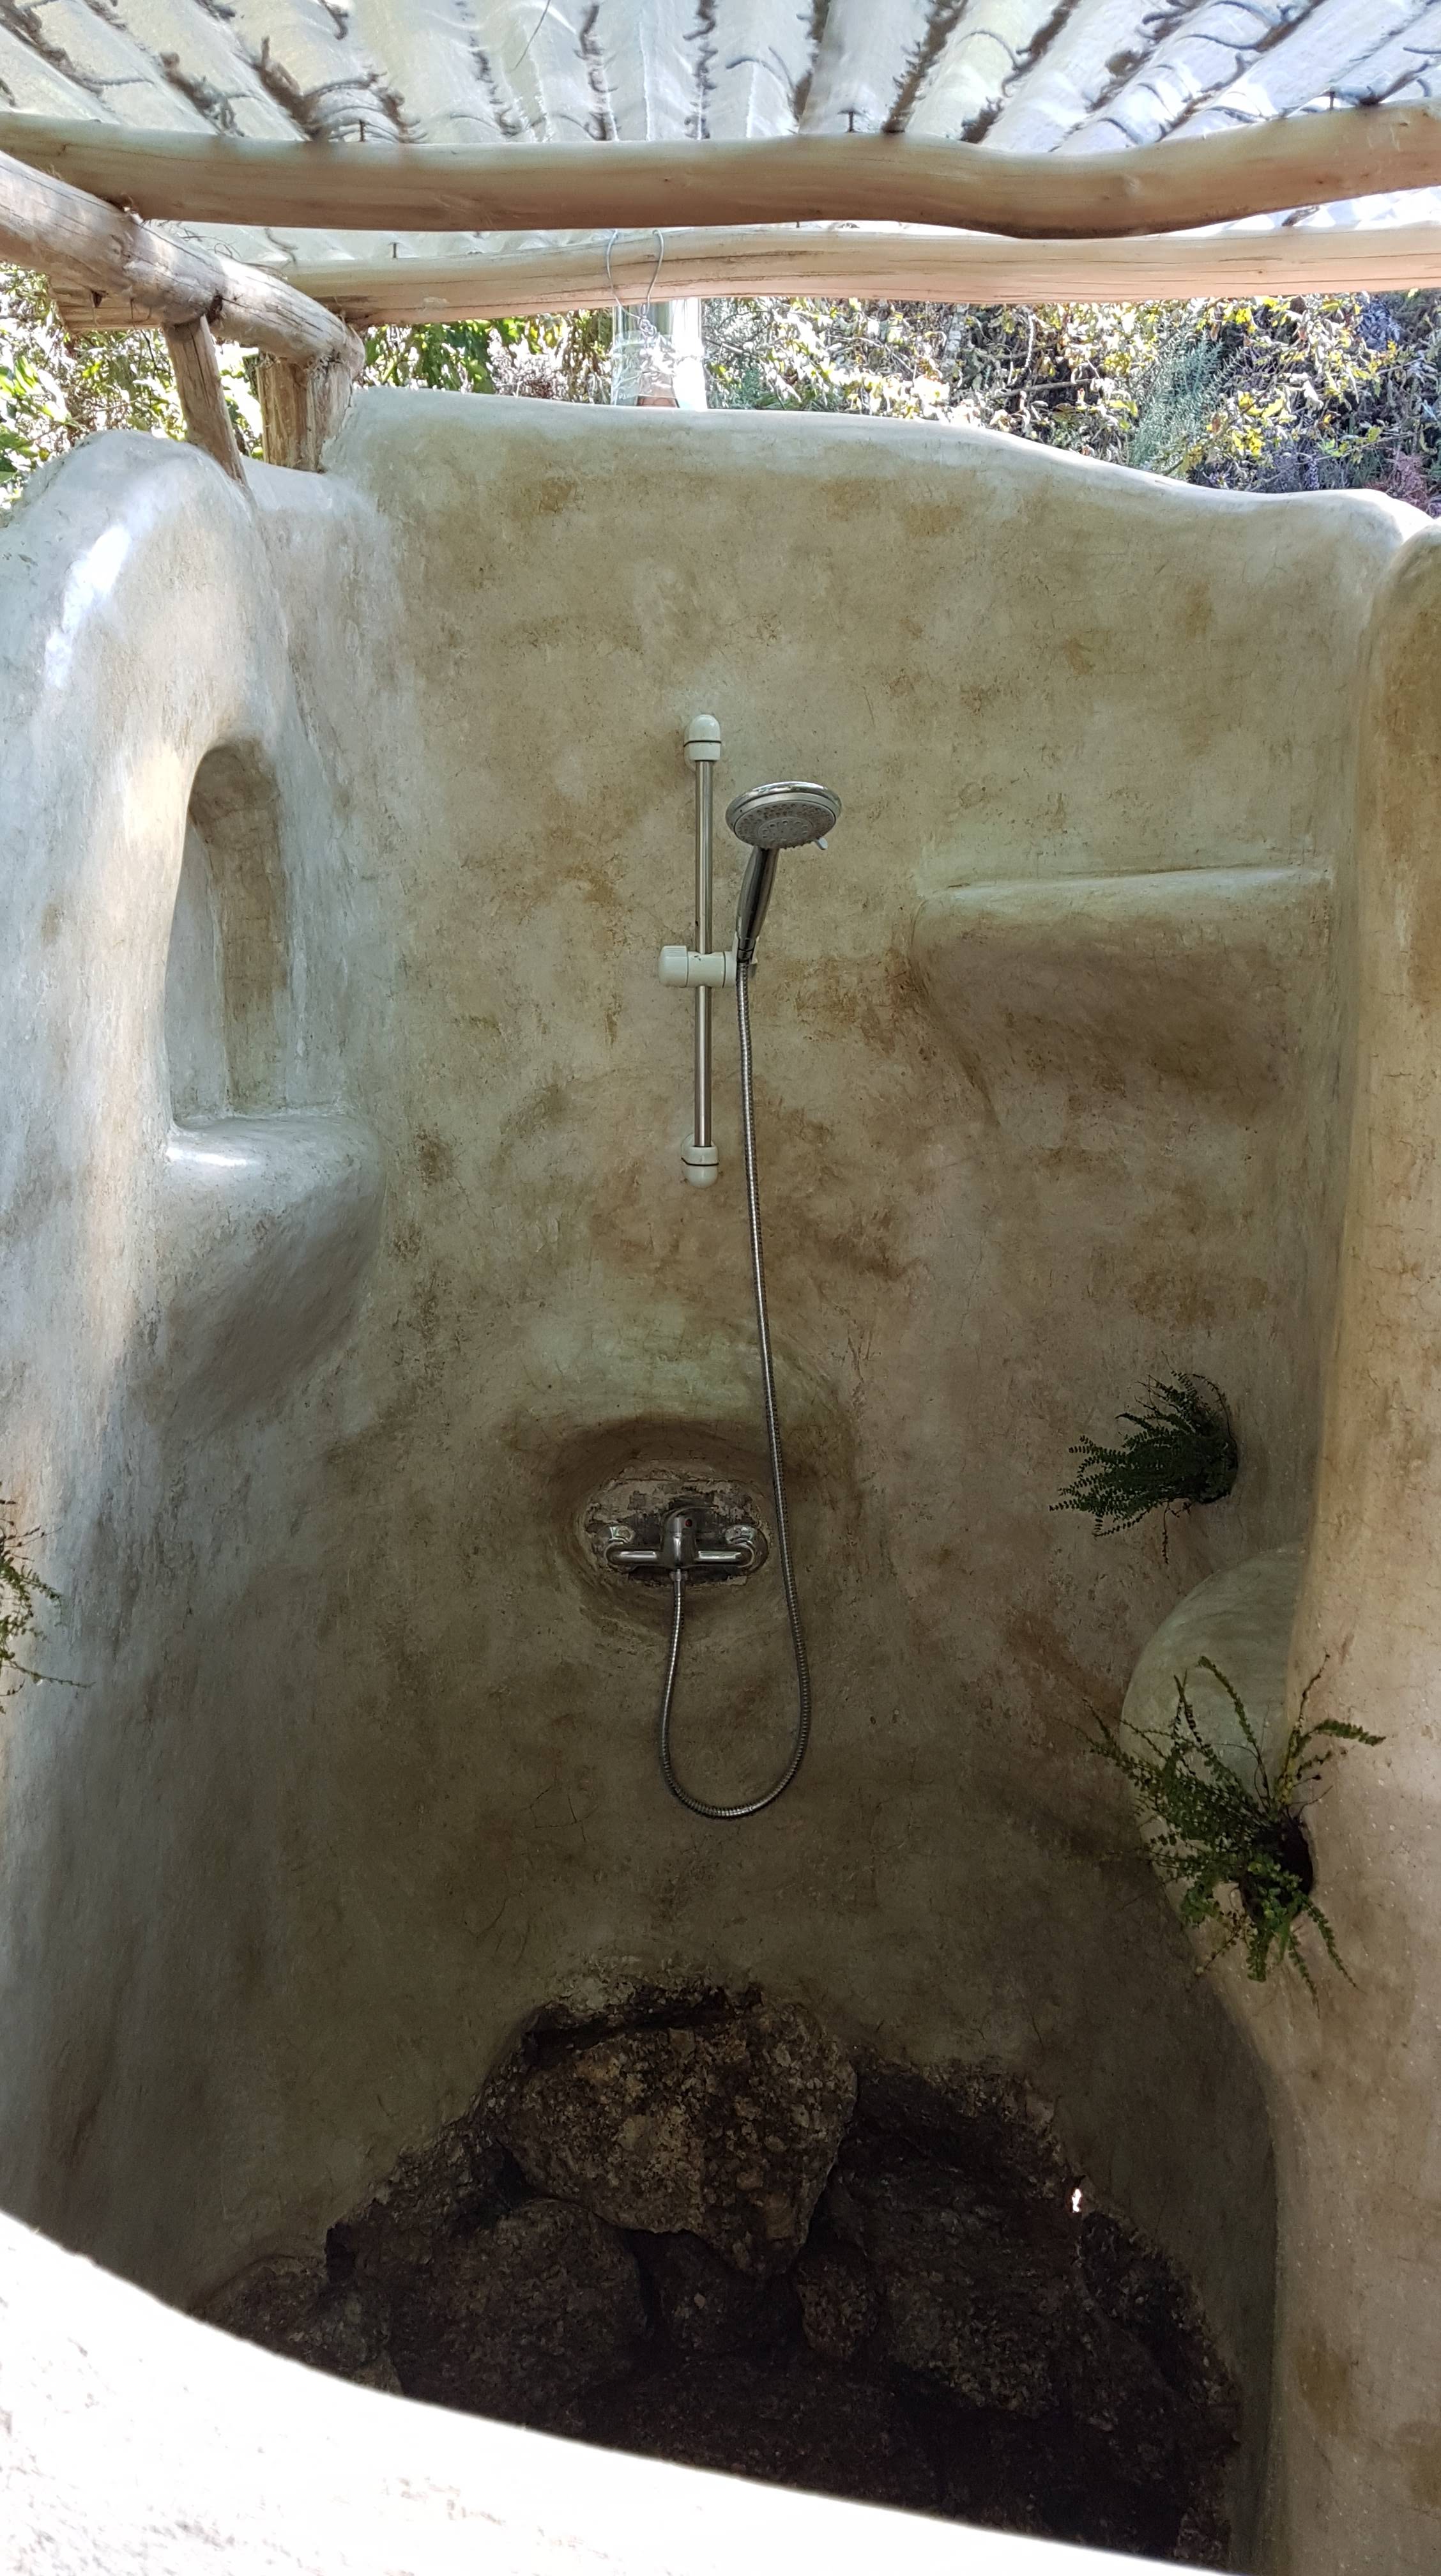
After preparing the filter, I placed the rocks for foundation, as well as the posts and roofing. We decided to have a transparent roof over the shower, in order to maximize natural lighting while protecting the cob.


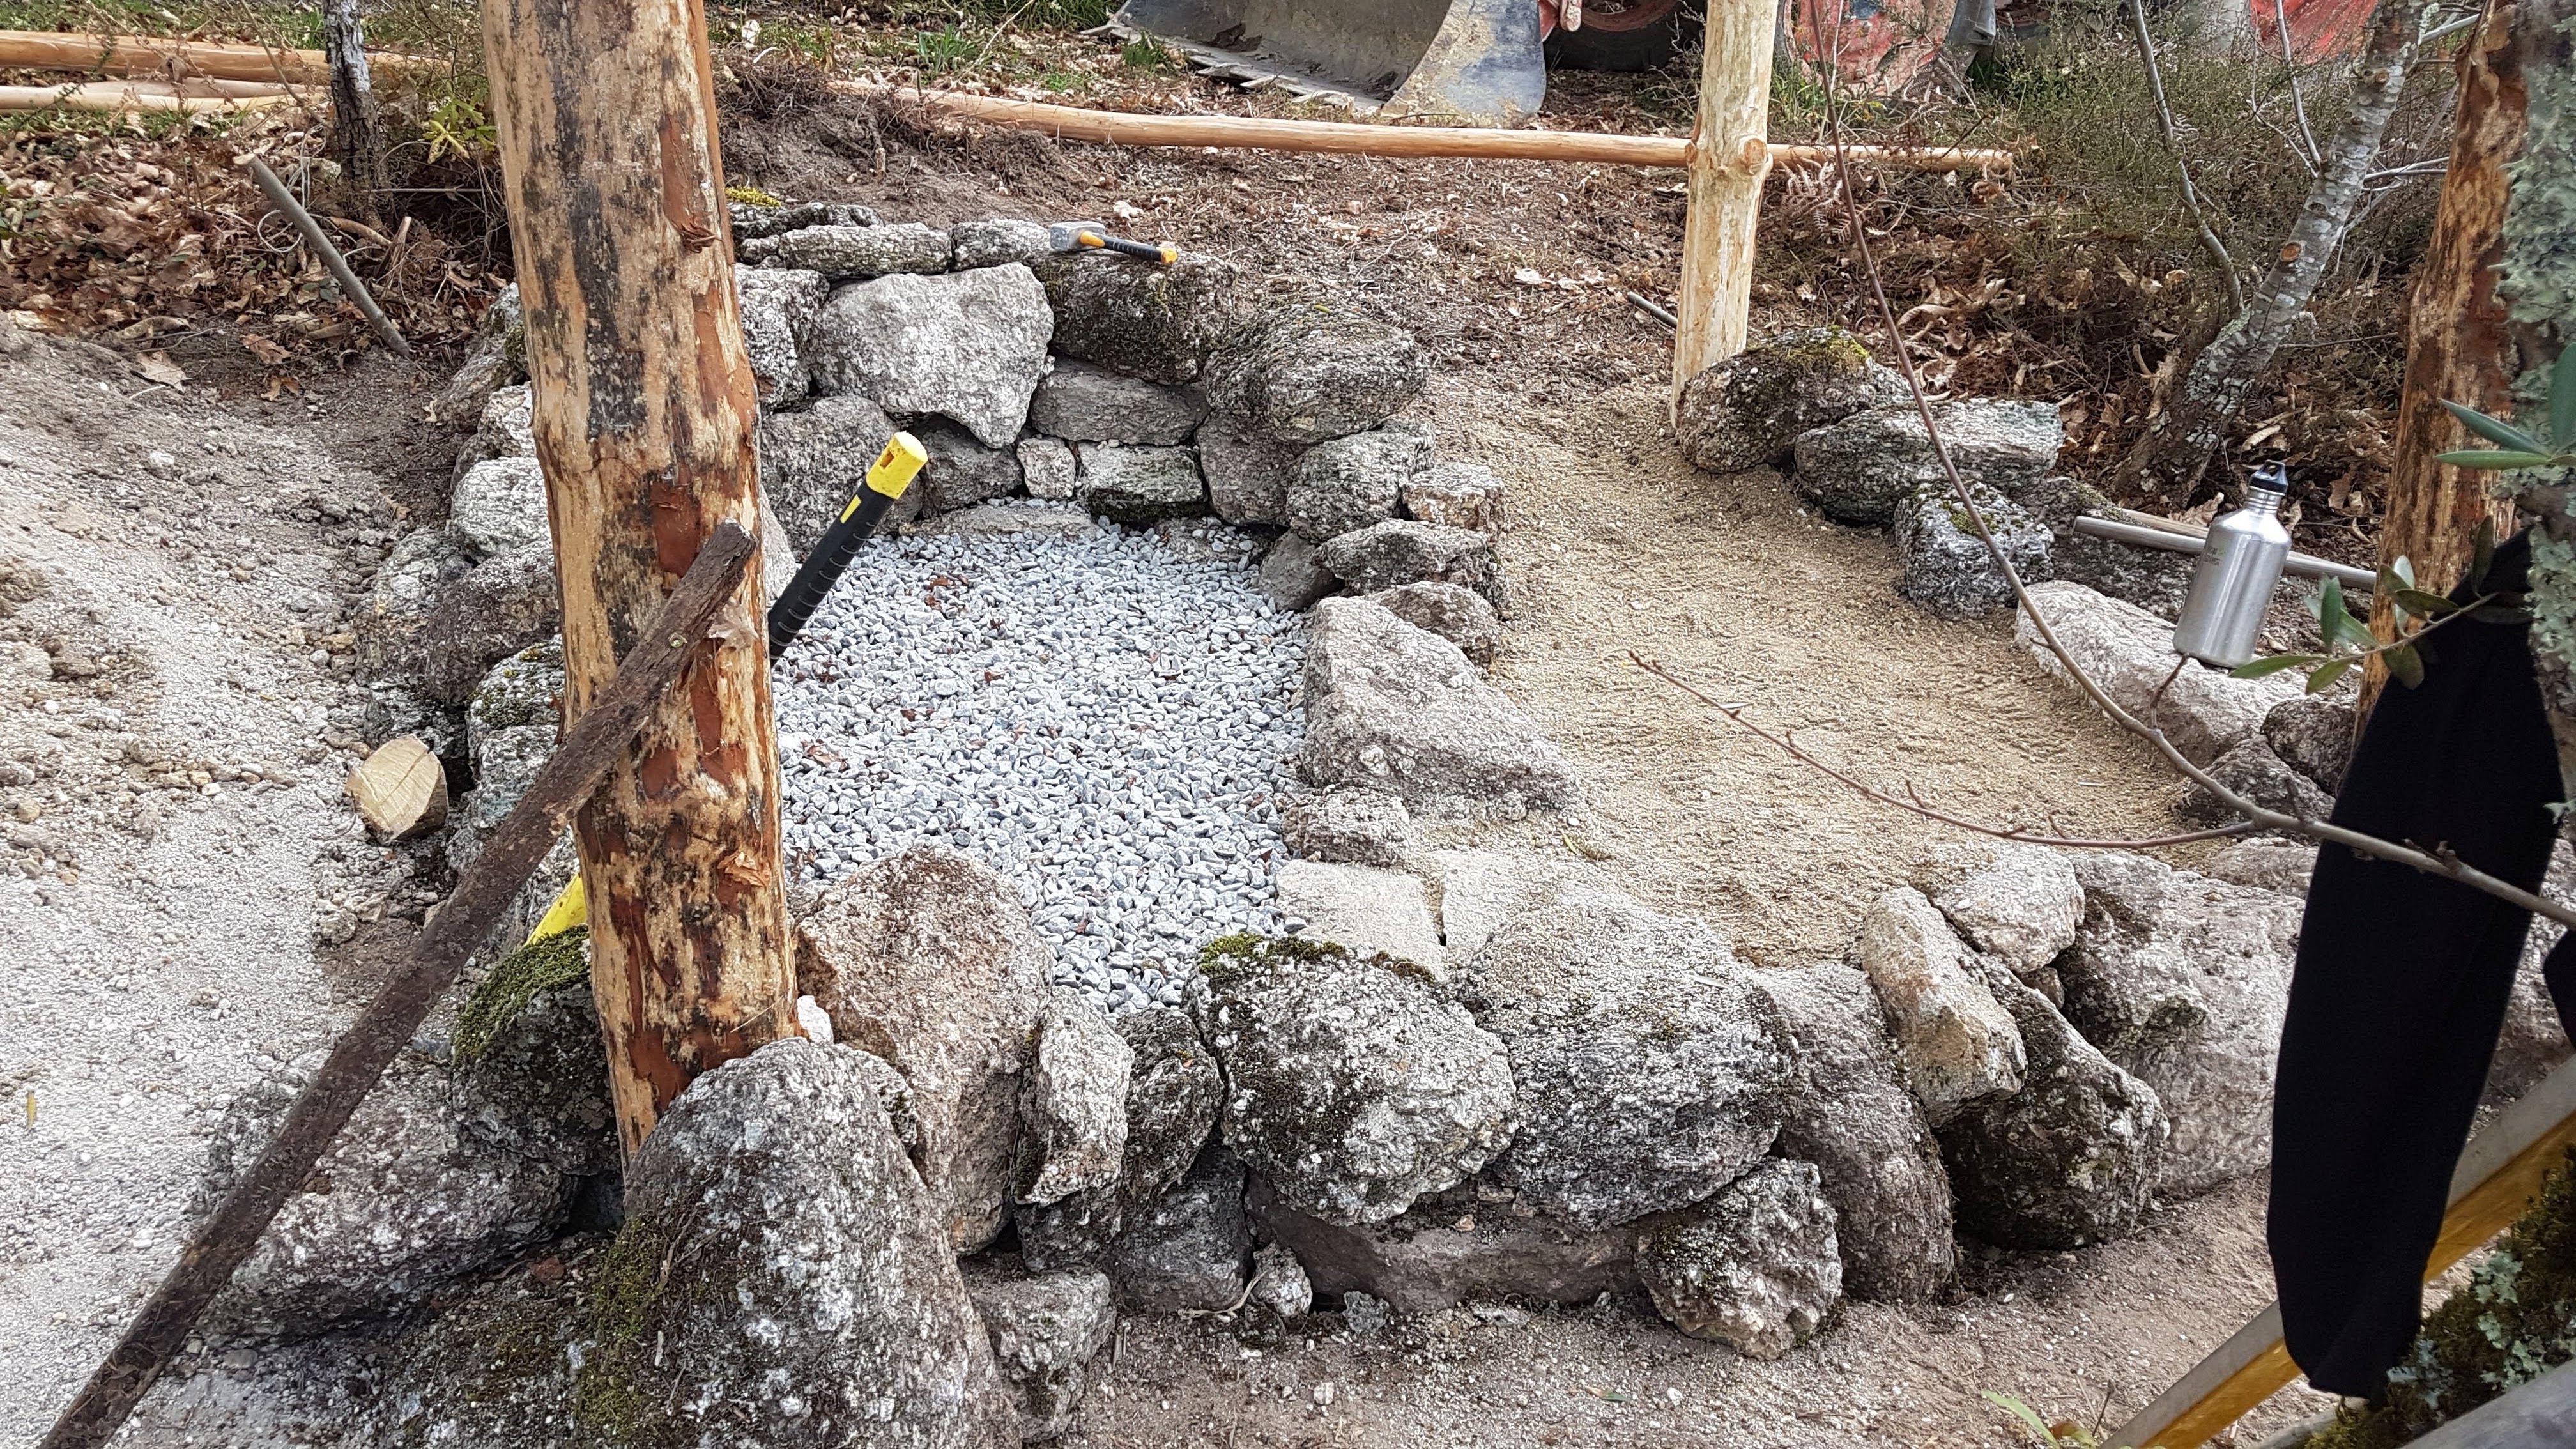
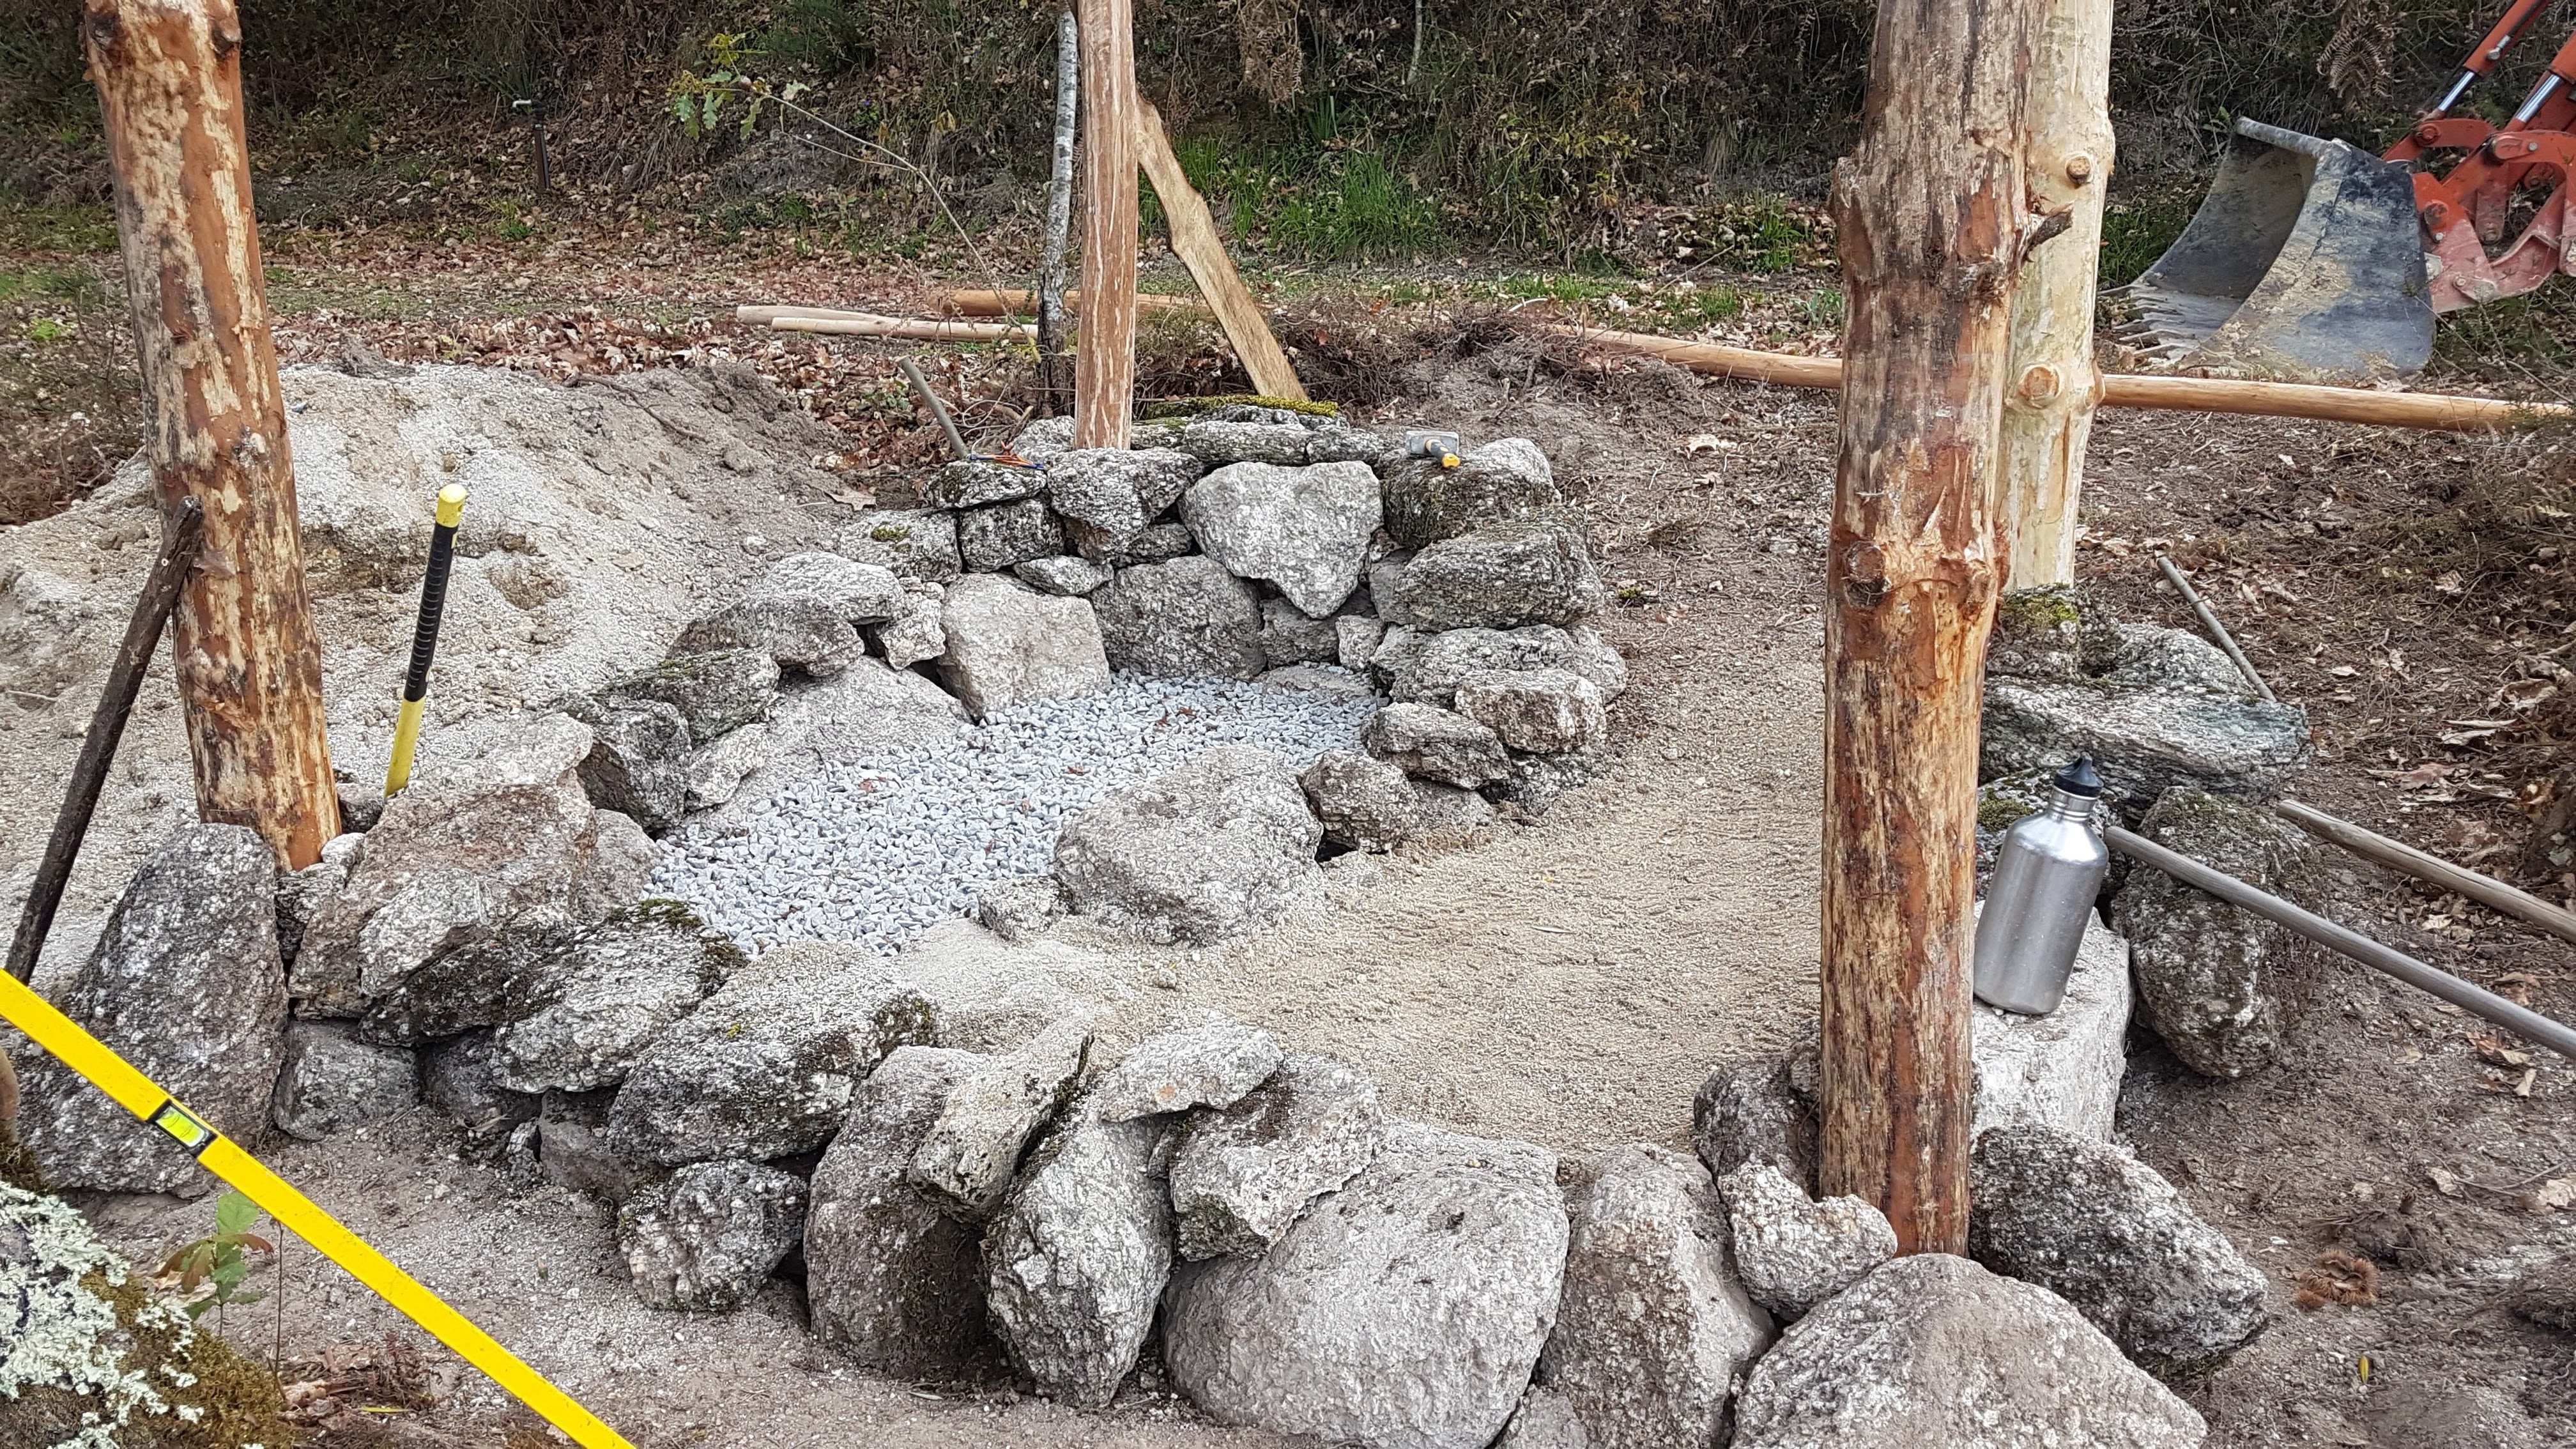
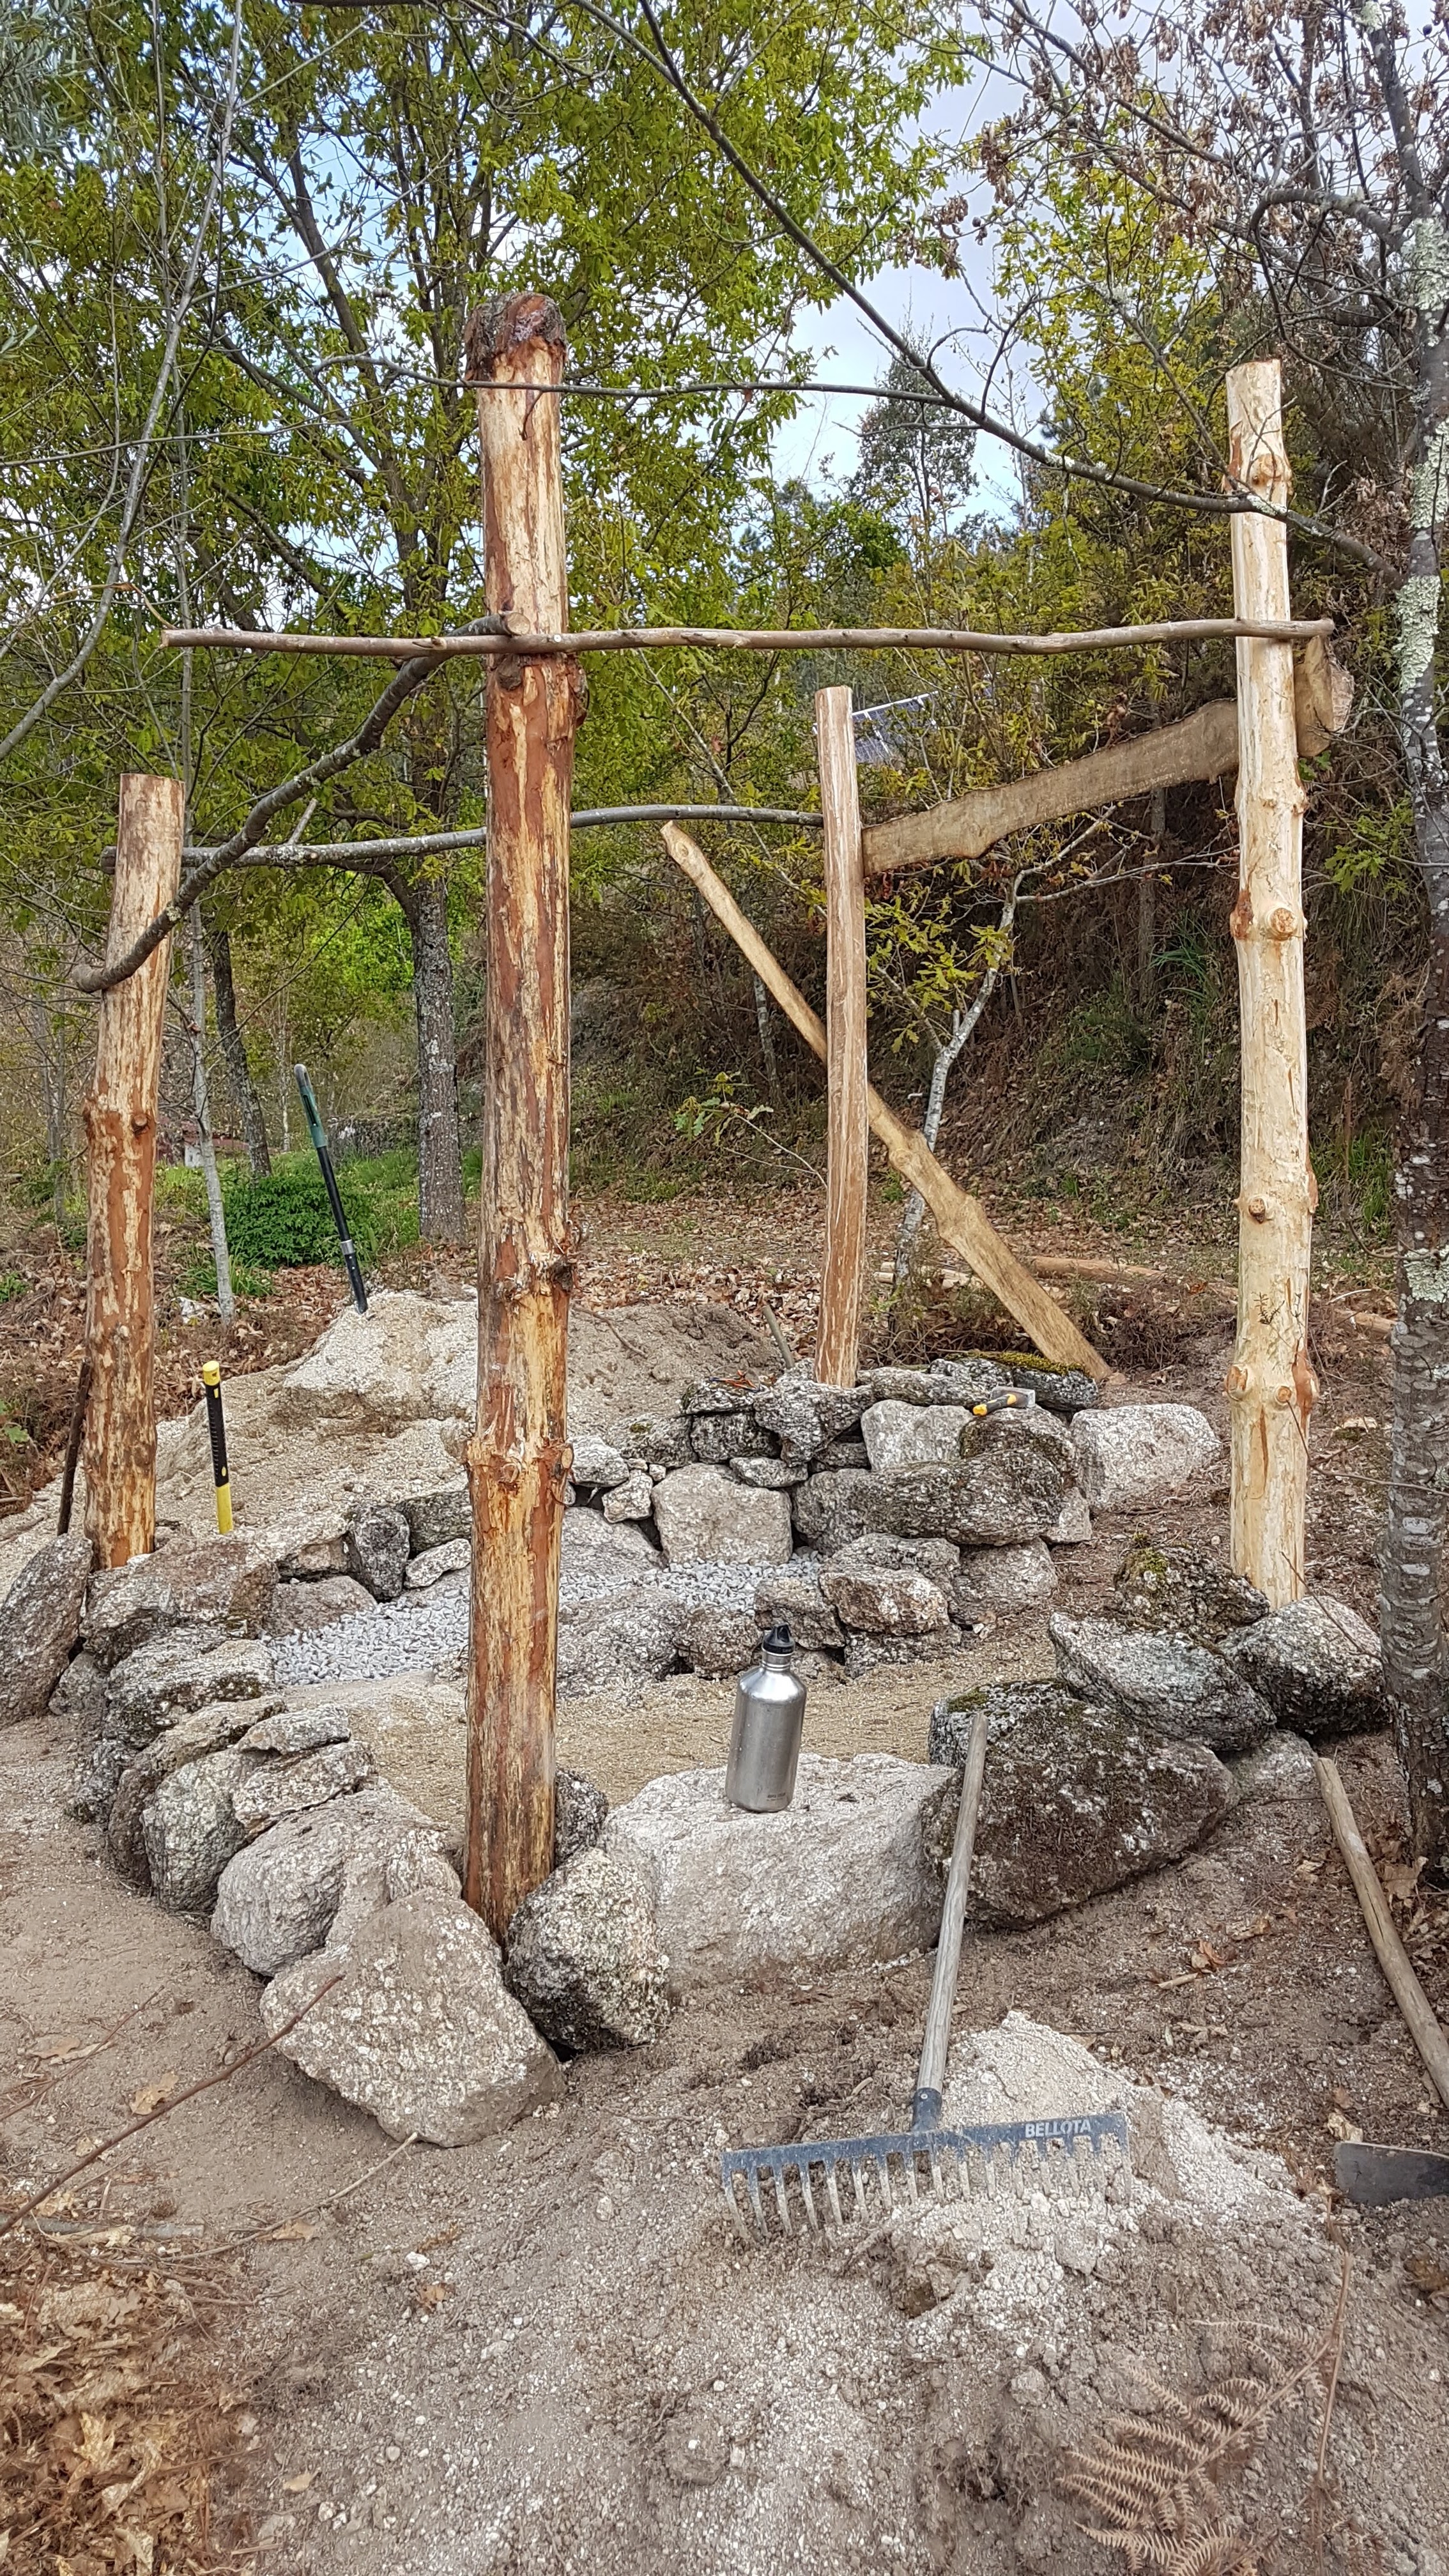


We don’t want the walls to go very high – just high enough to provide privacy, while still allowing a view. Having low walls enables us to keep them quite narrow.
-
Outdoor Shower: Walls, Plaster & Decor

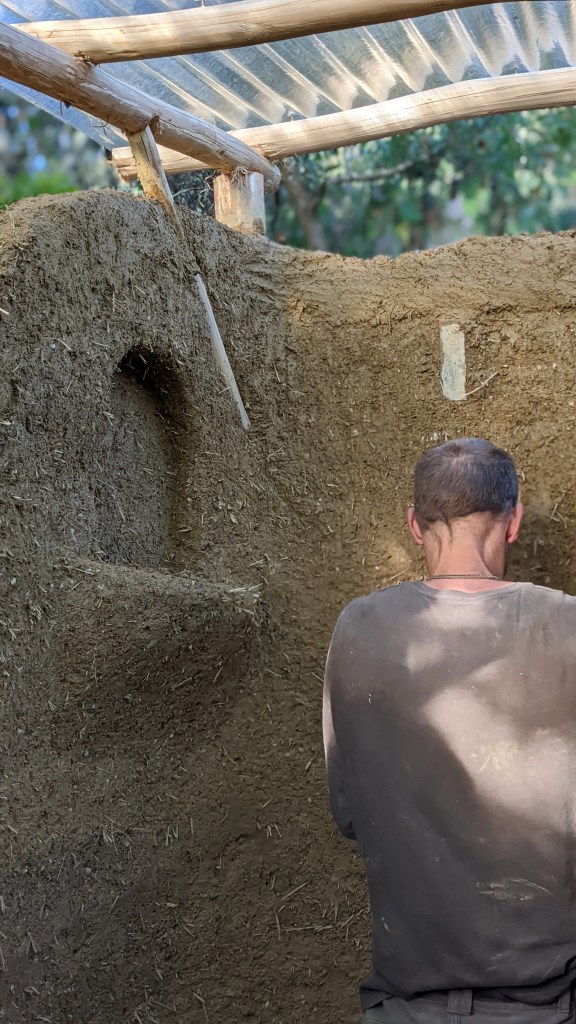
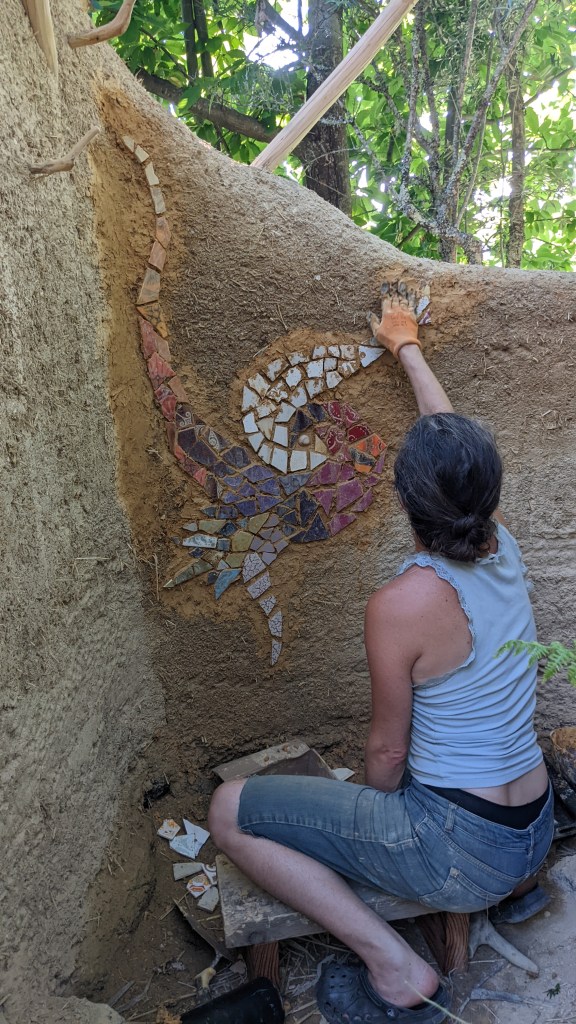
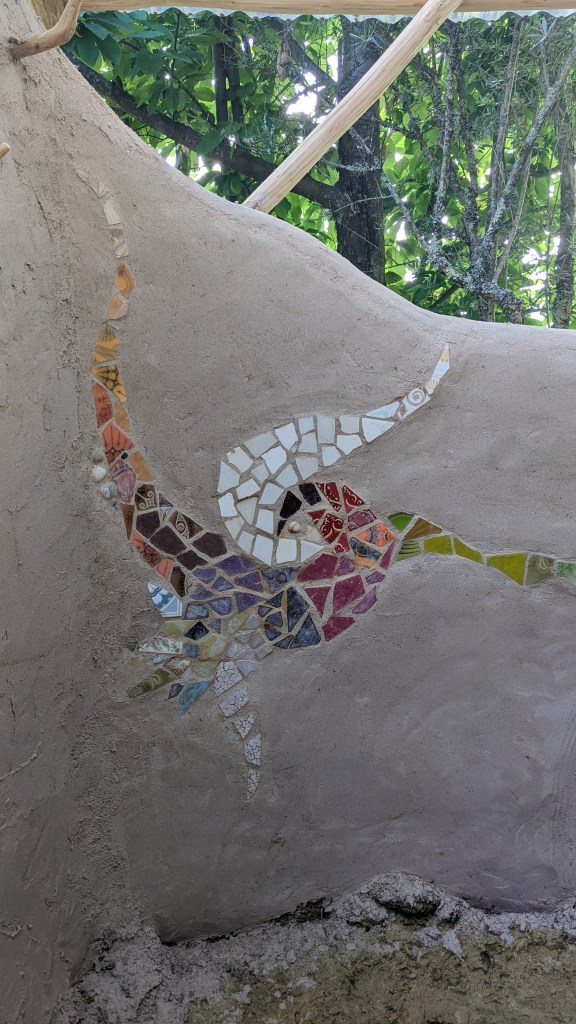
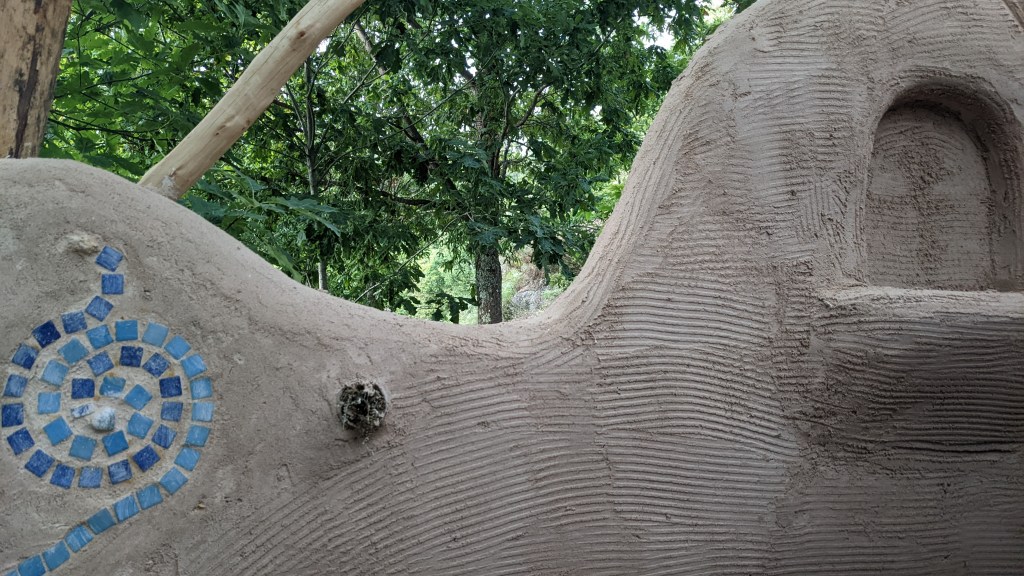
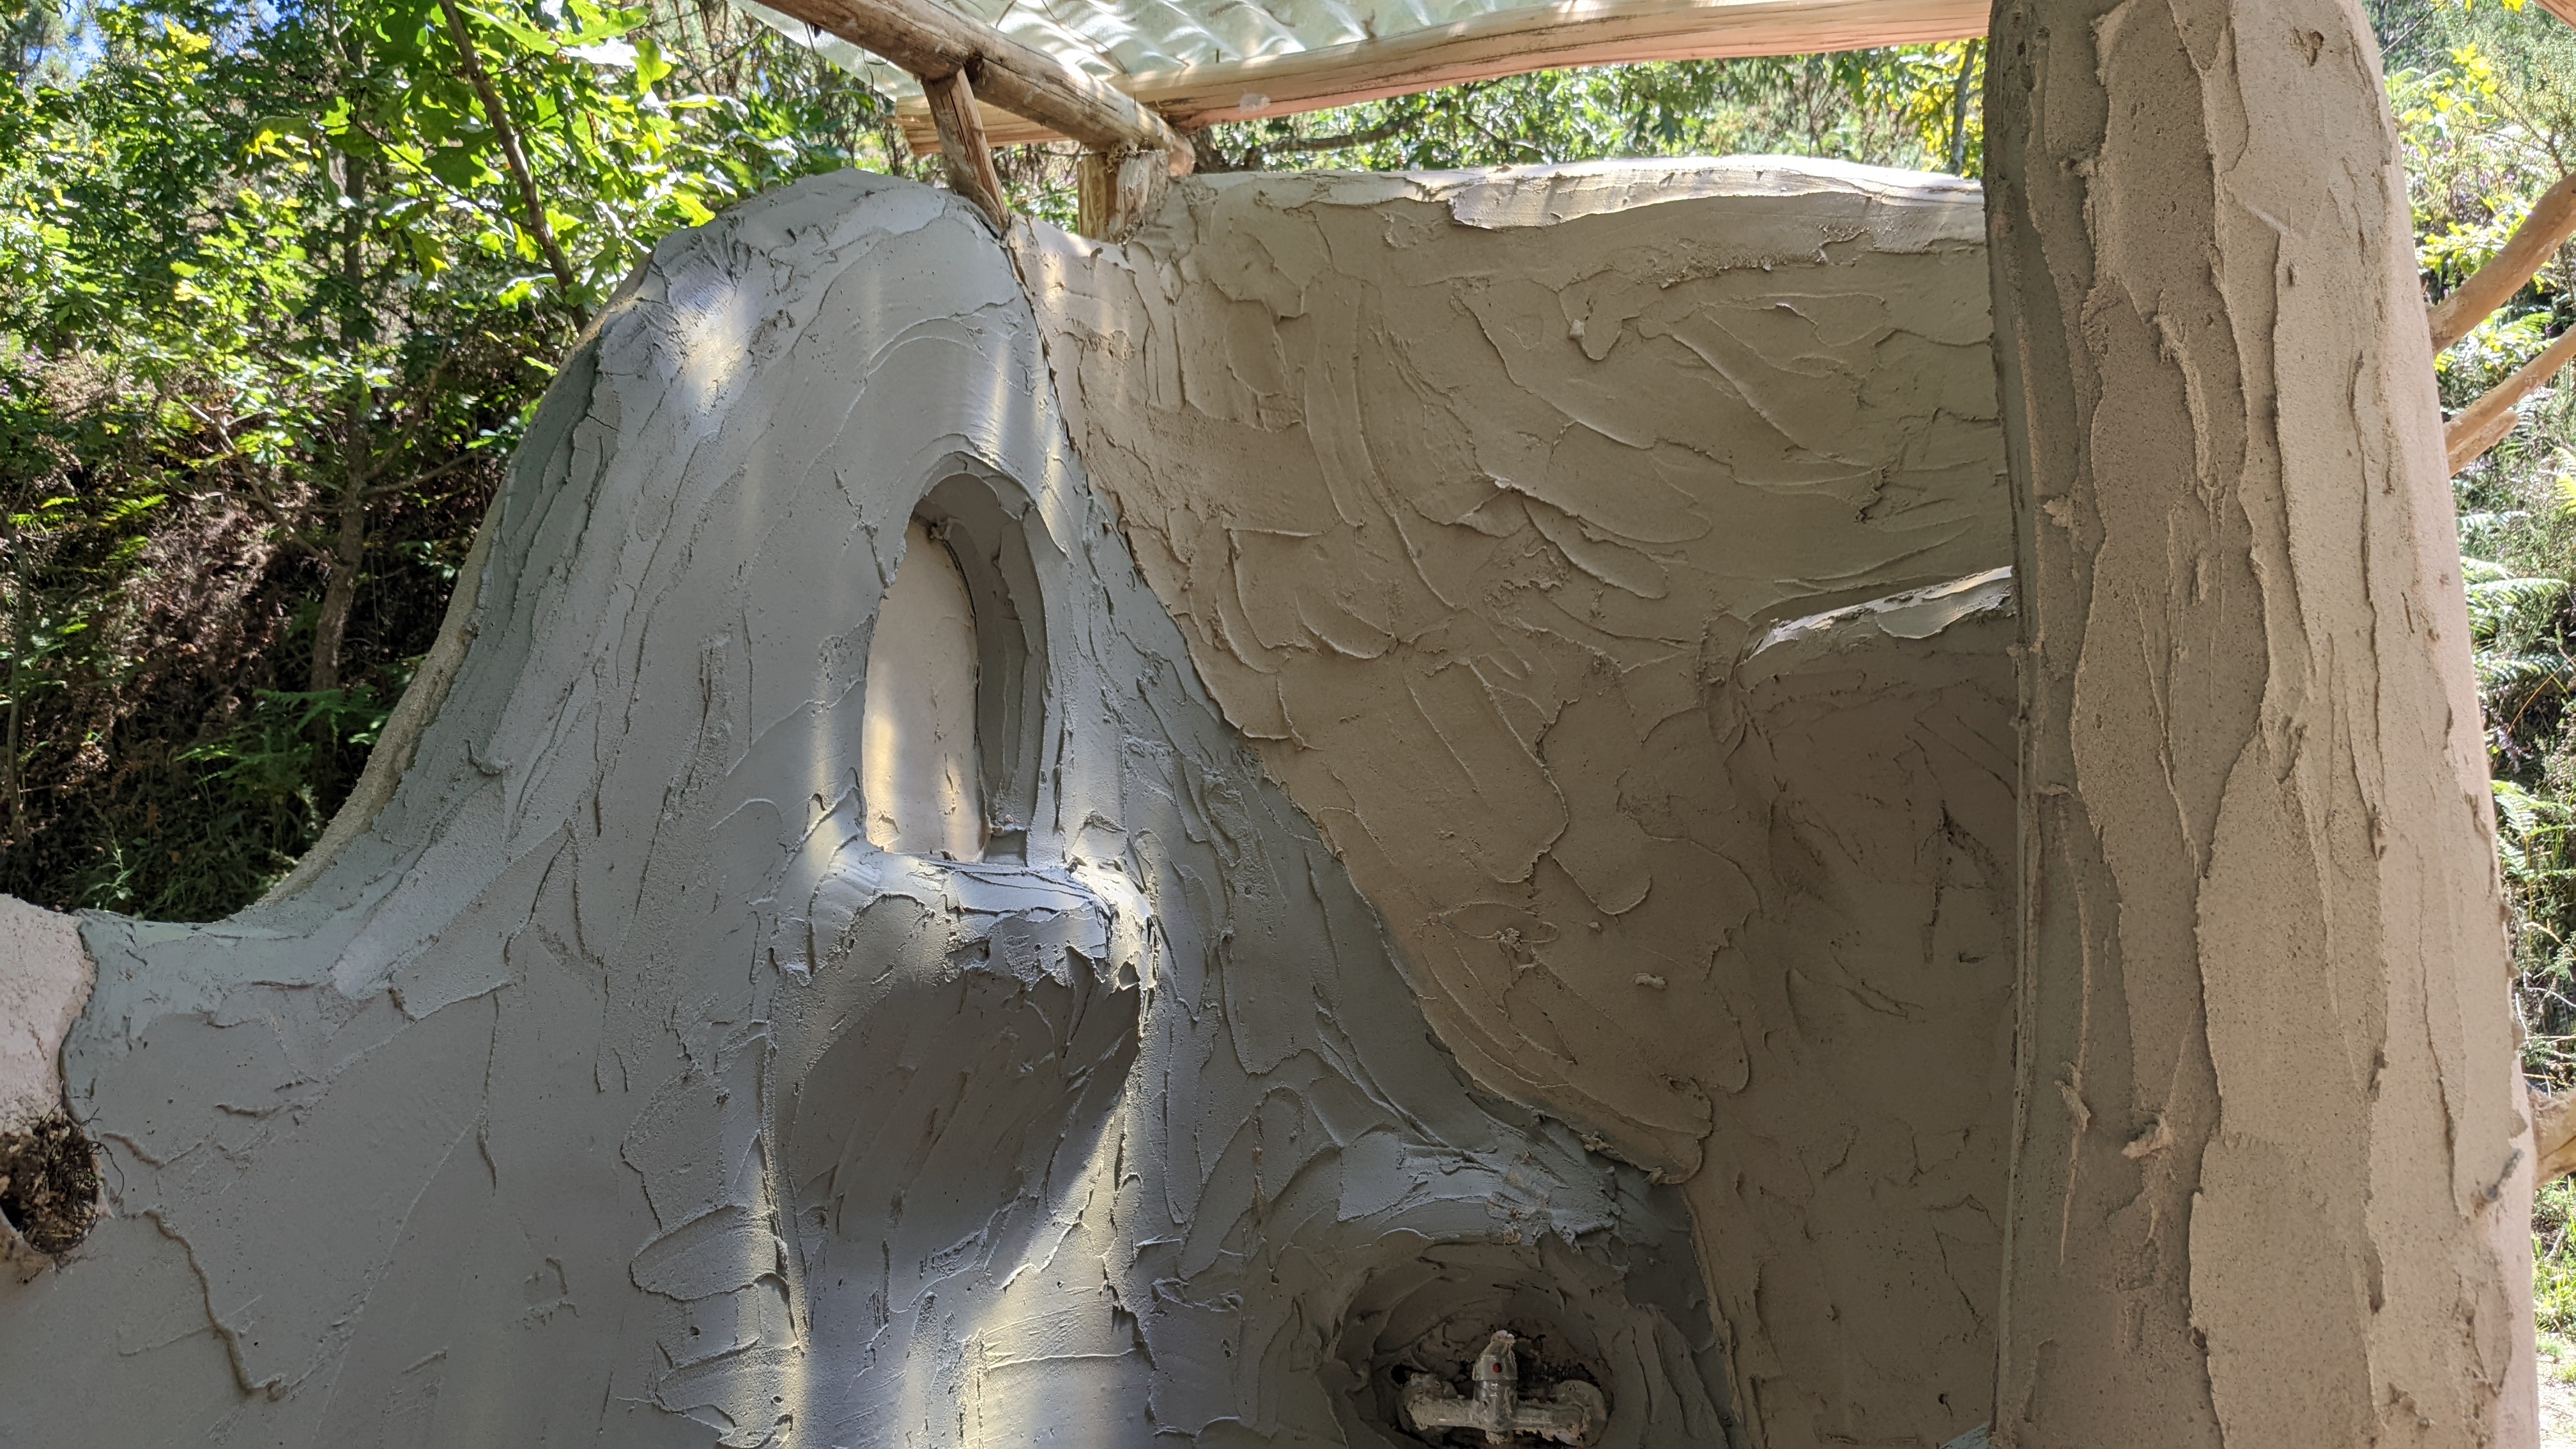
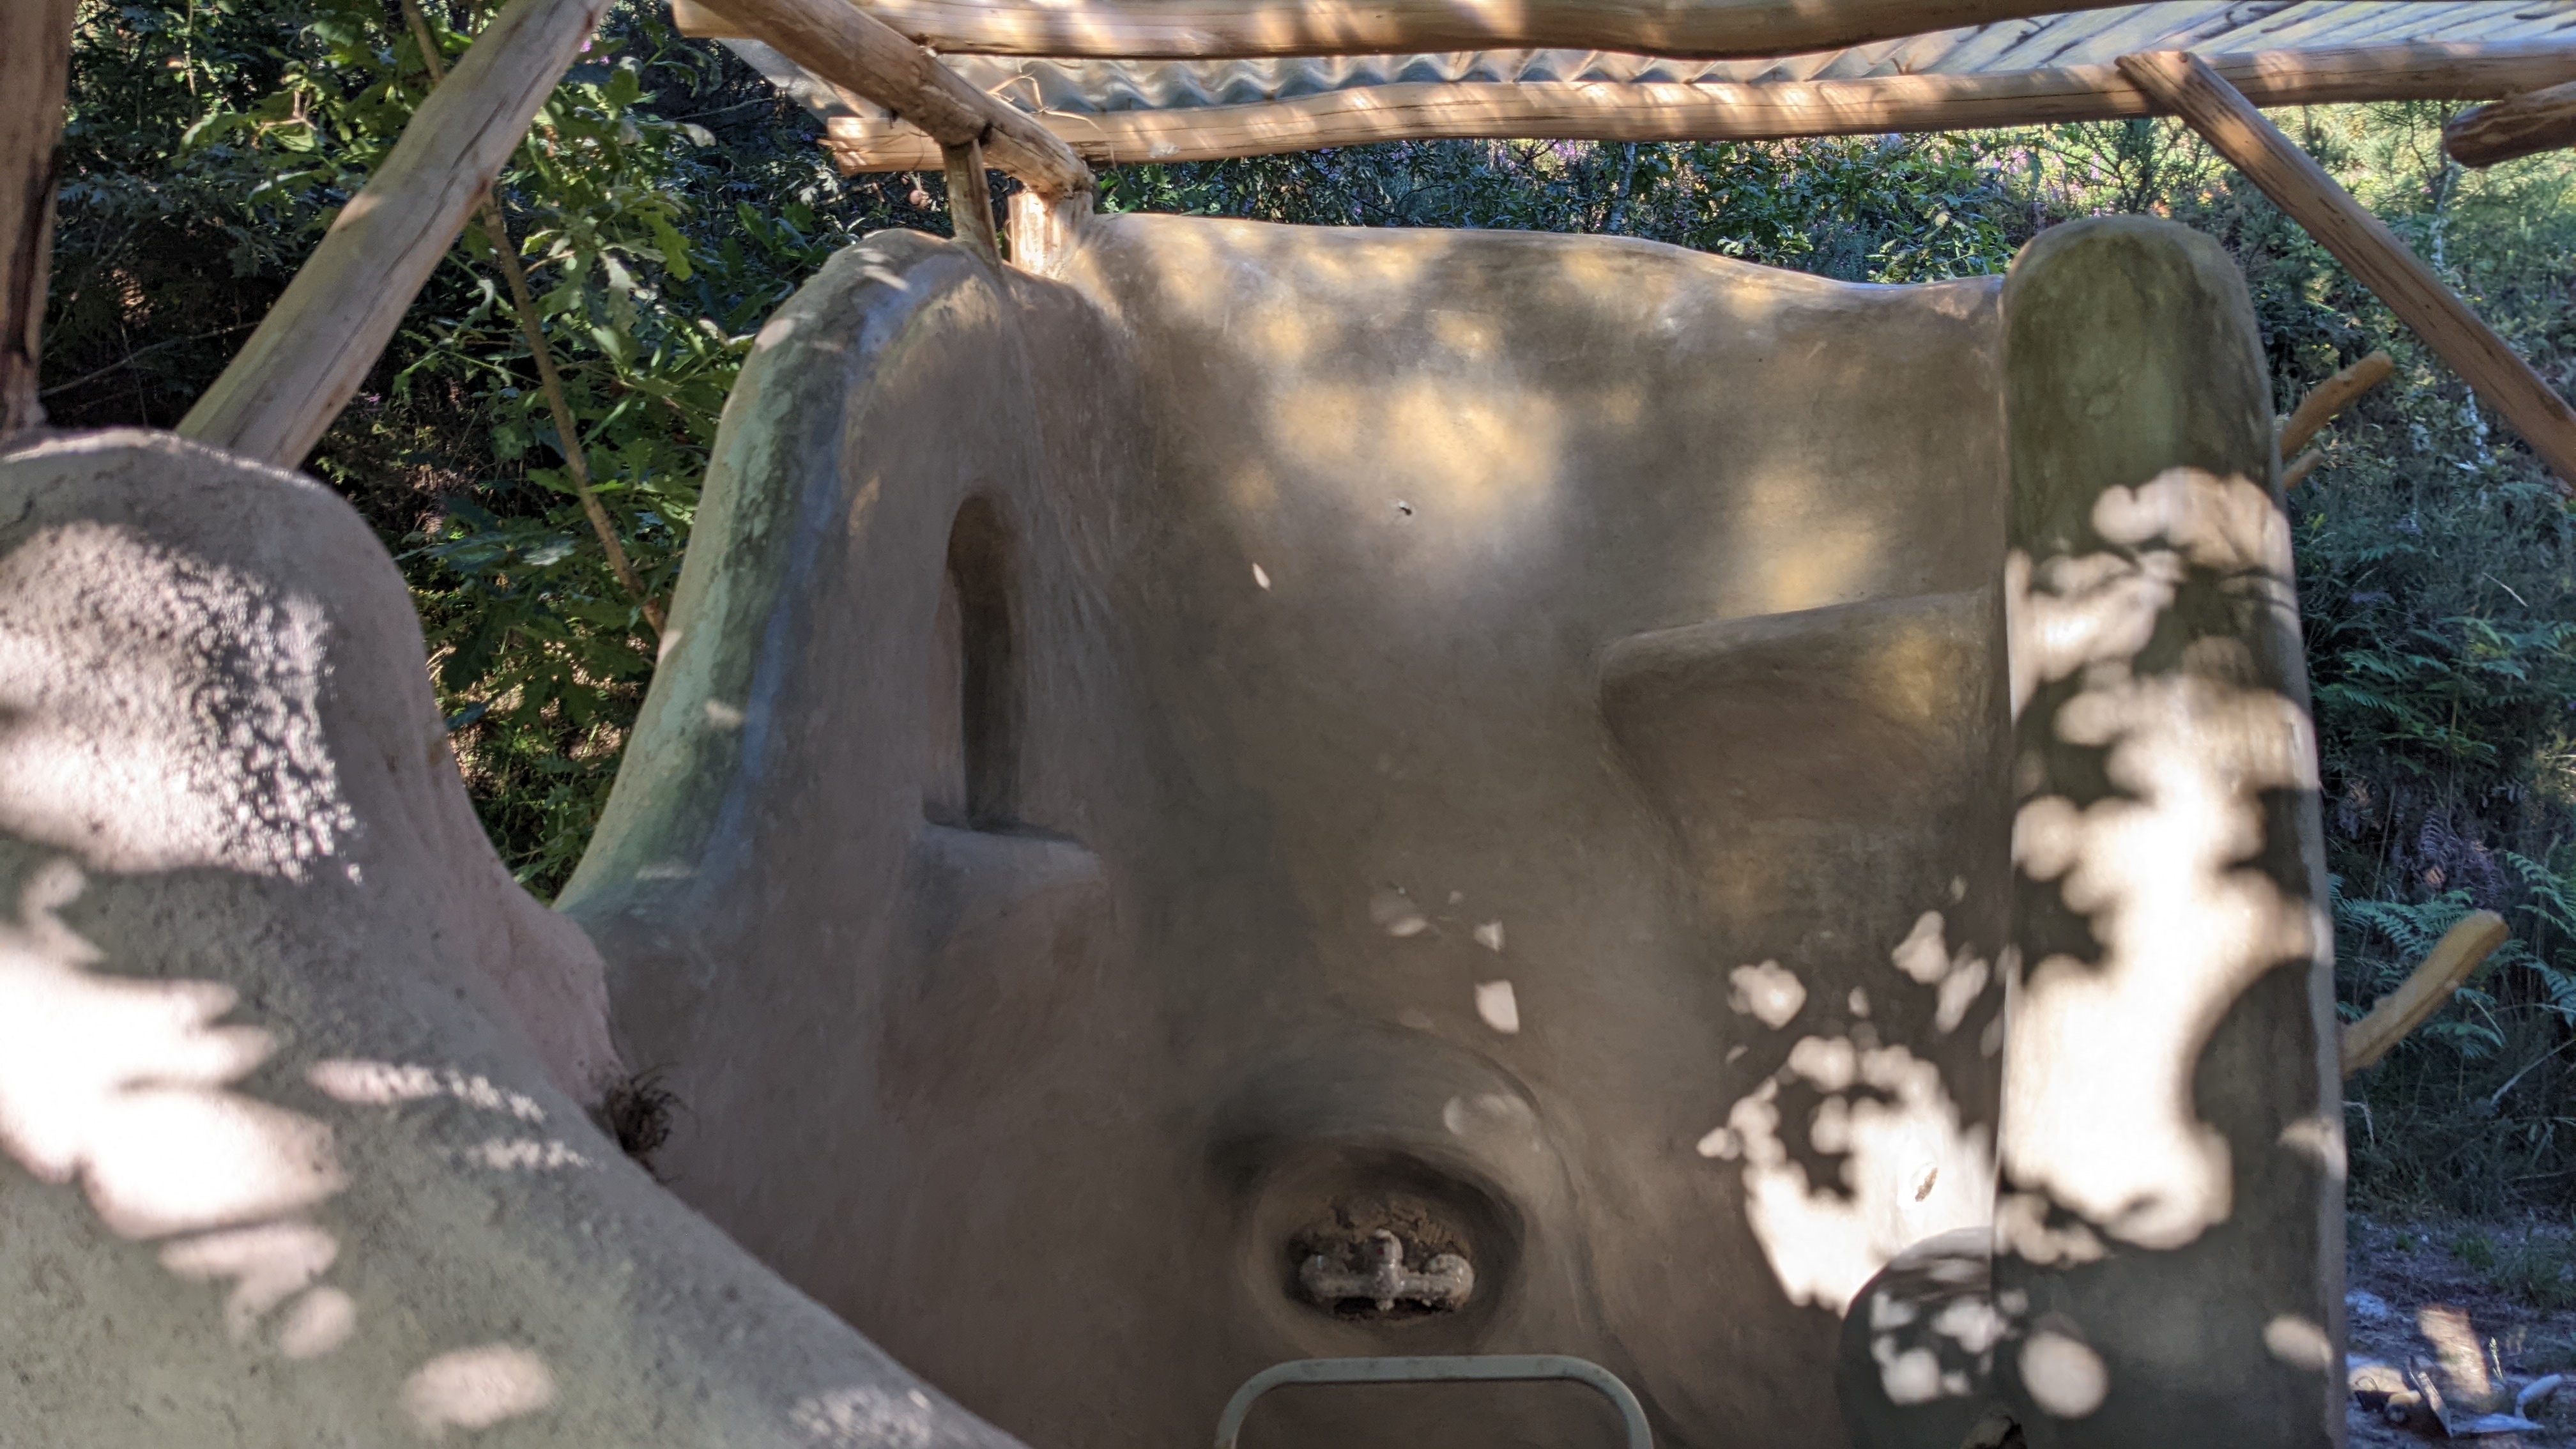
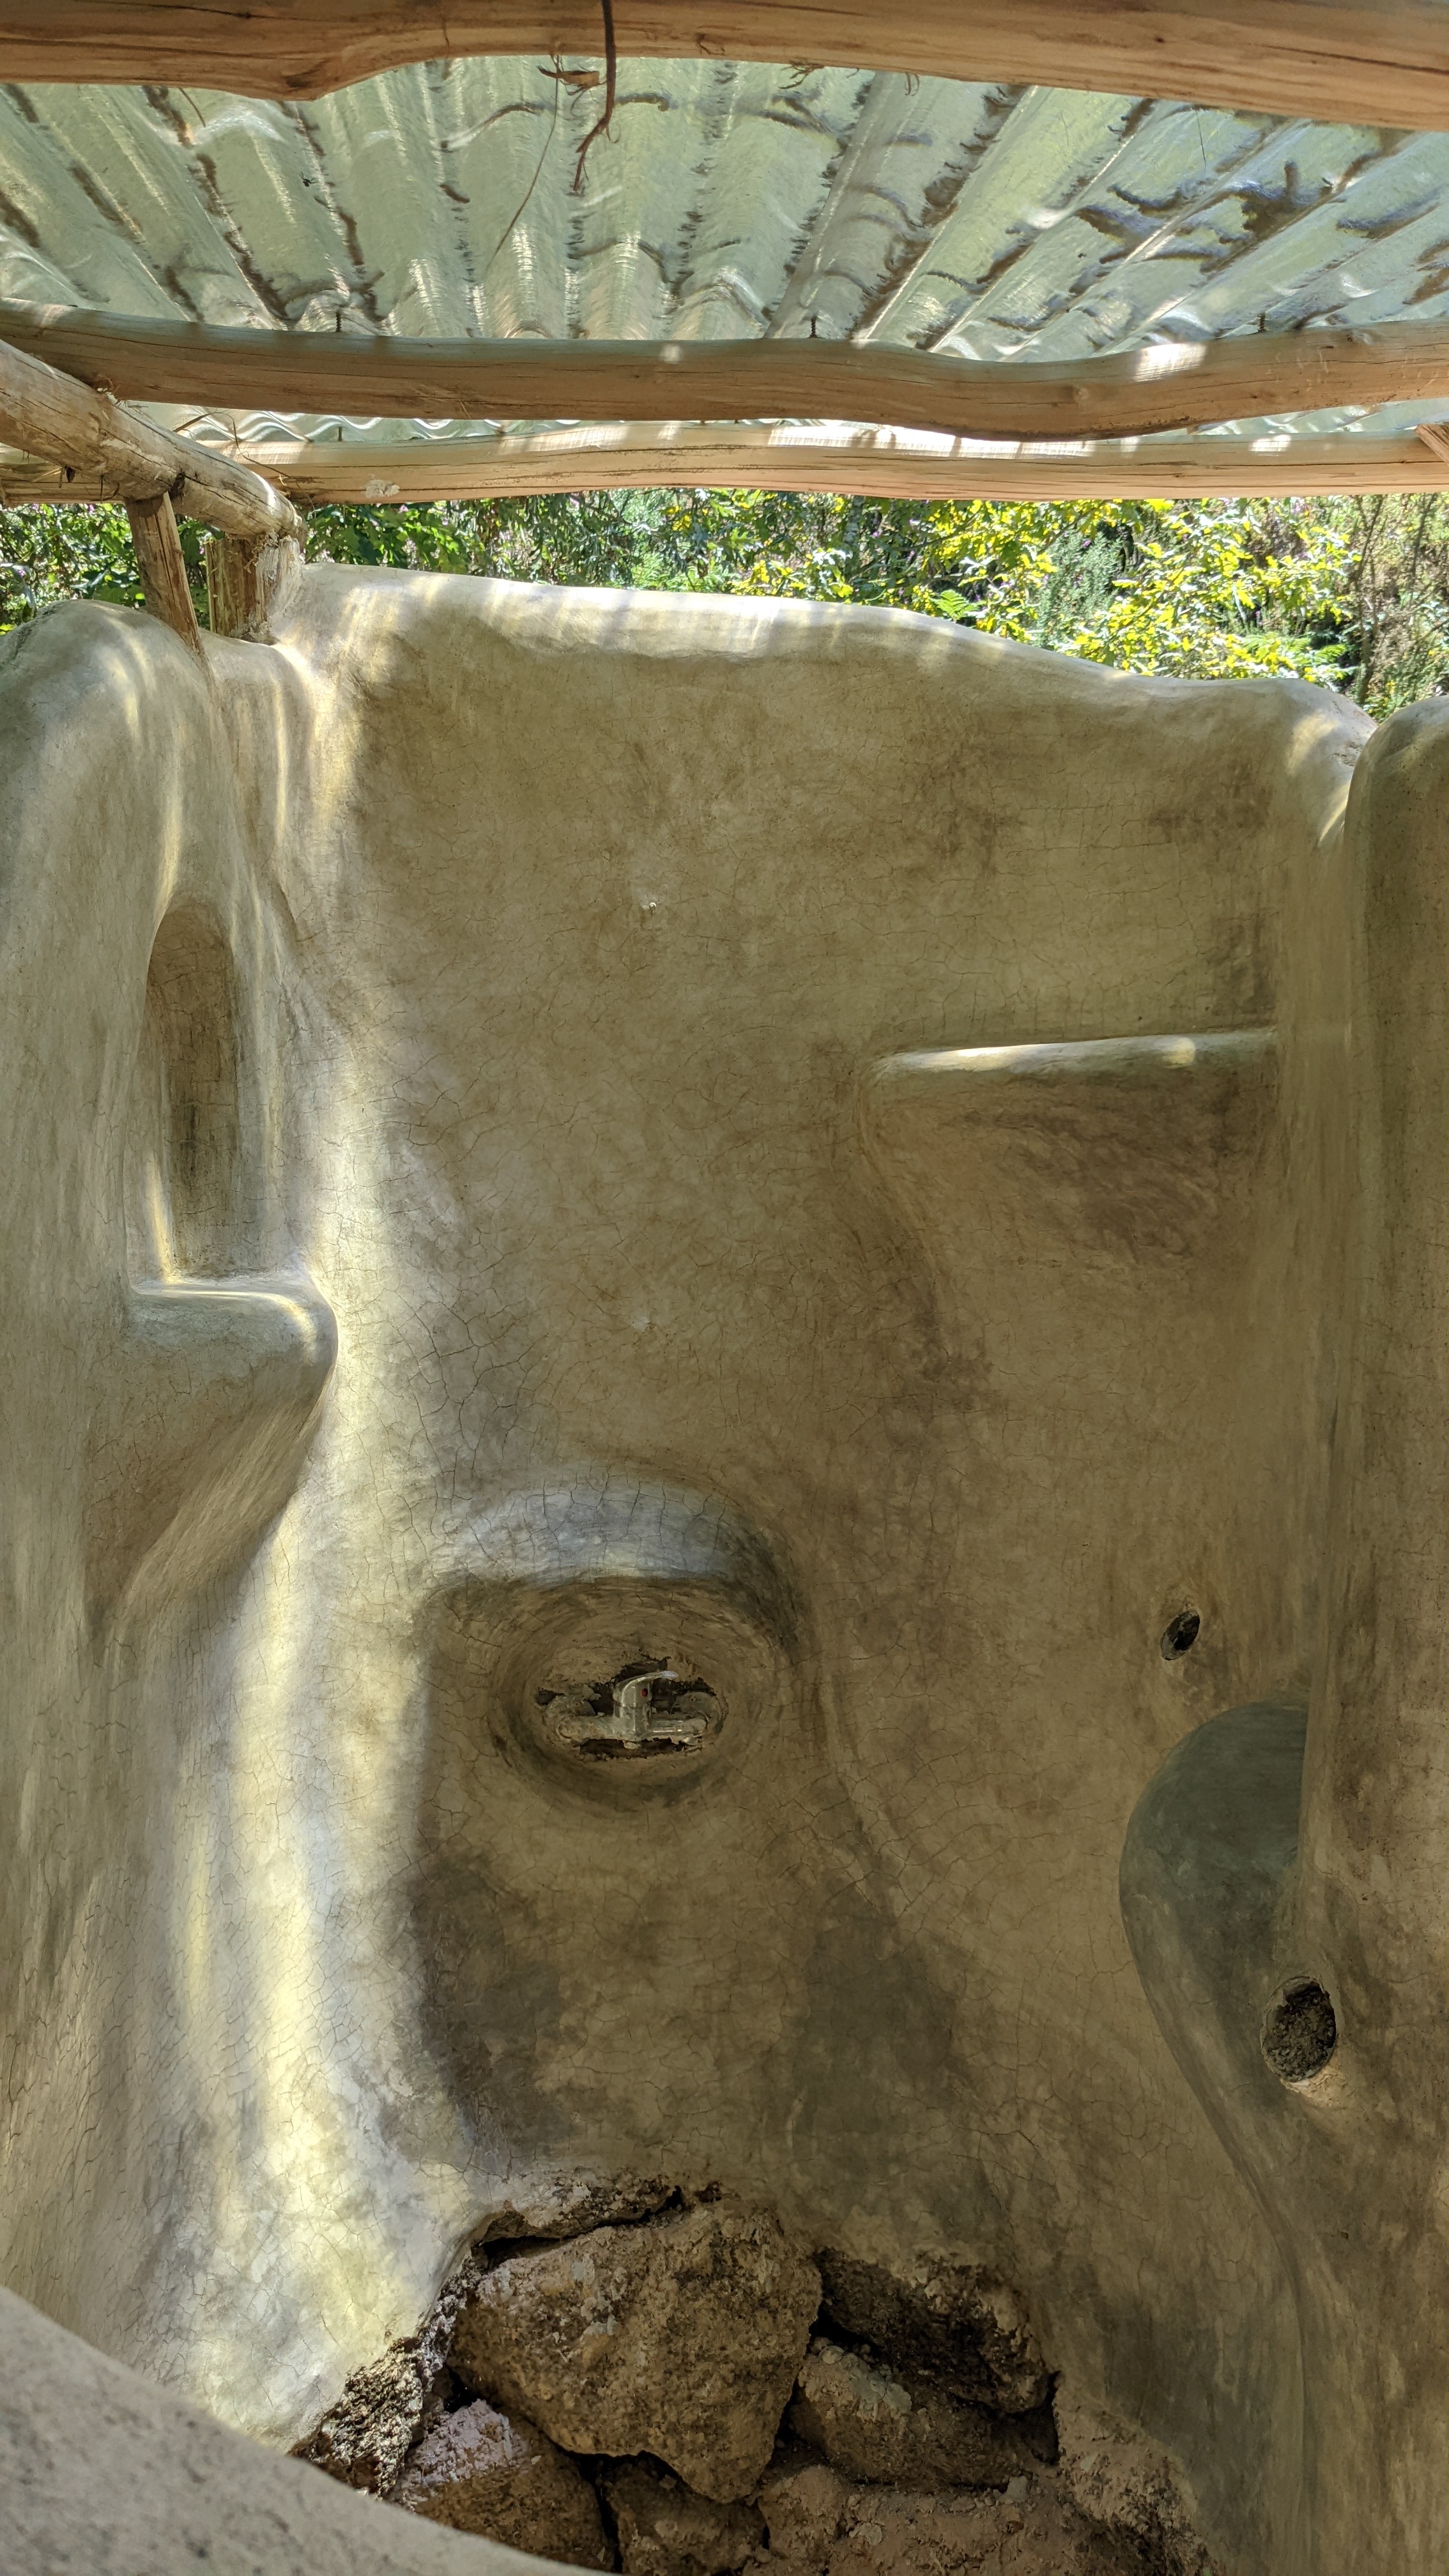
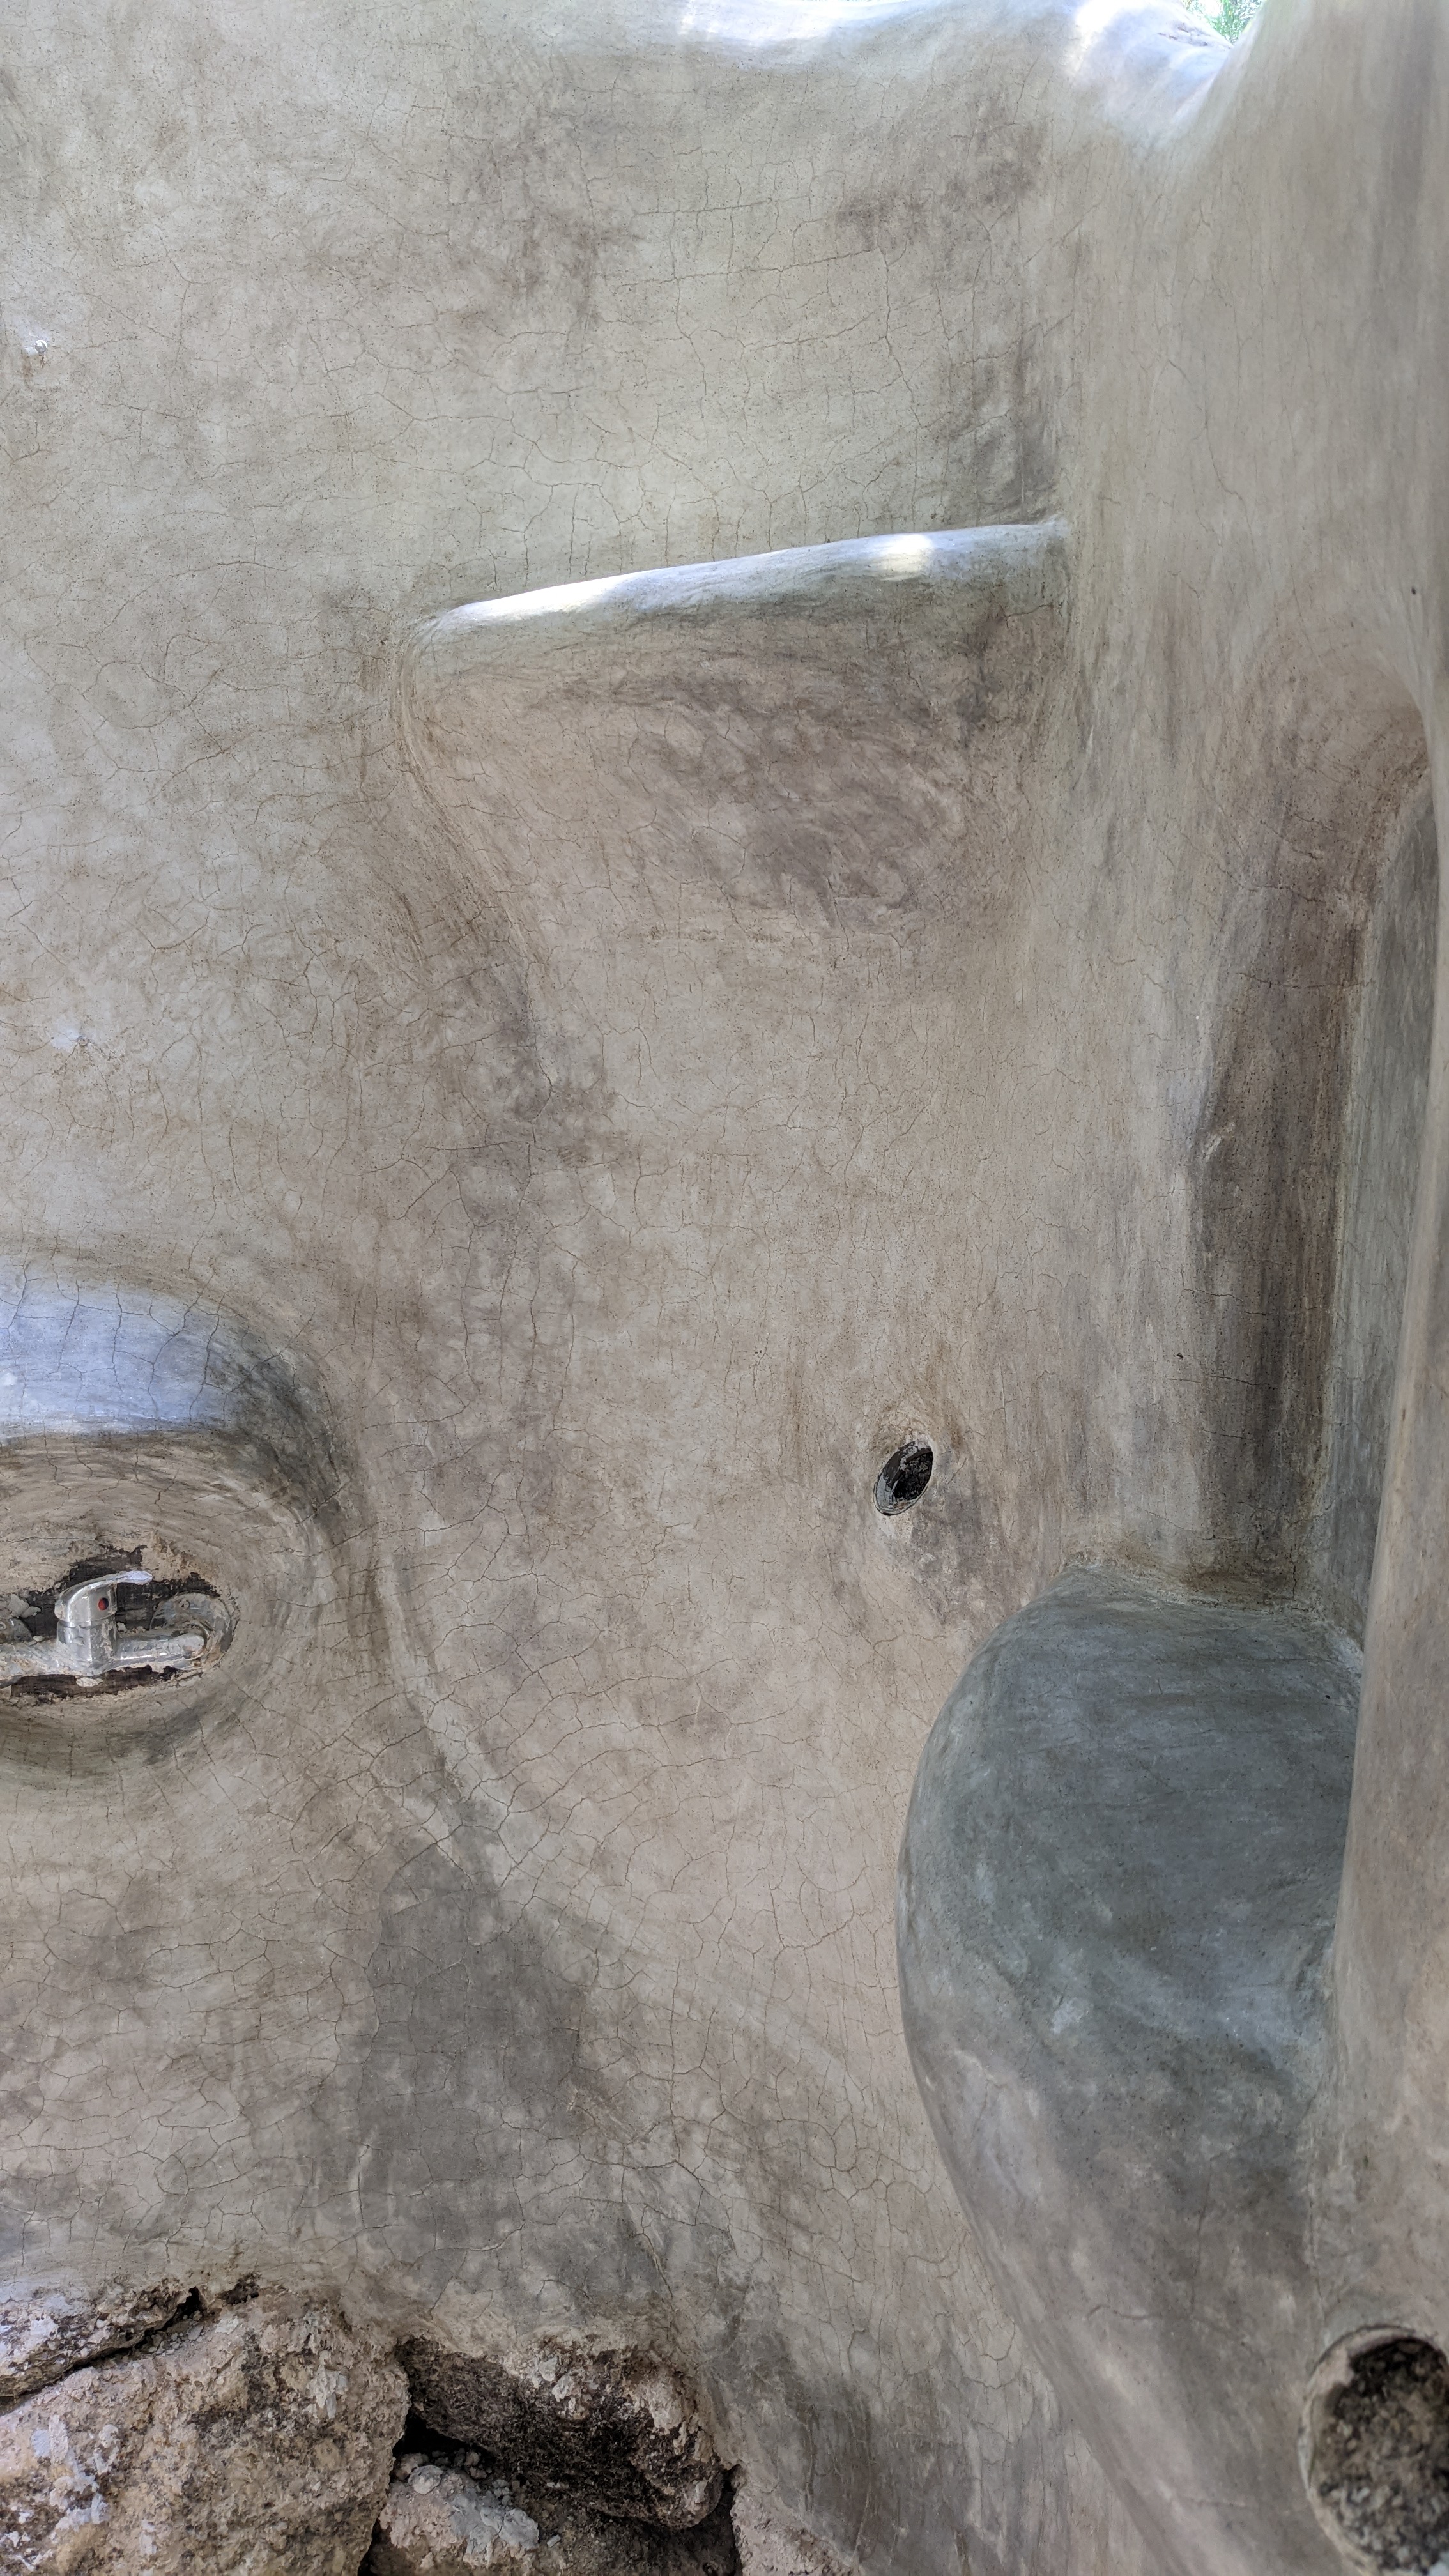
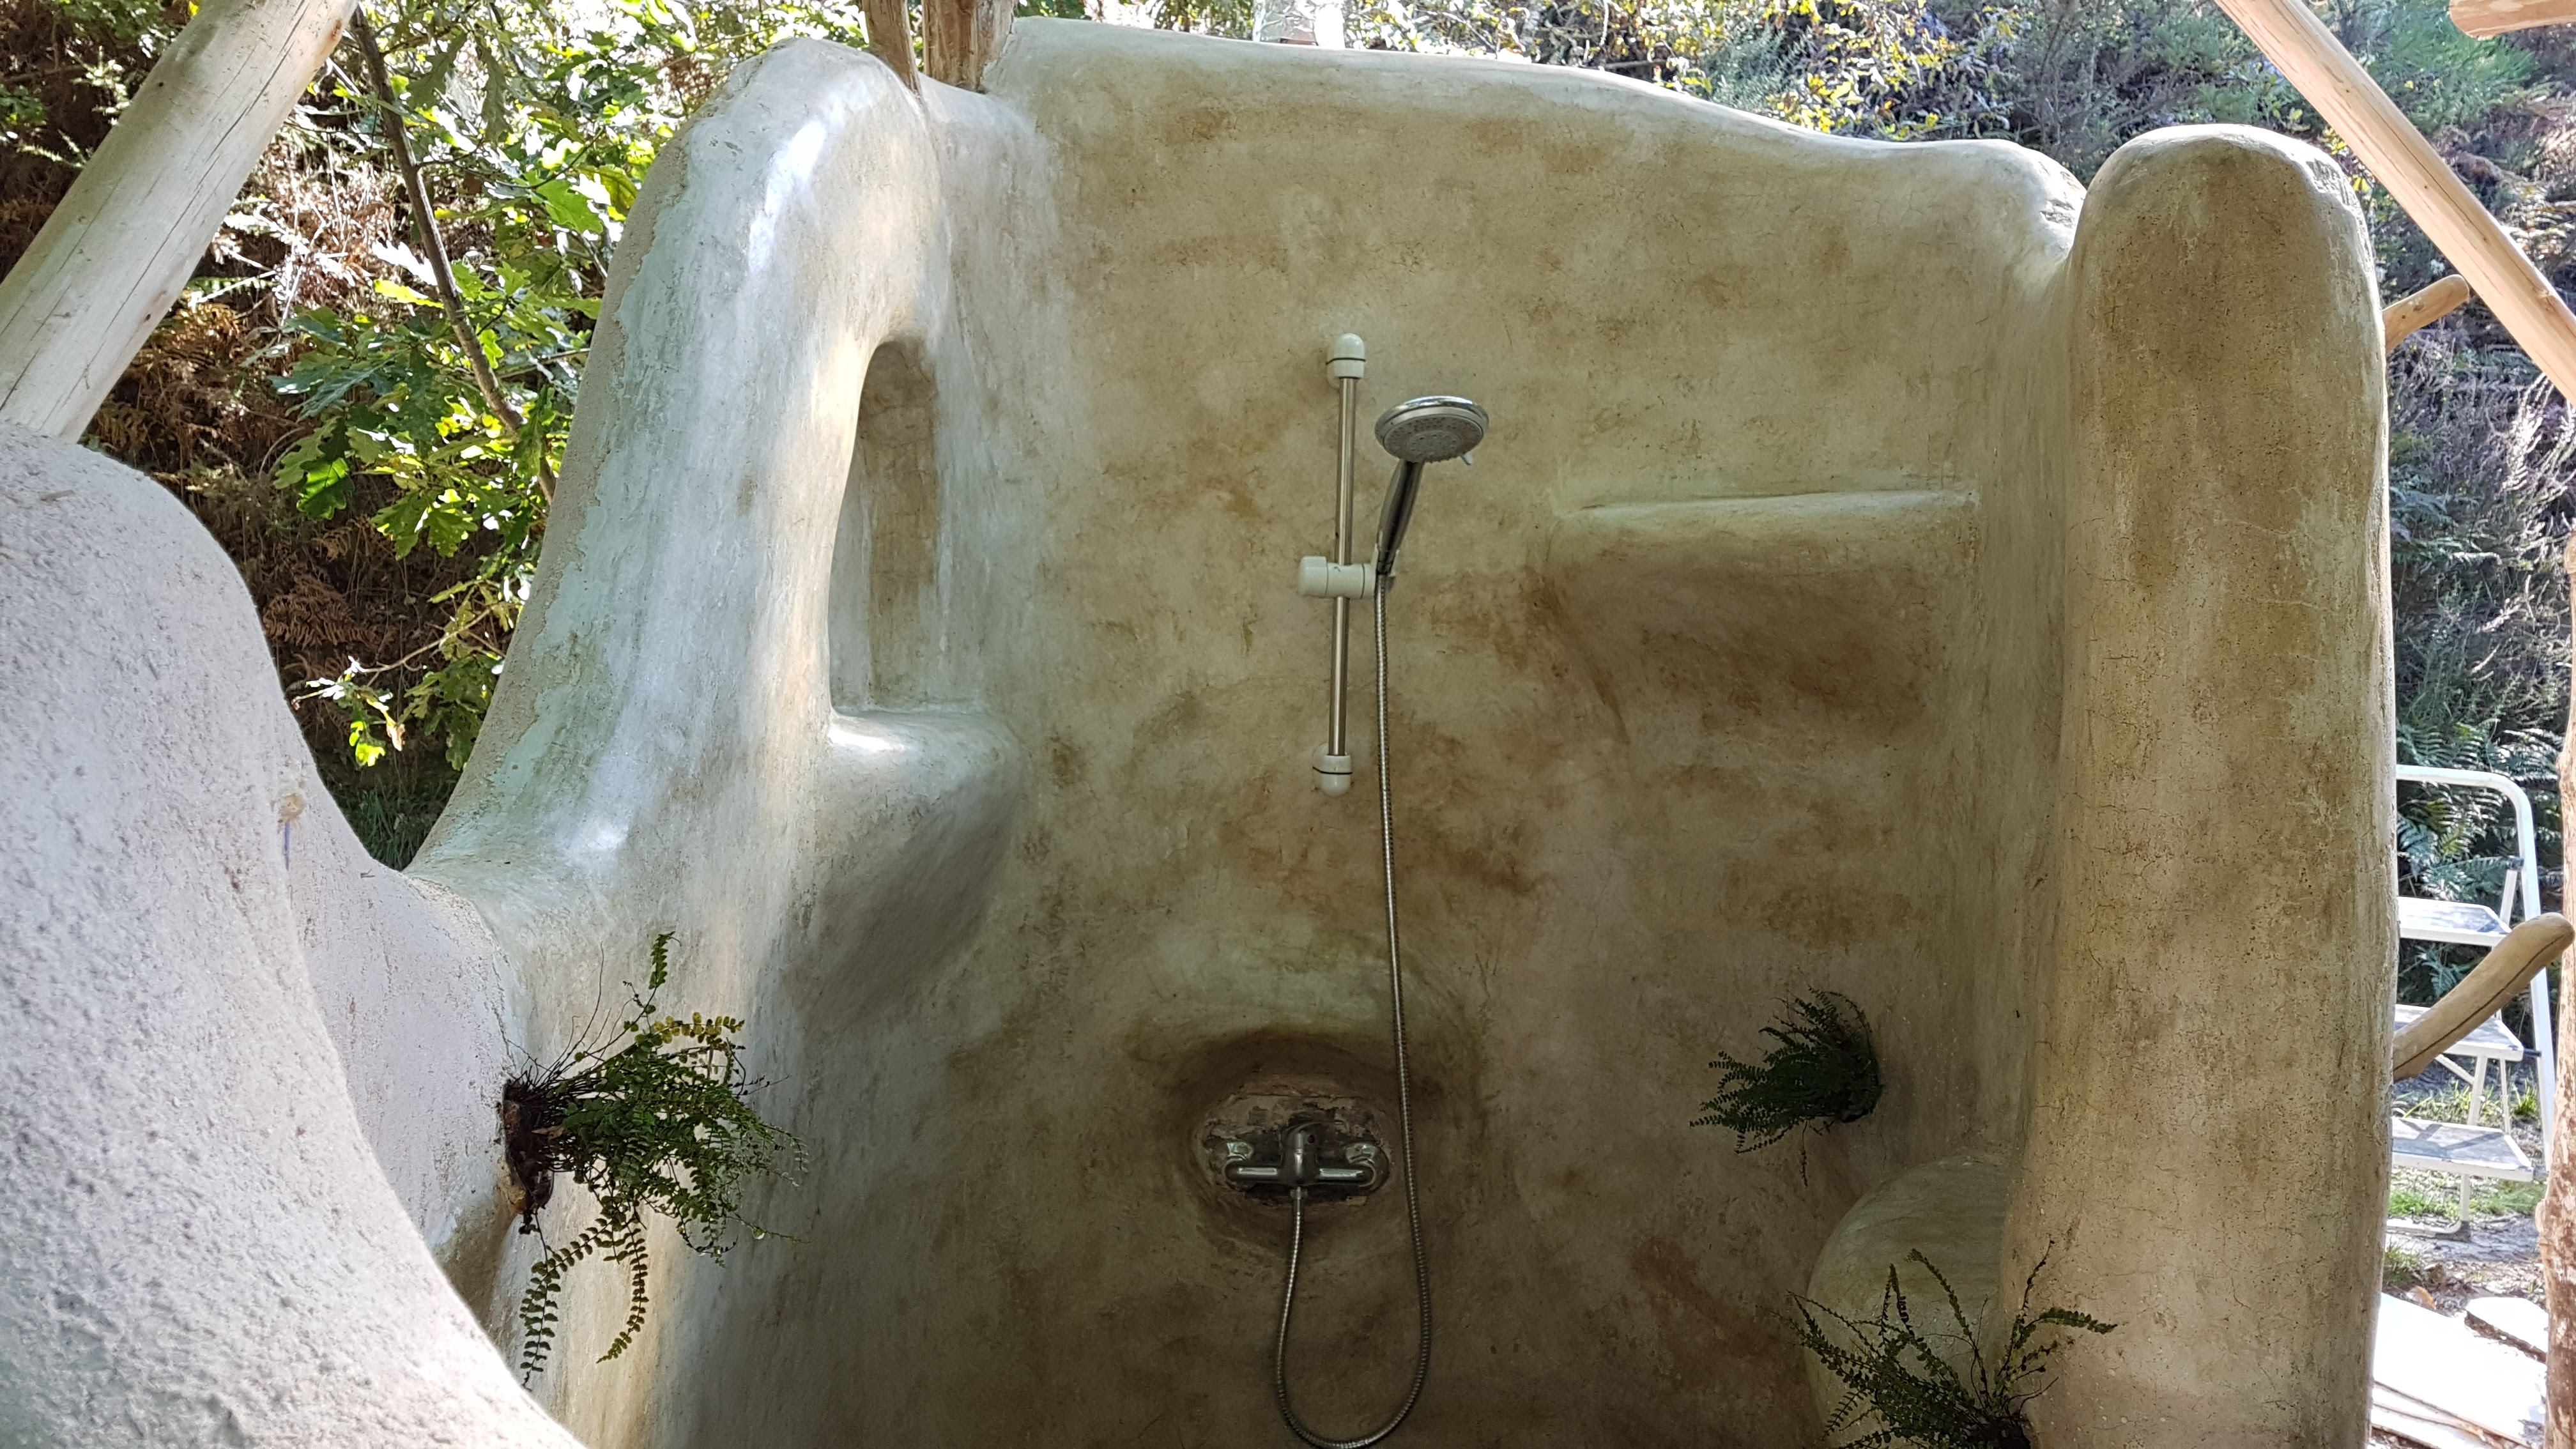
While we were having a series of wonderful family visits, our friends who are living on the land with us finished cobbing the outdoor shower. I then did some trimming, and added the niches in the showering space.
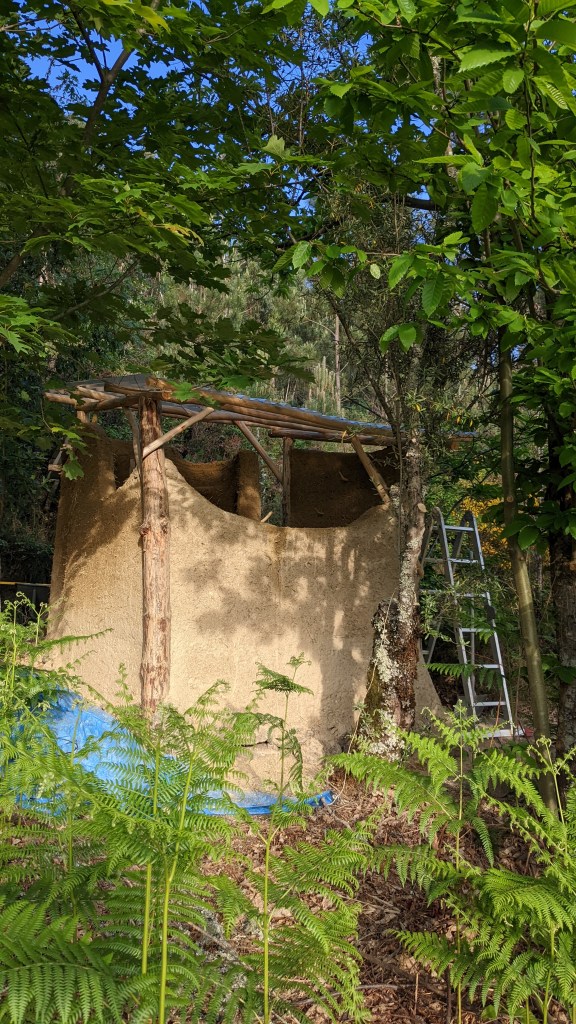


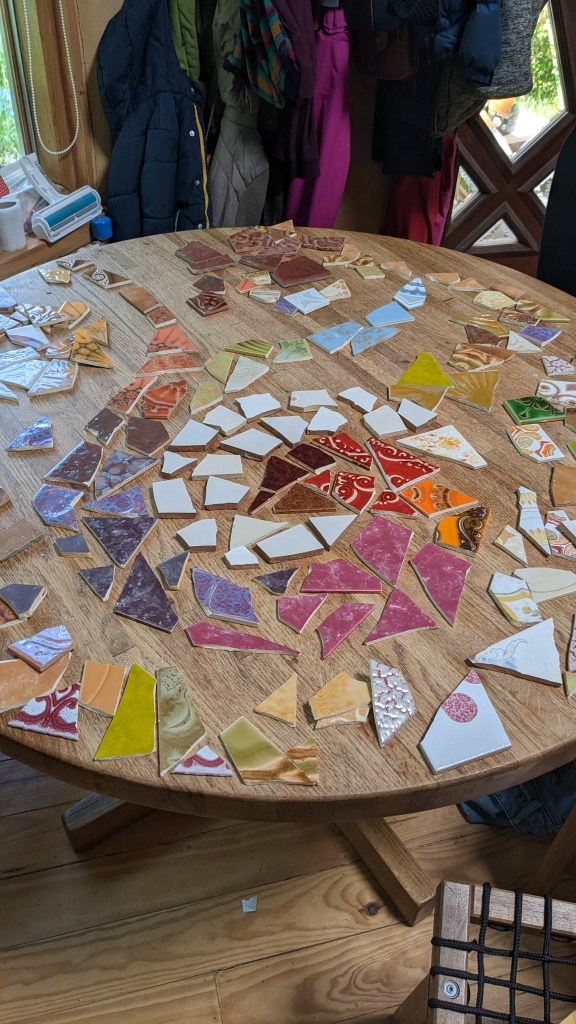
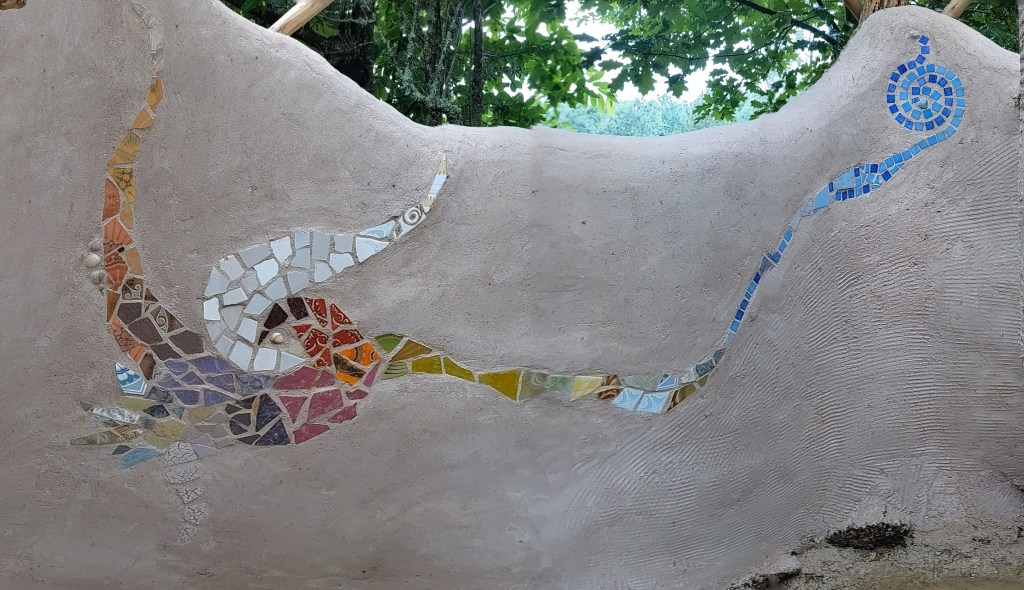
Tal then added her decorative touches with a mosaic that echoes the spiral structure.


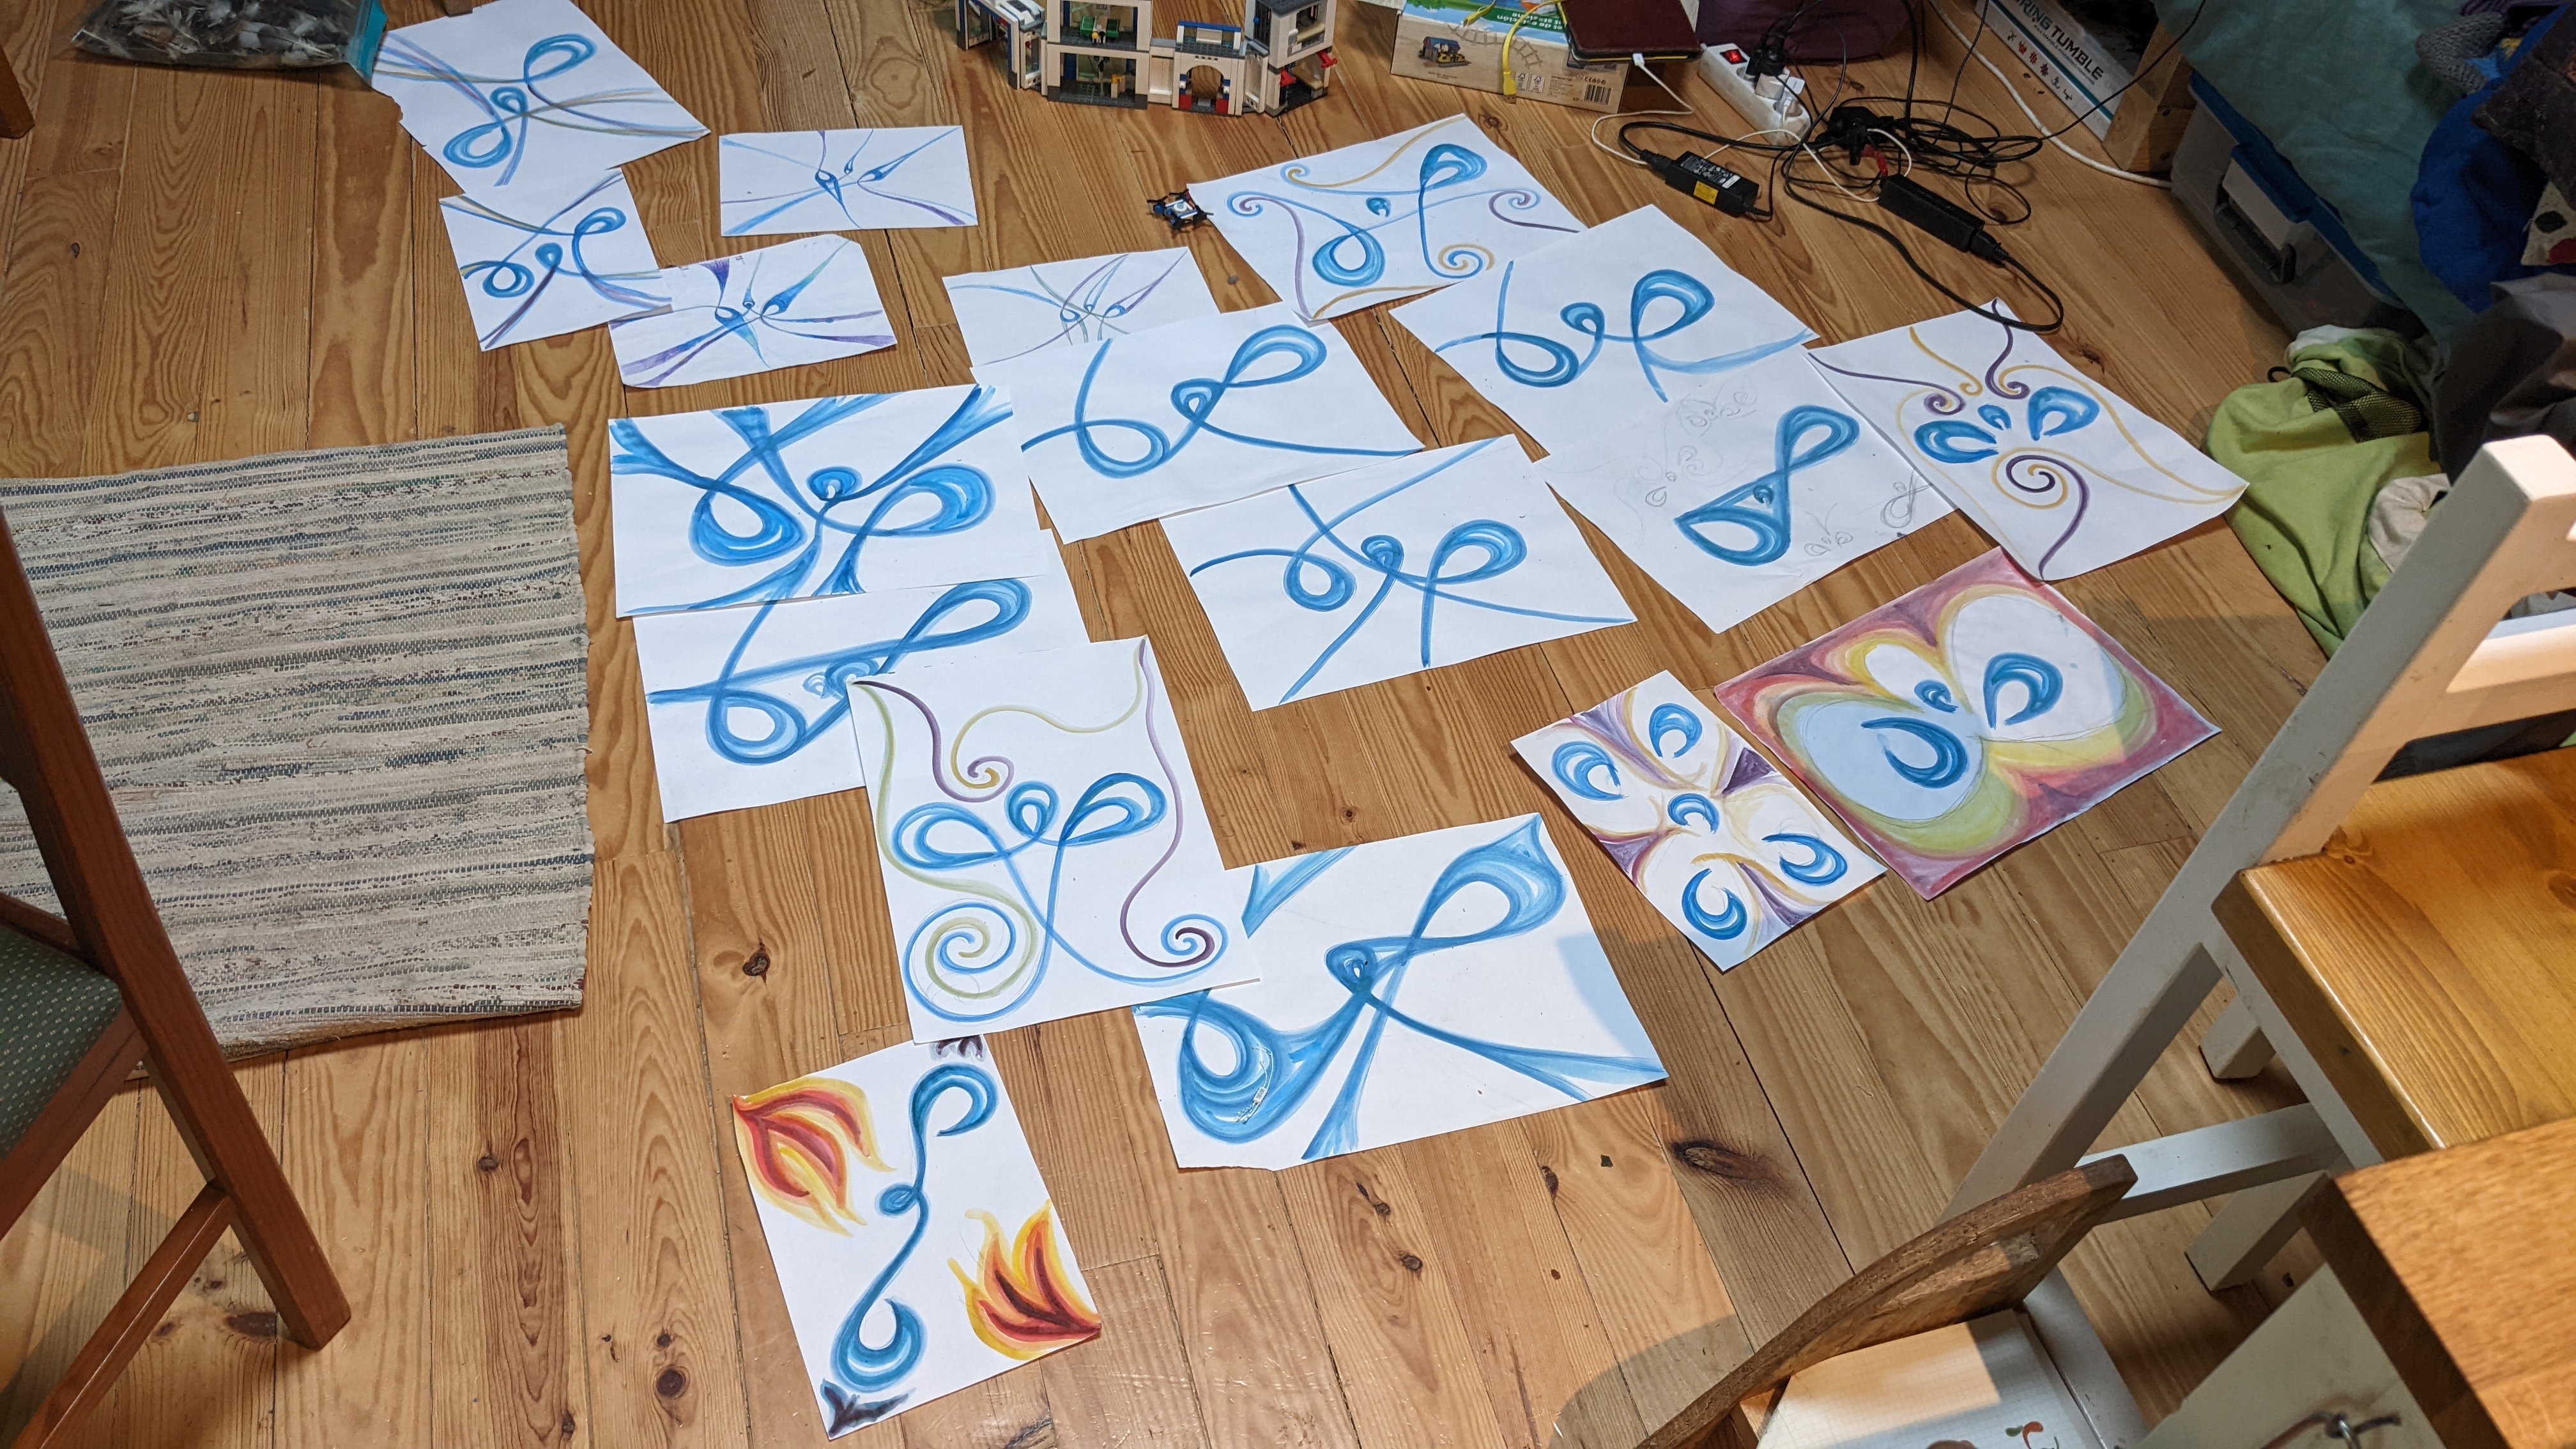
She is also planning to experiment with fresco lime painting on the outside of the shower, once it is plastered, reworking the Hebrew word for water (מים) into her design. It’s a work in progress!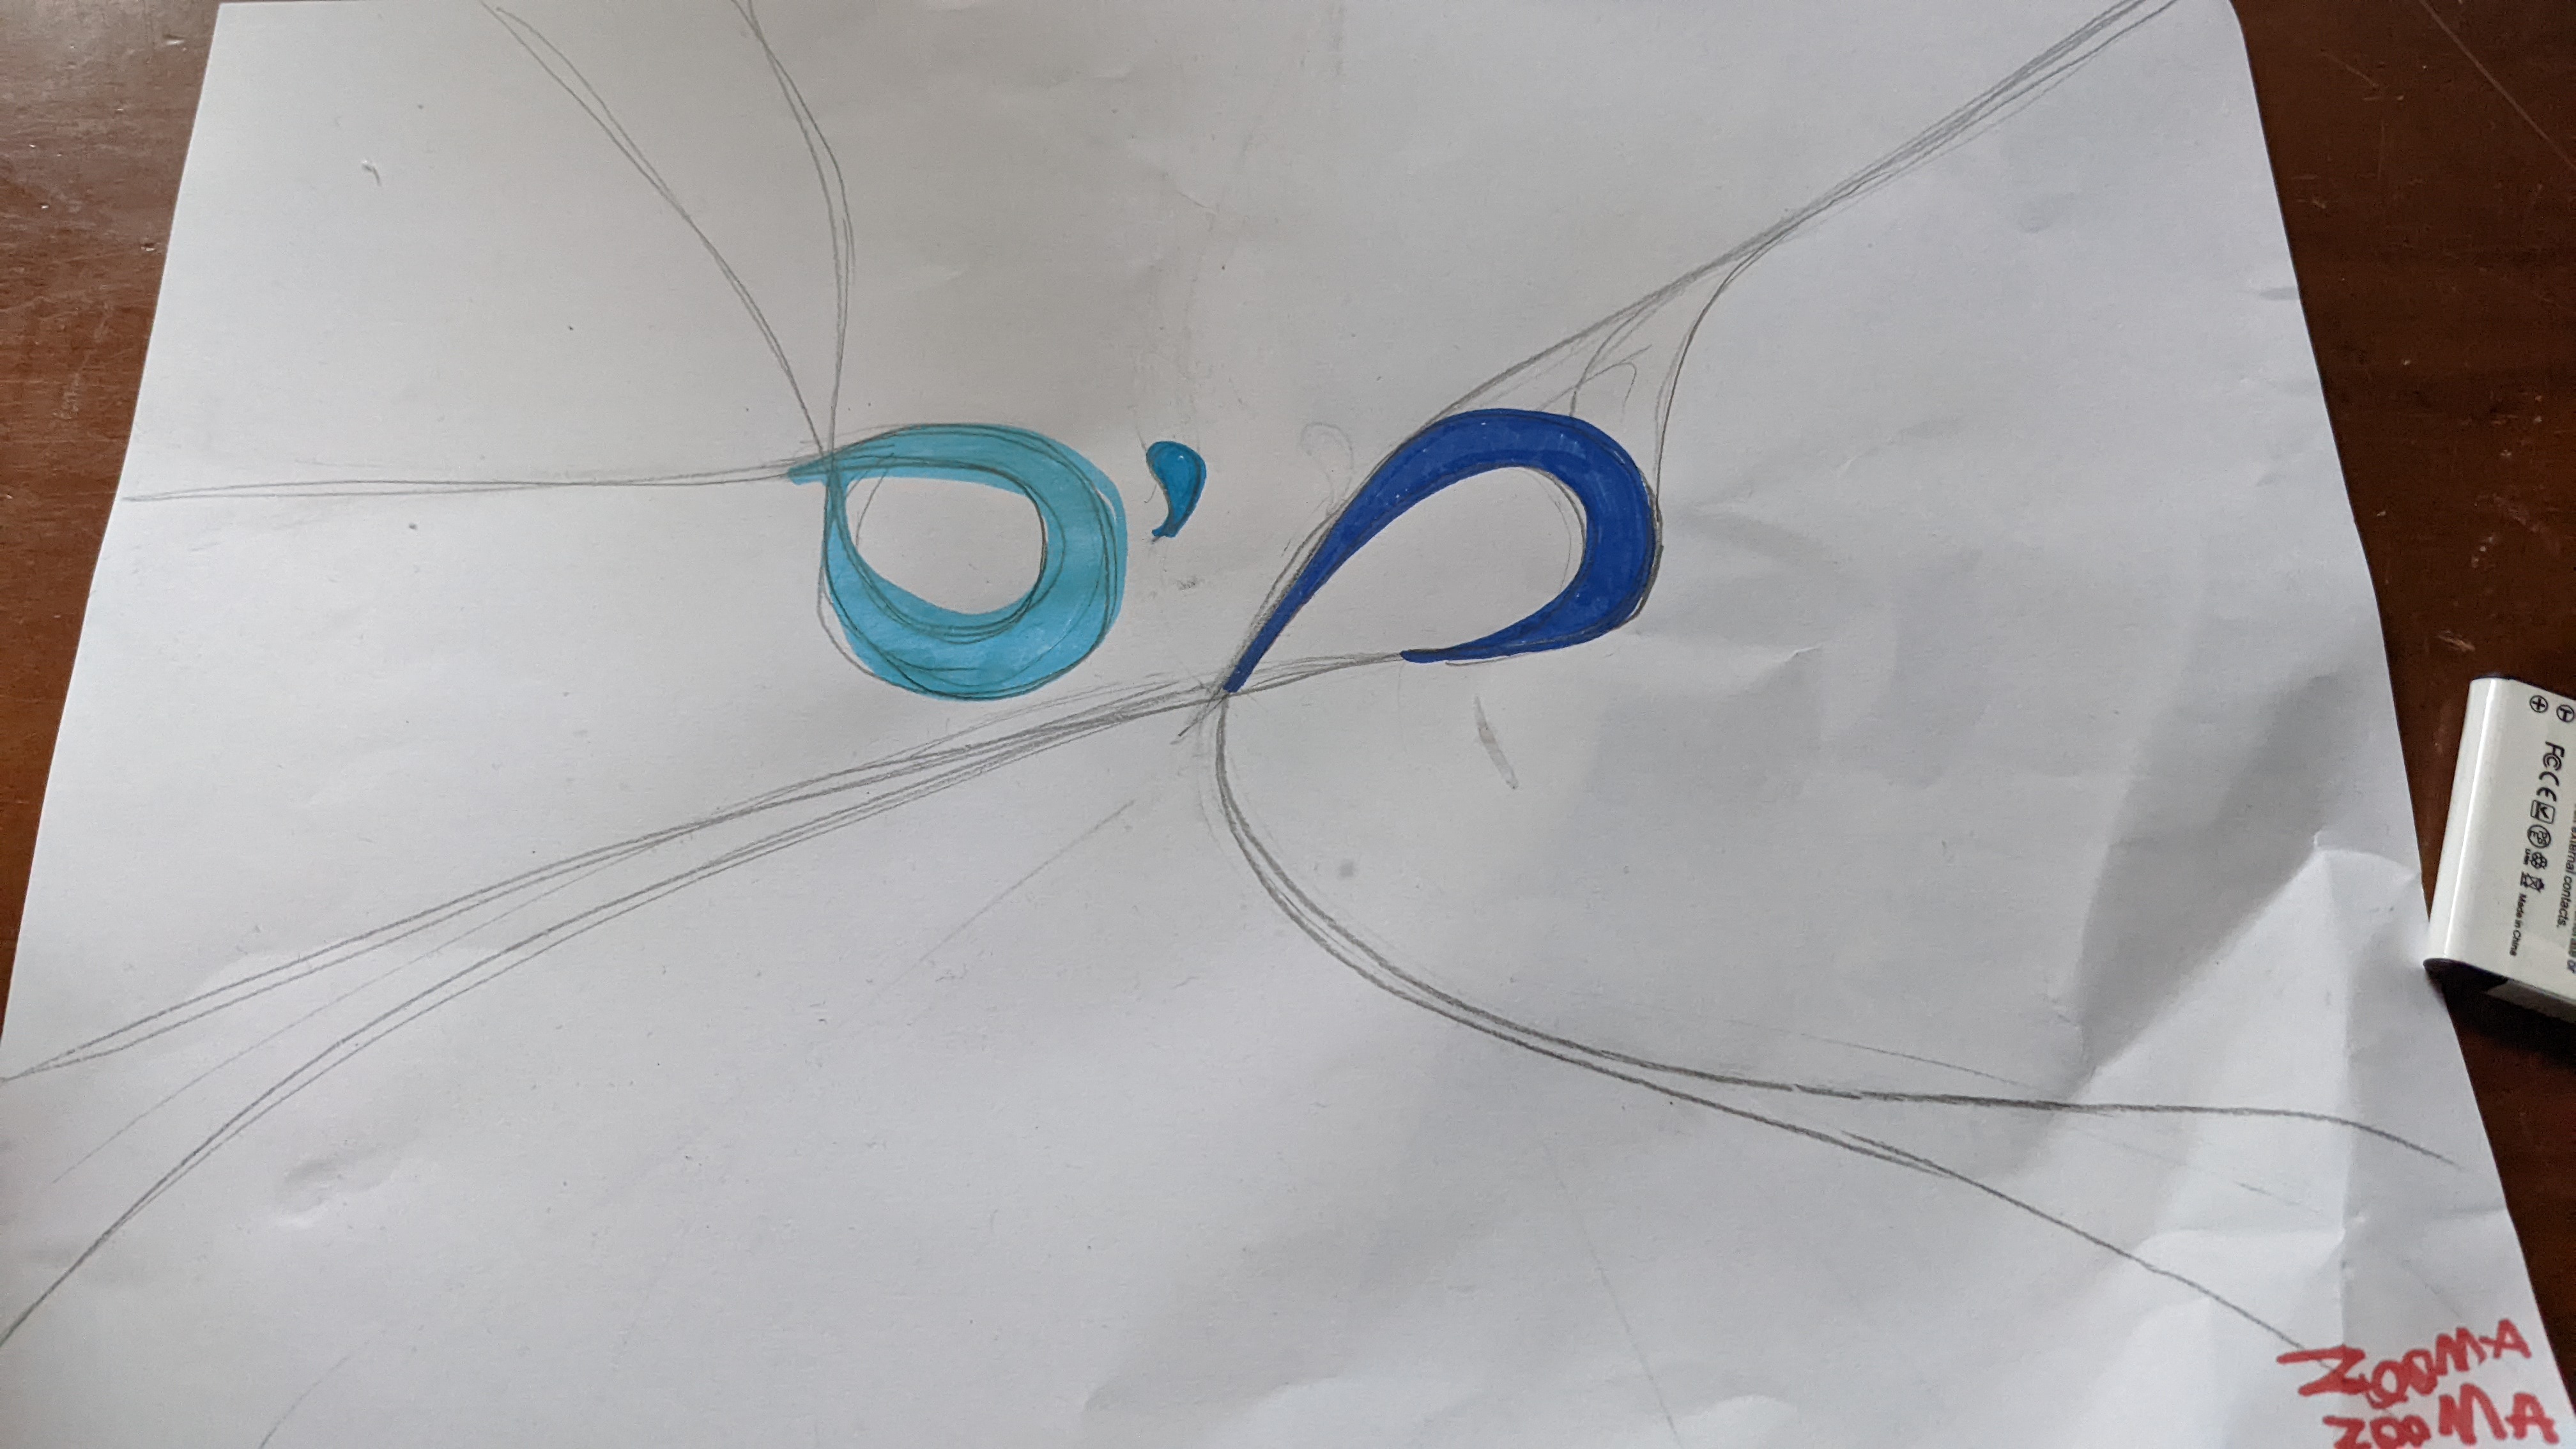
We decided to plaster the entire cob wall with one layer of lime plaster. We used horse manure in this plaster and added some pigment, to give it color and experiment with using pigments in plaster.

For the showering space we intend to finish with Tadelakt. I used the lime plaster here as a base layer, but instead of burnishing it smooth I put a scratch layer for the Tadelakt to adhere to.
-
Outdoor Shower: Finishing Touches – Tadelakt Plaster and Fresco Mural
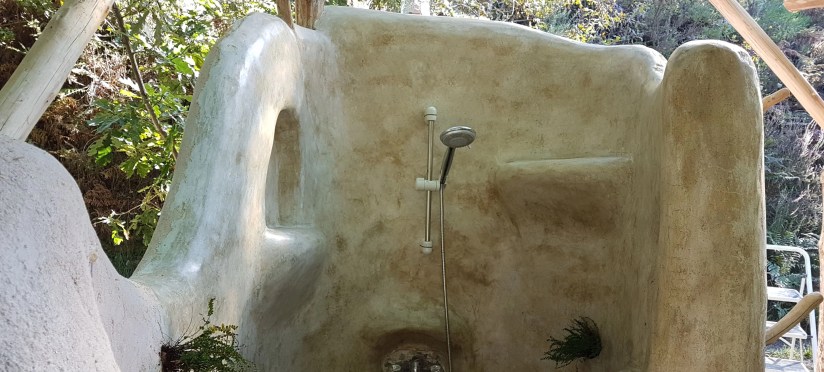
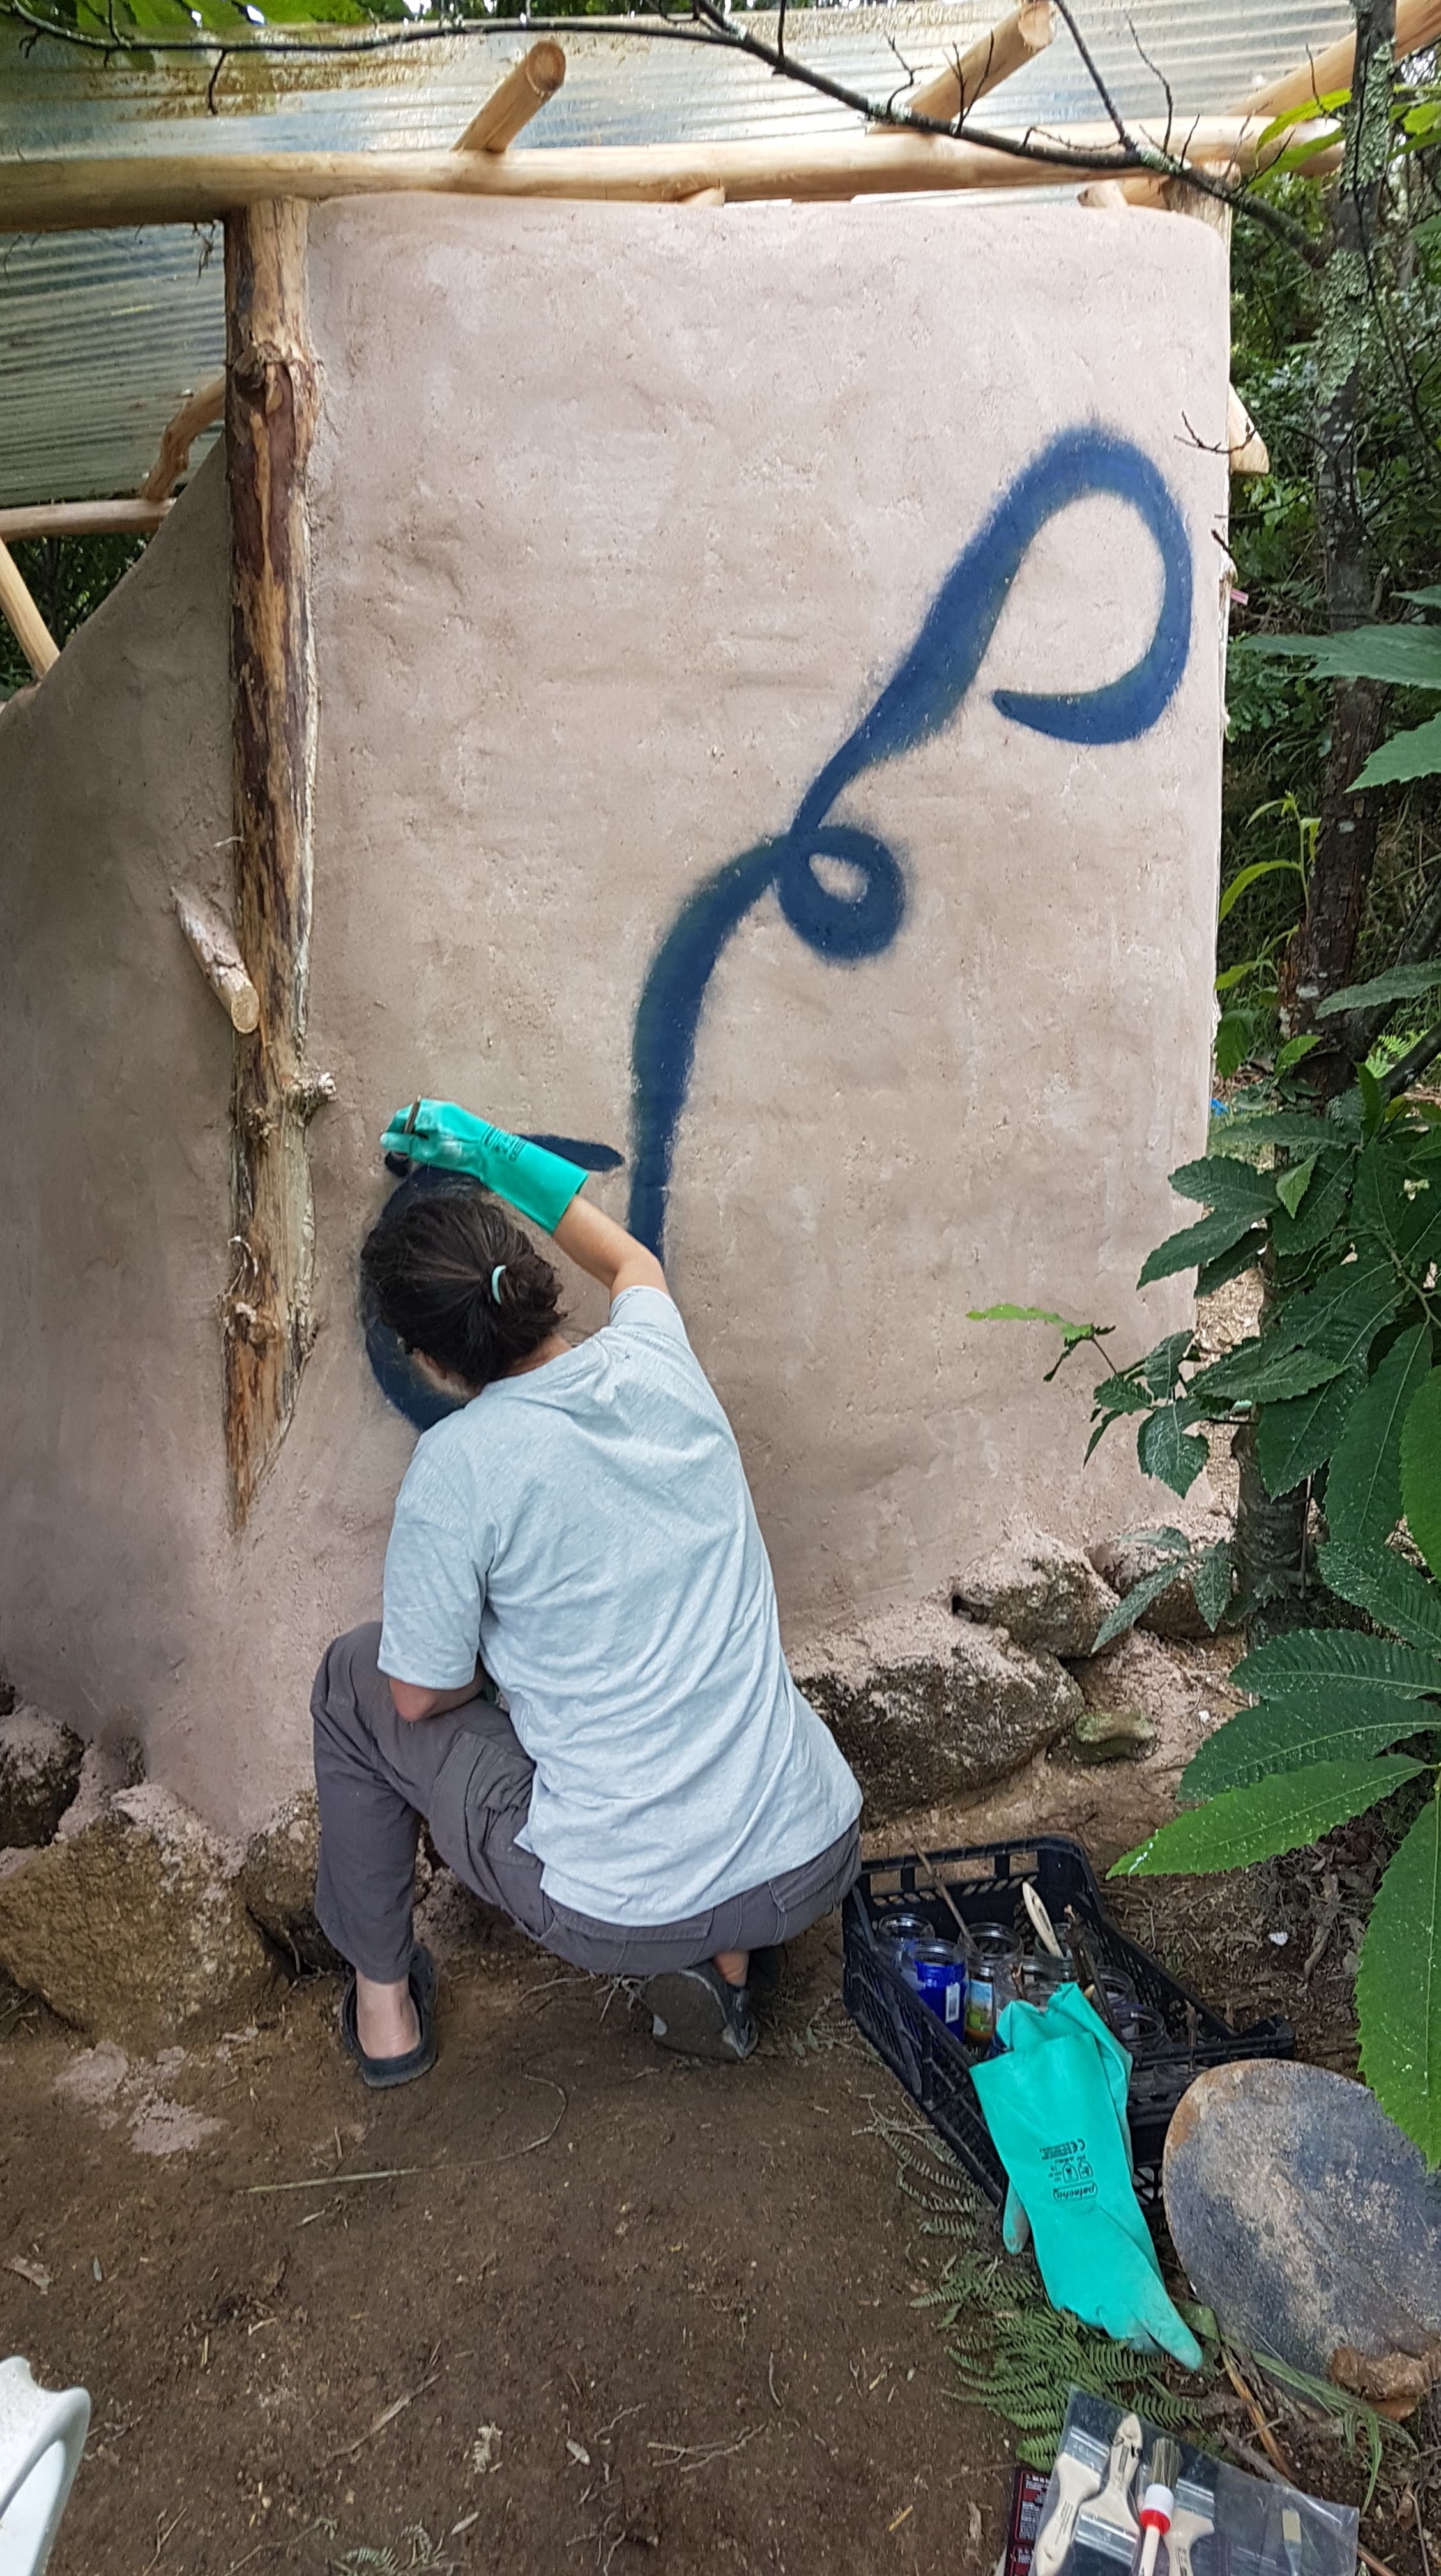
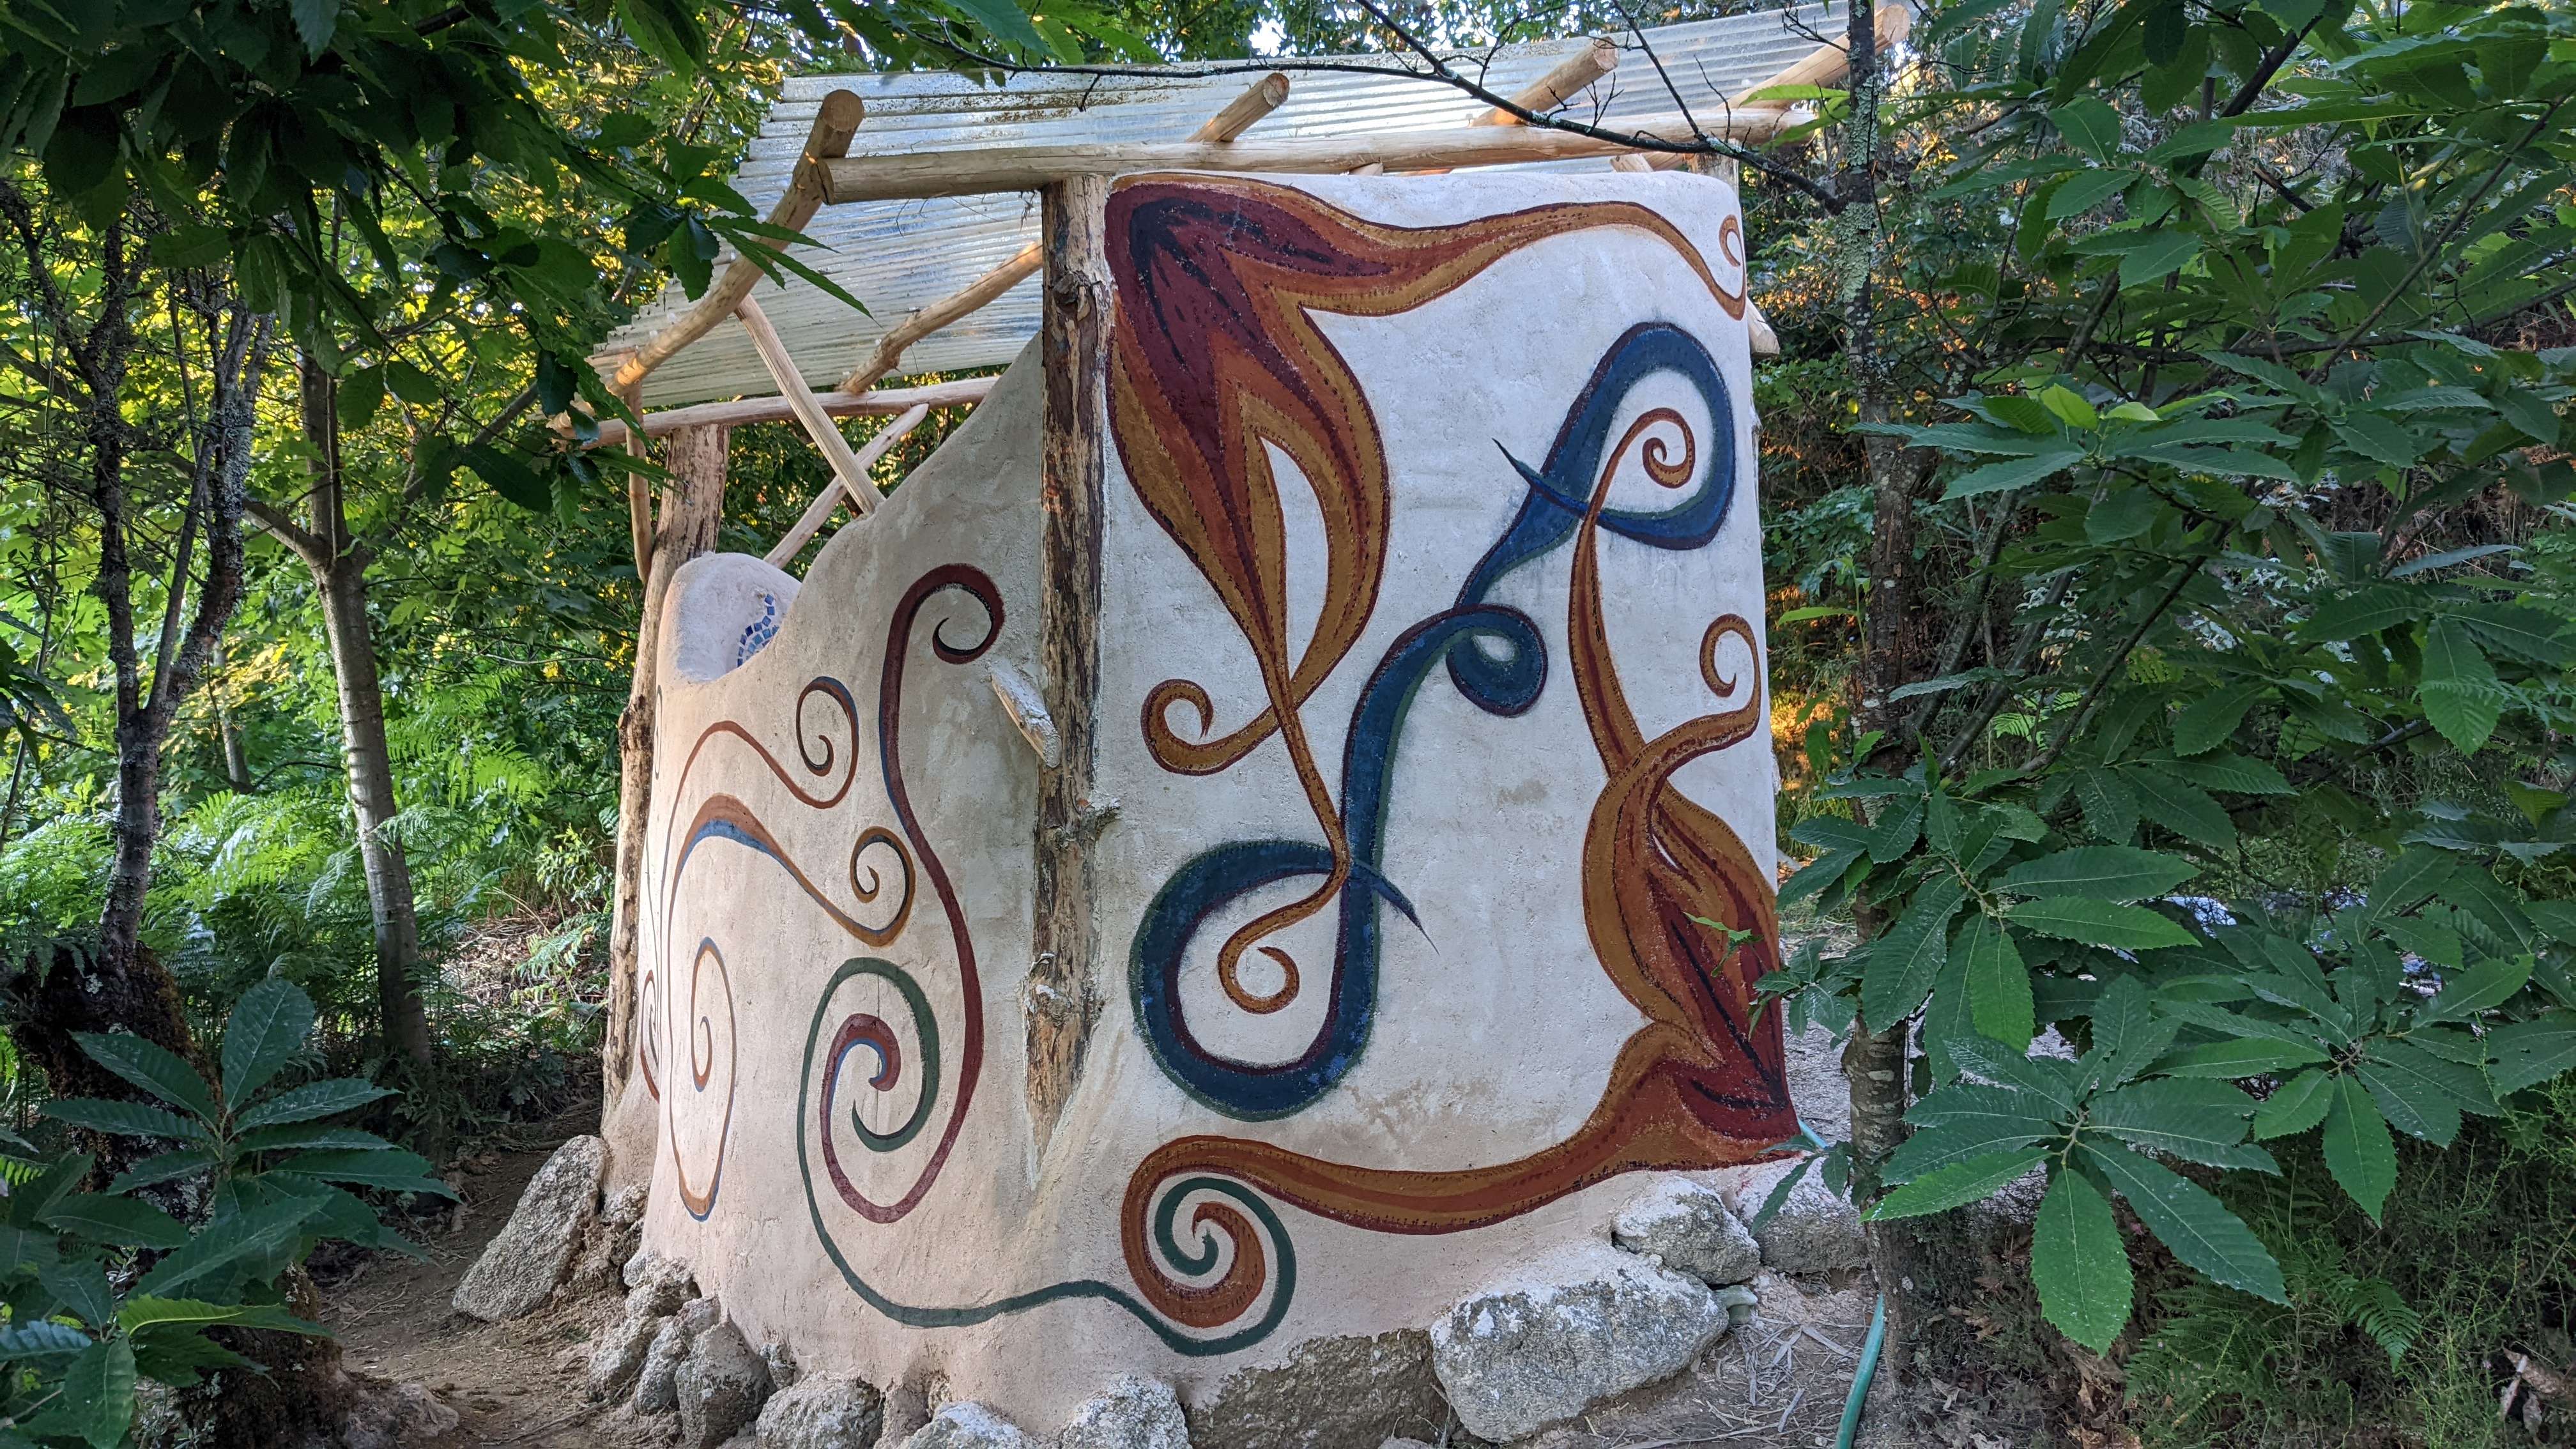
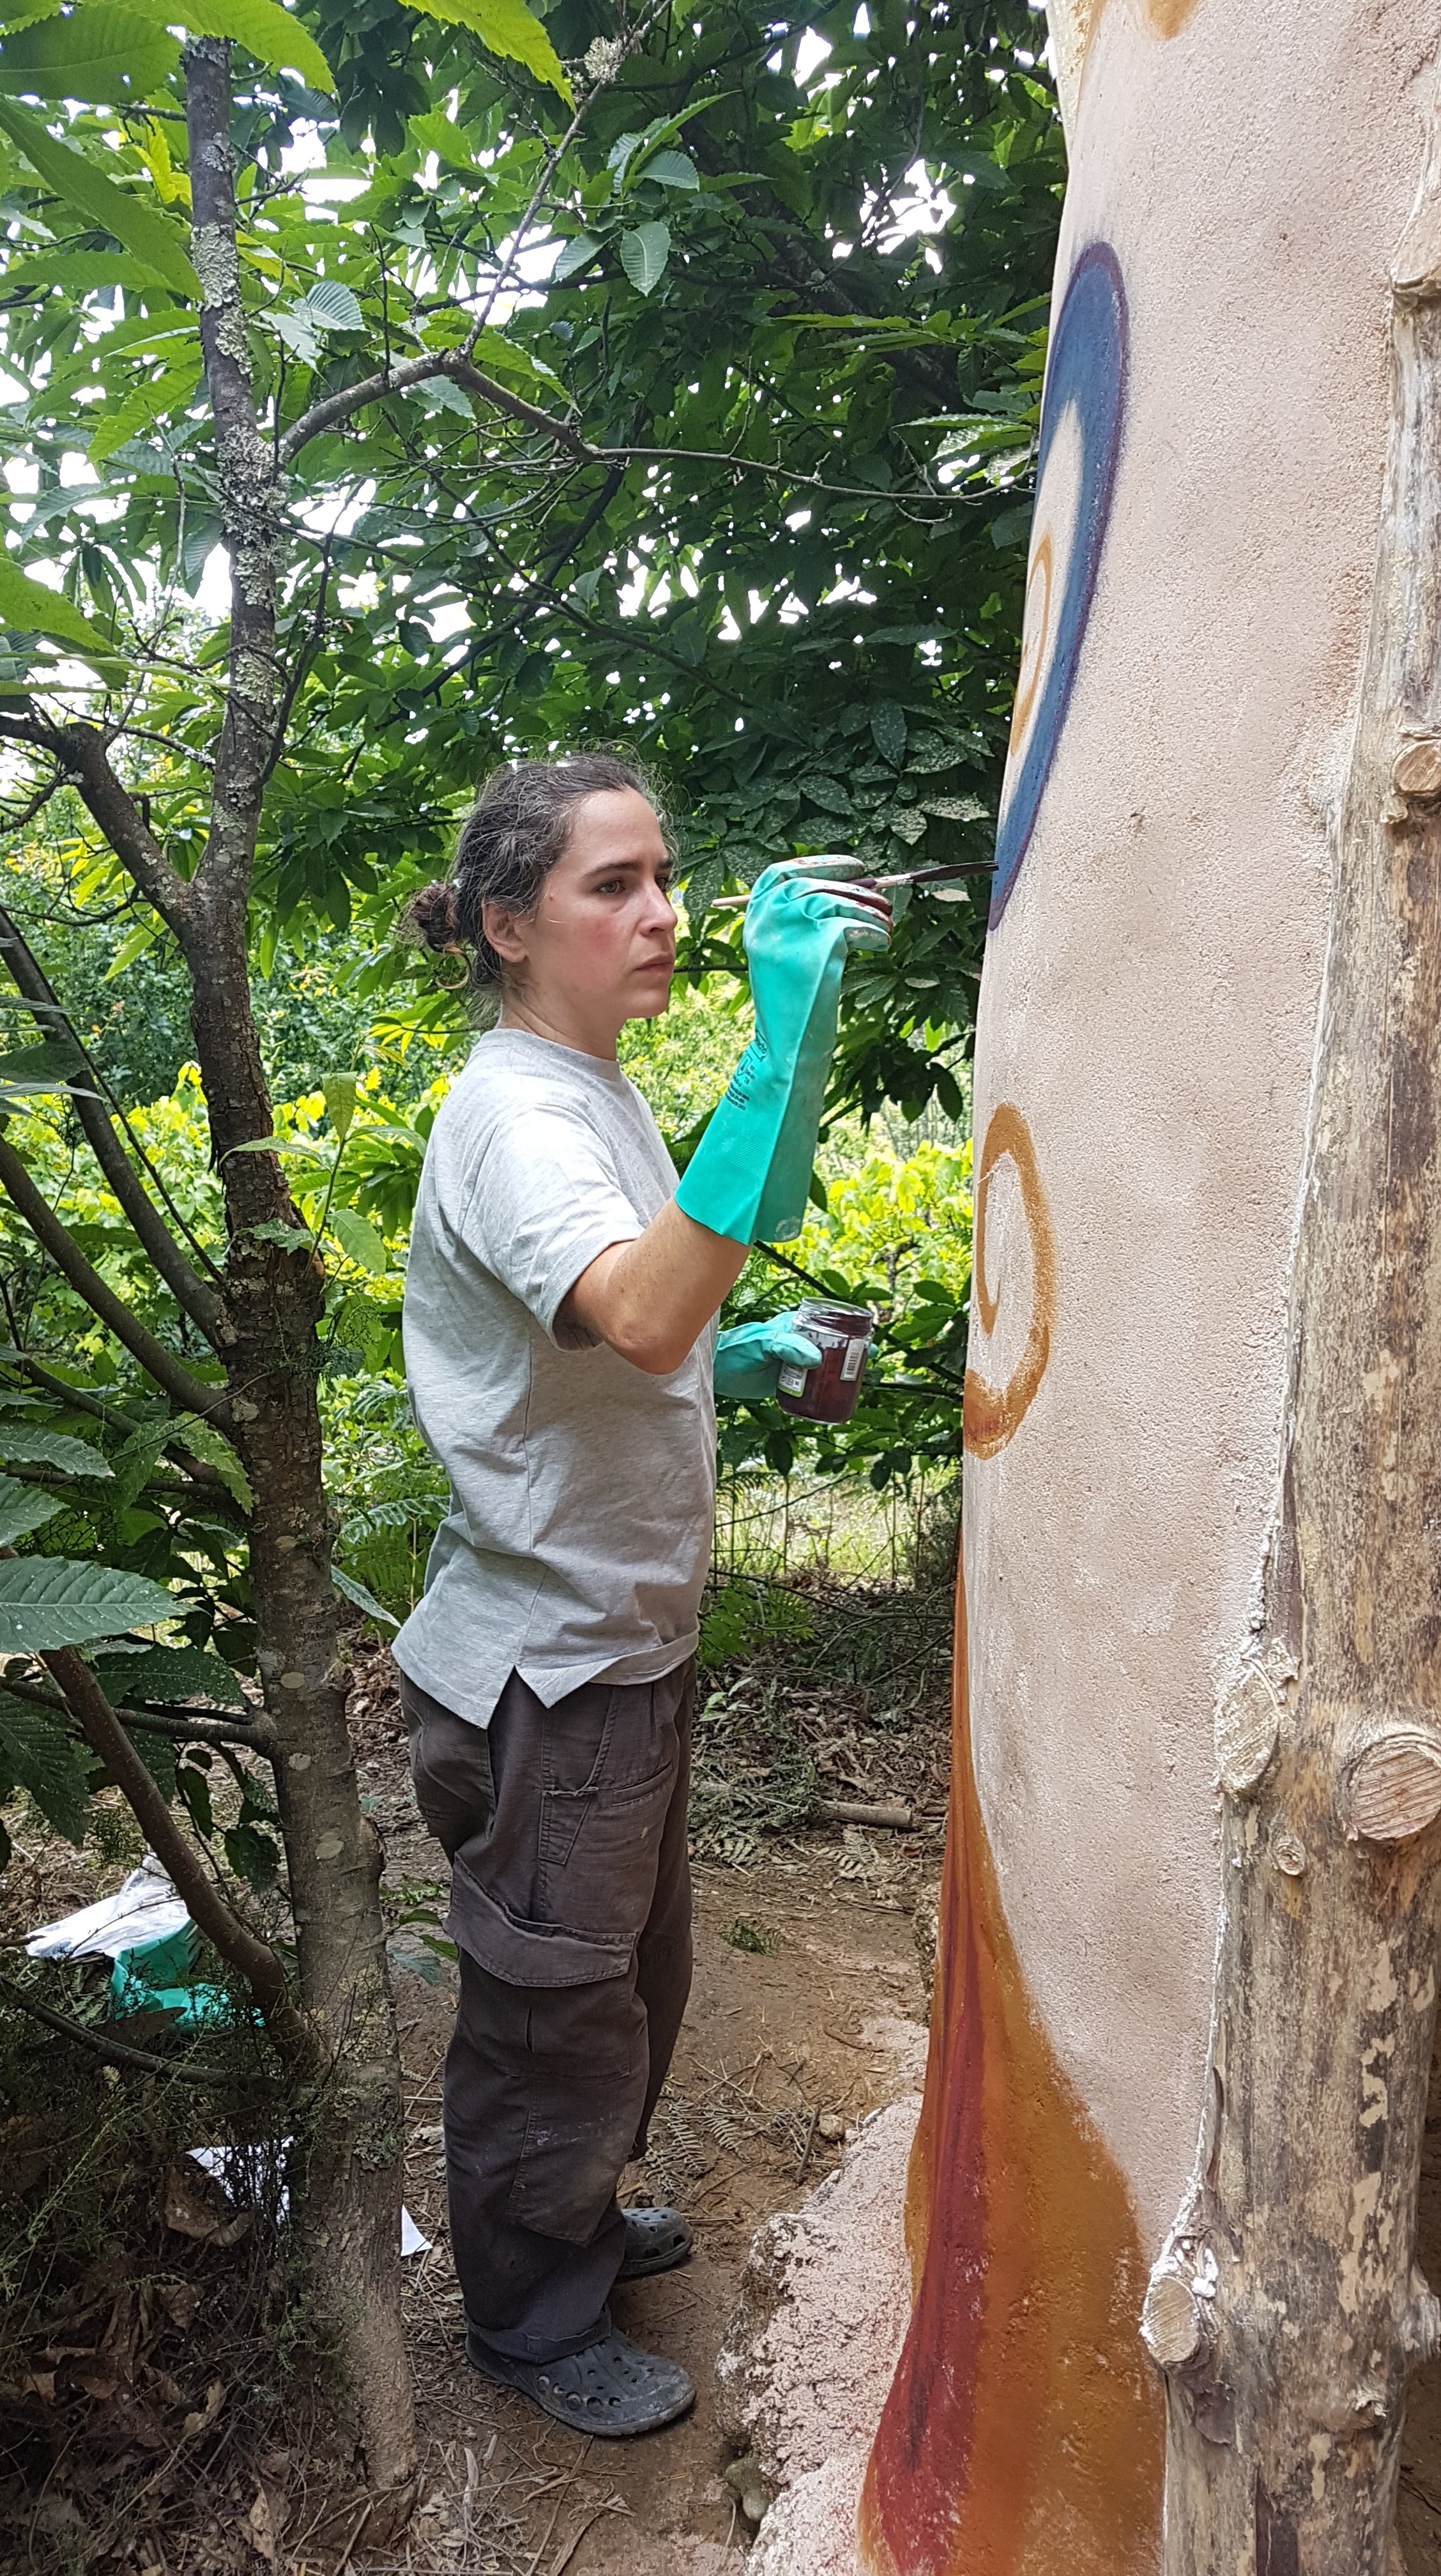
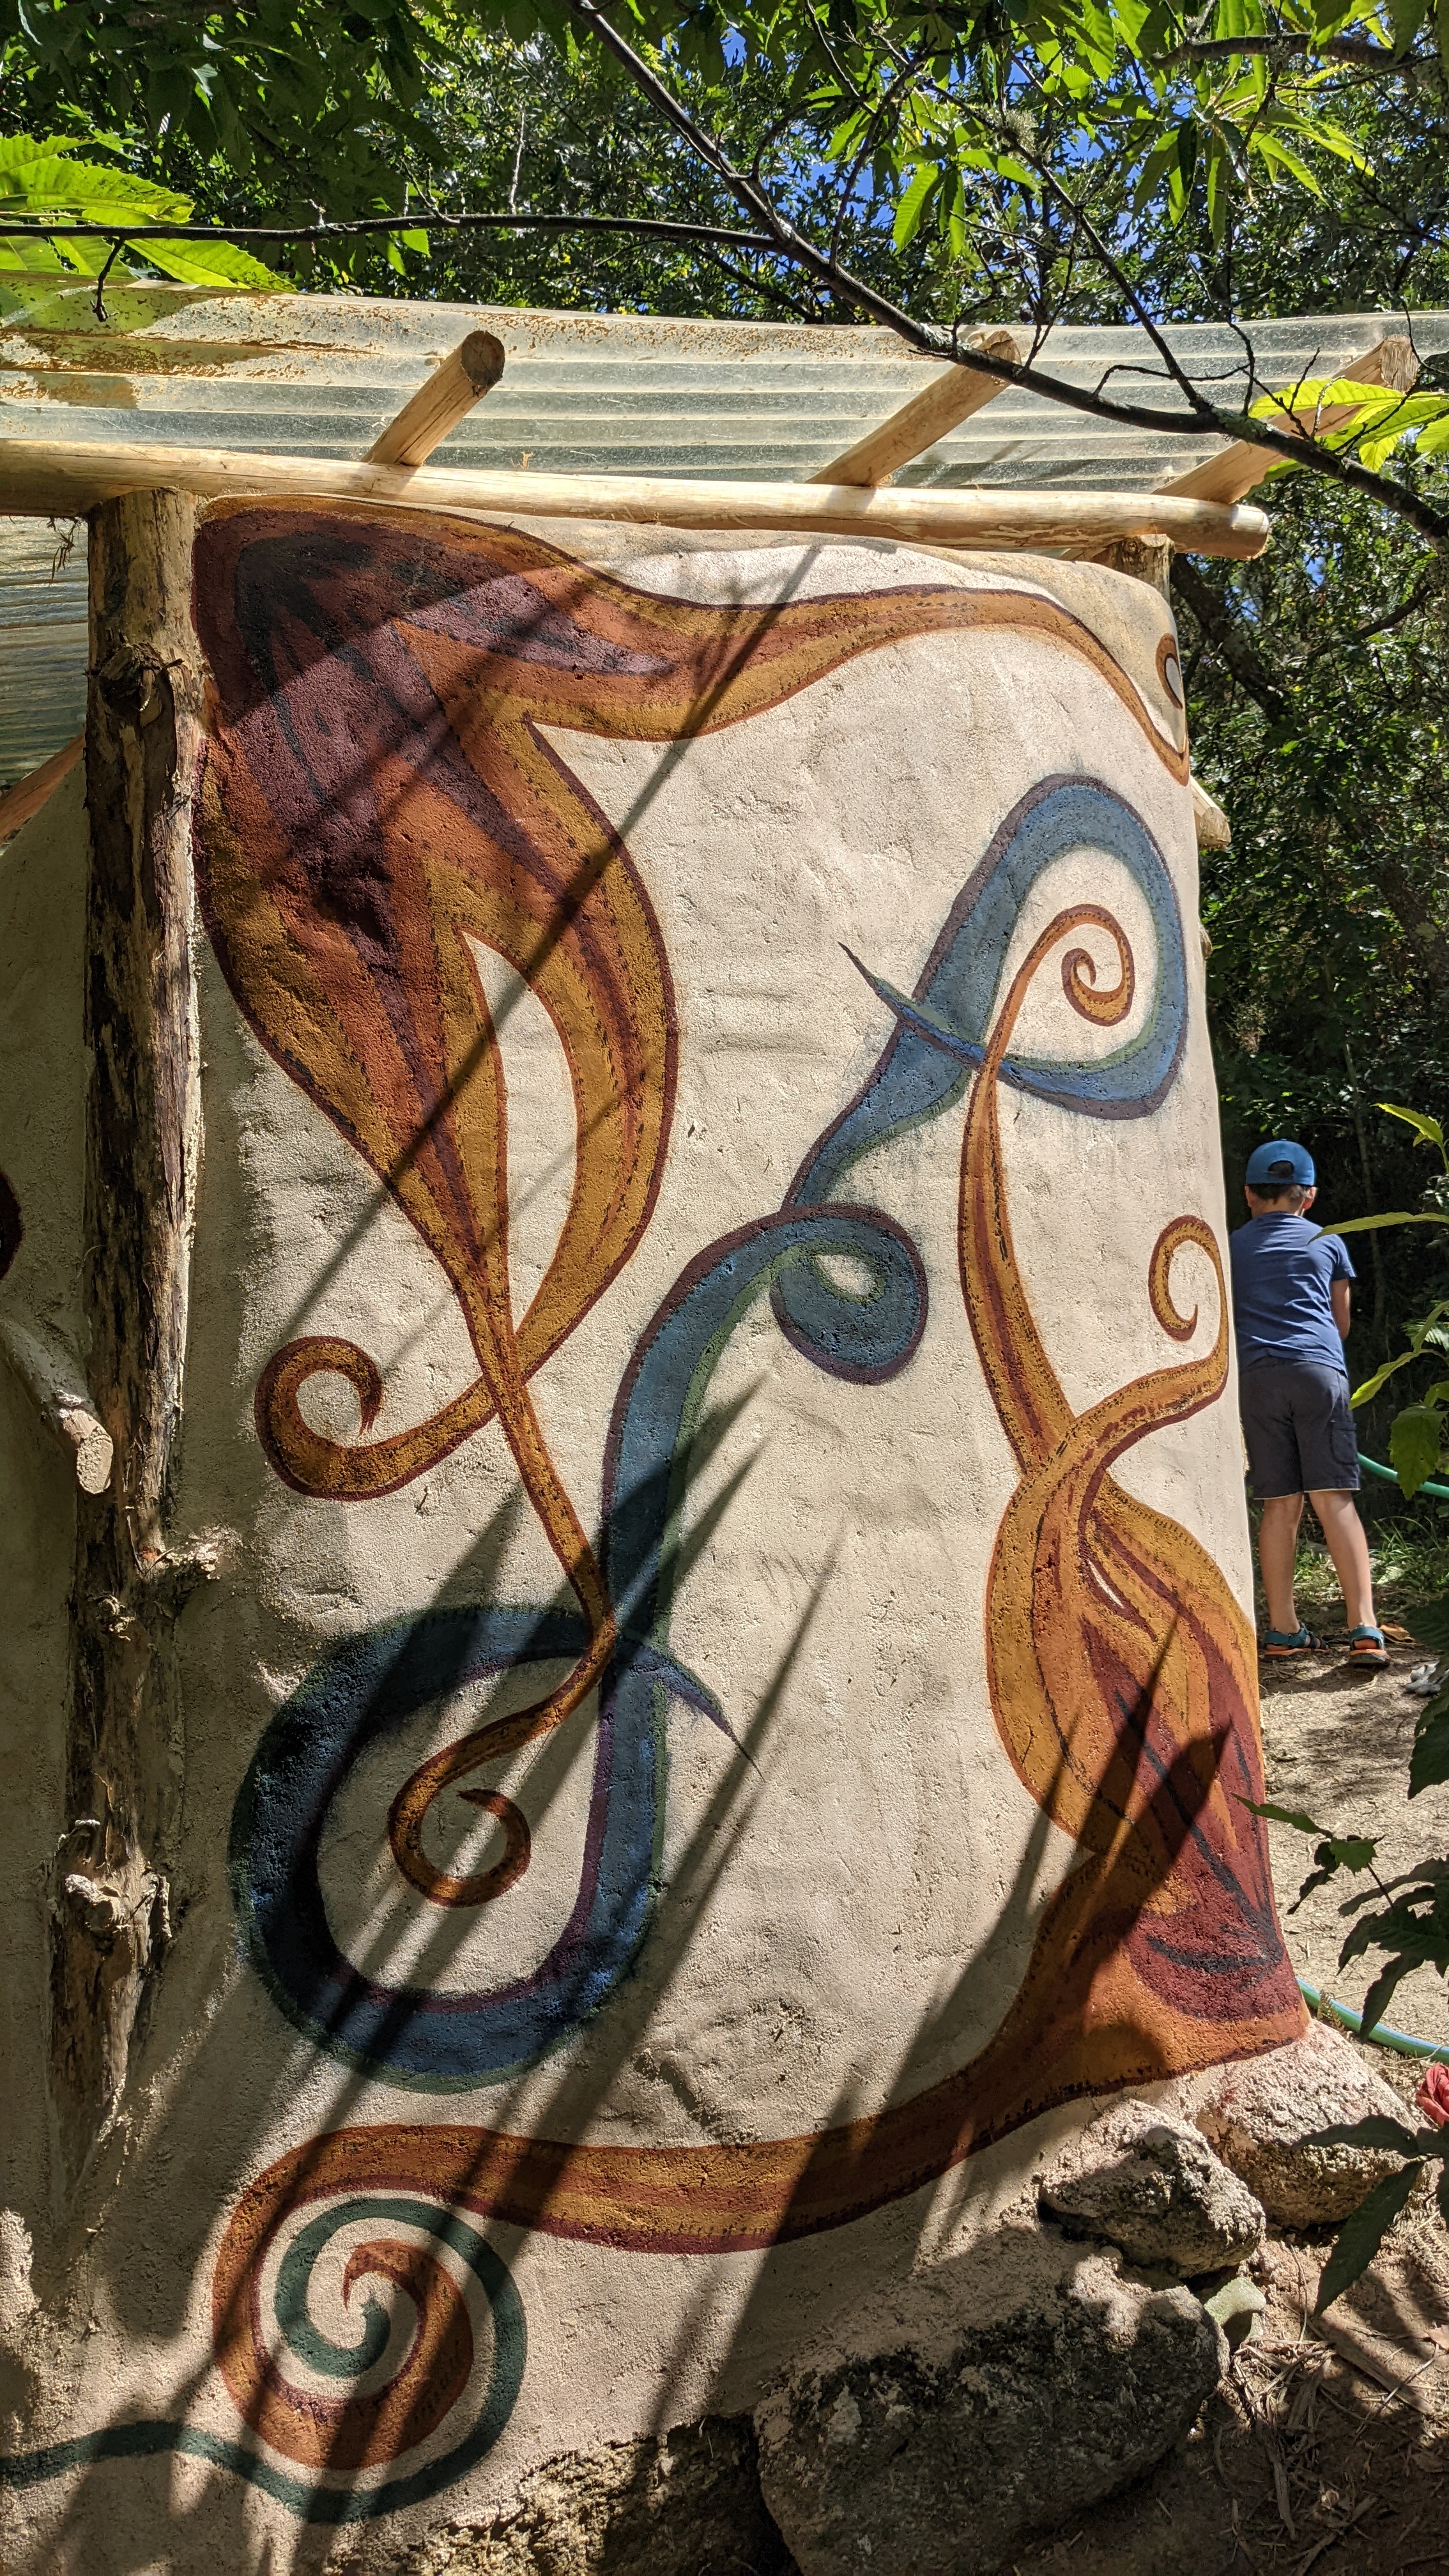
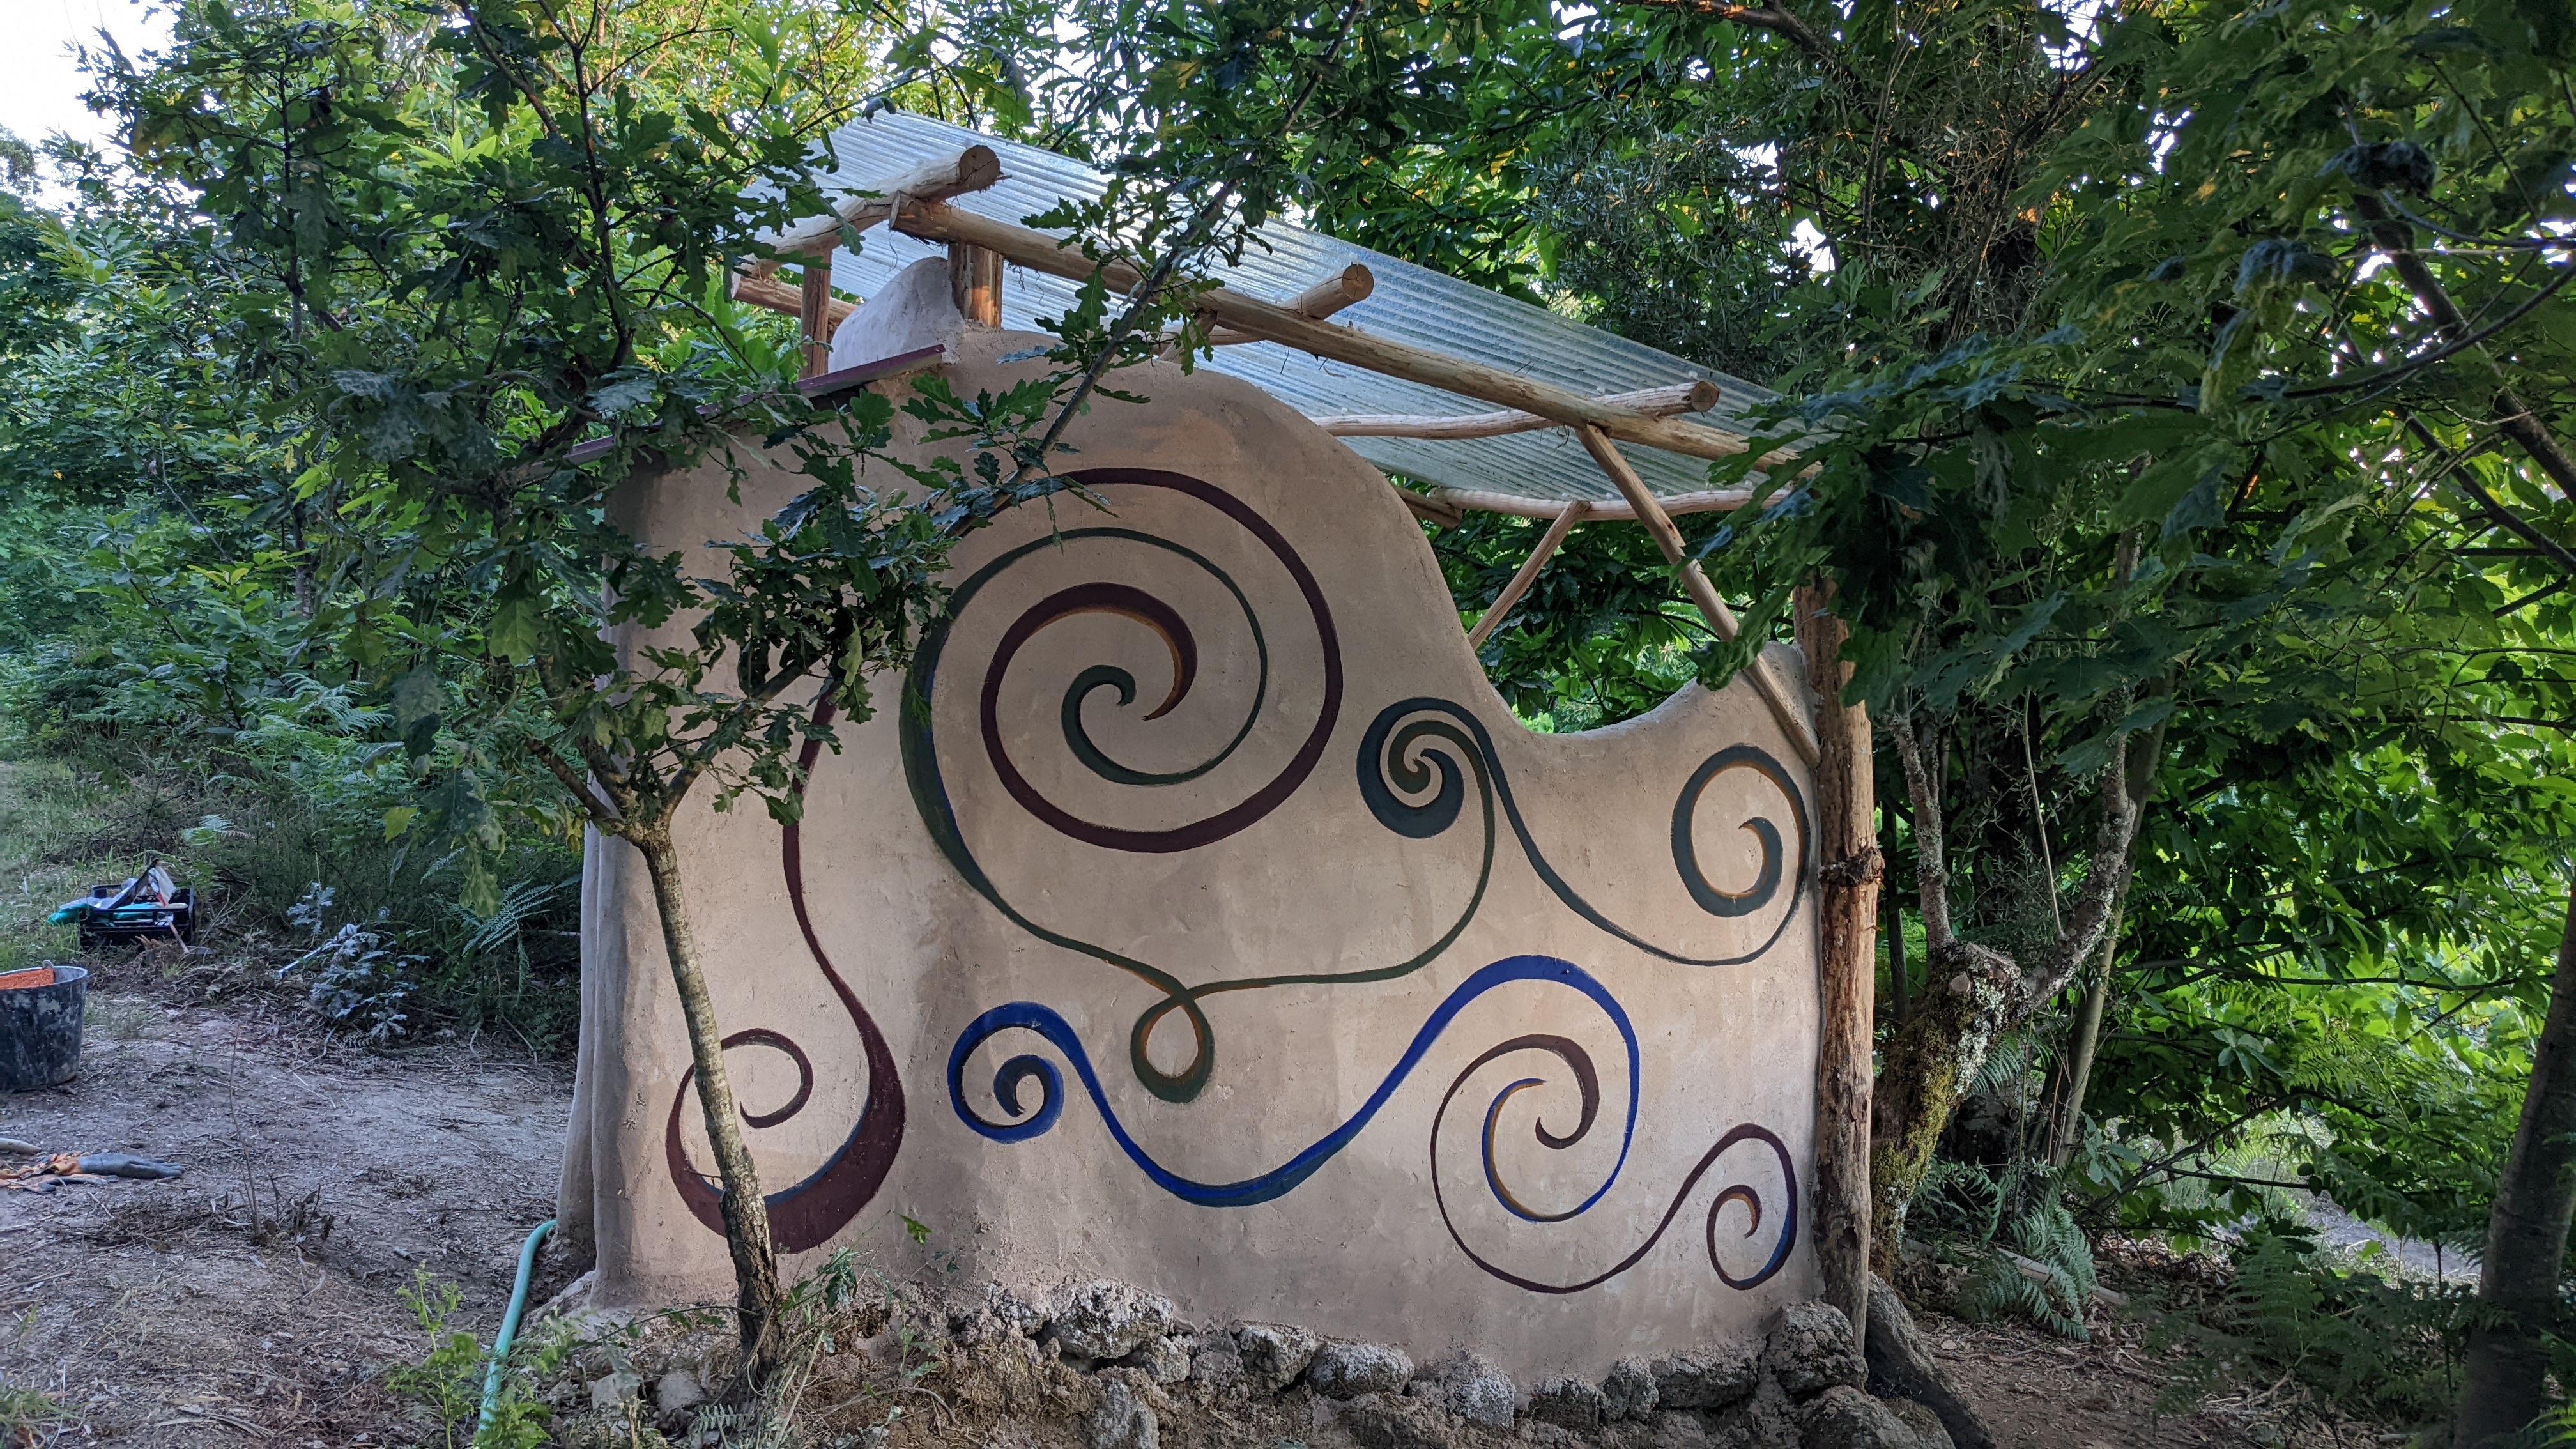
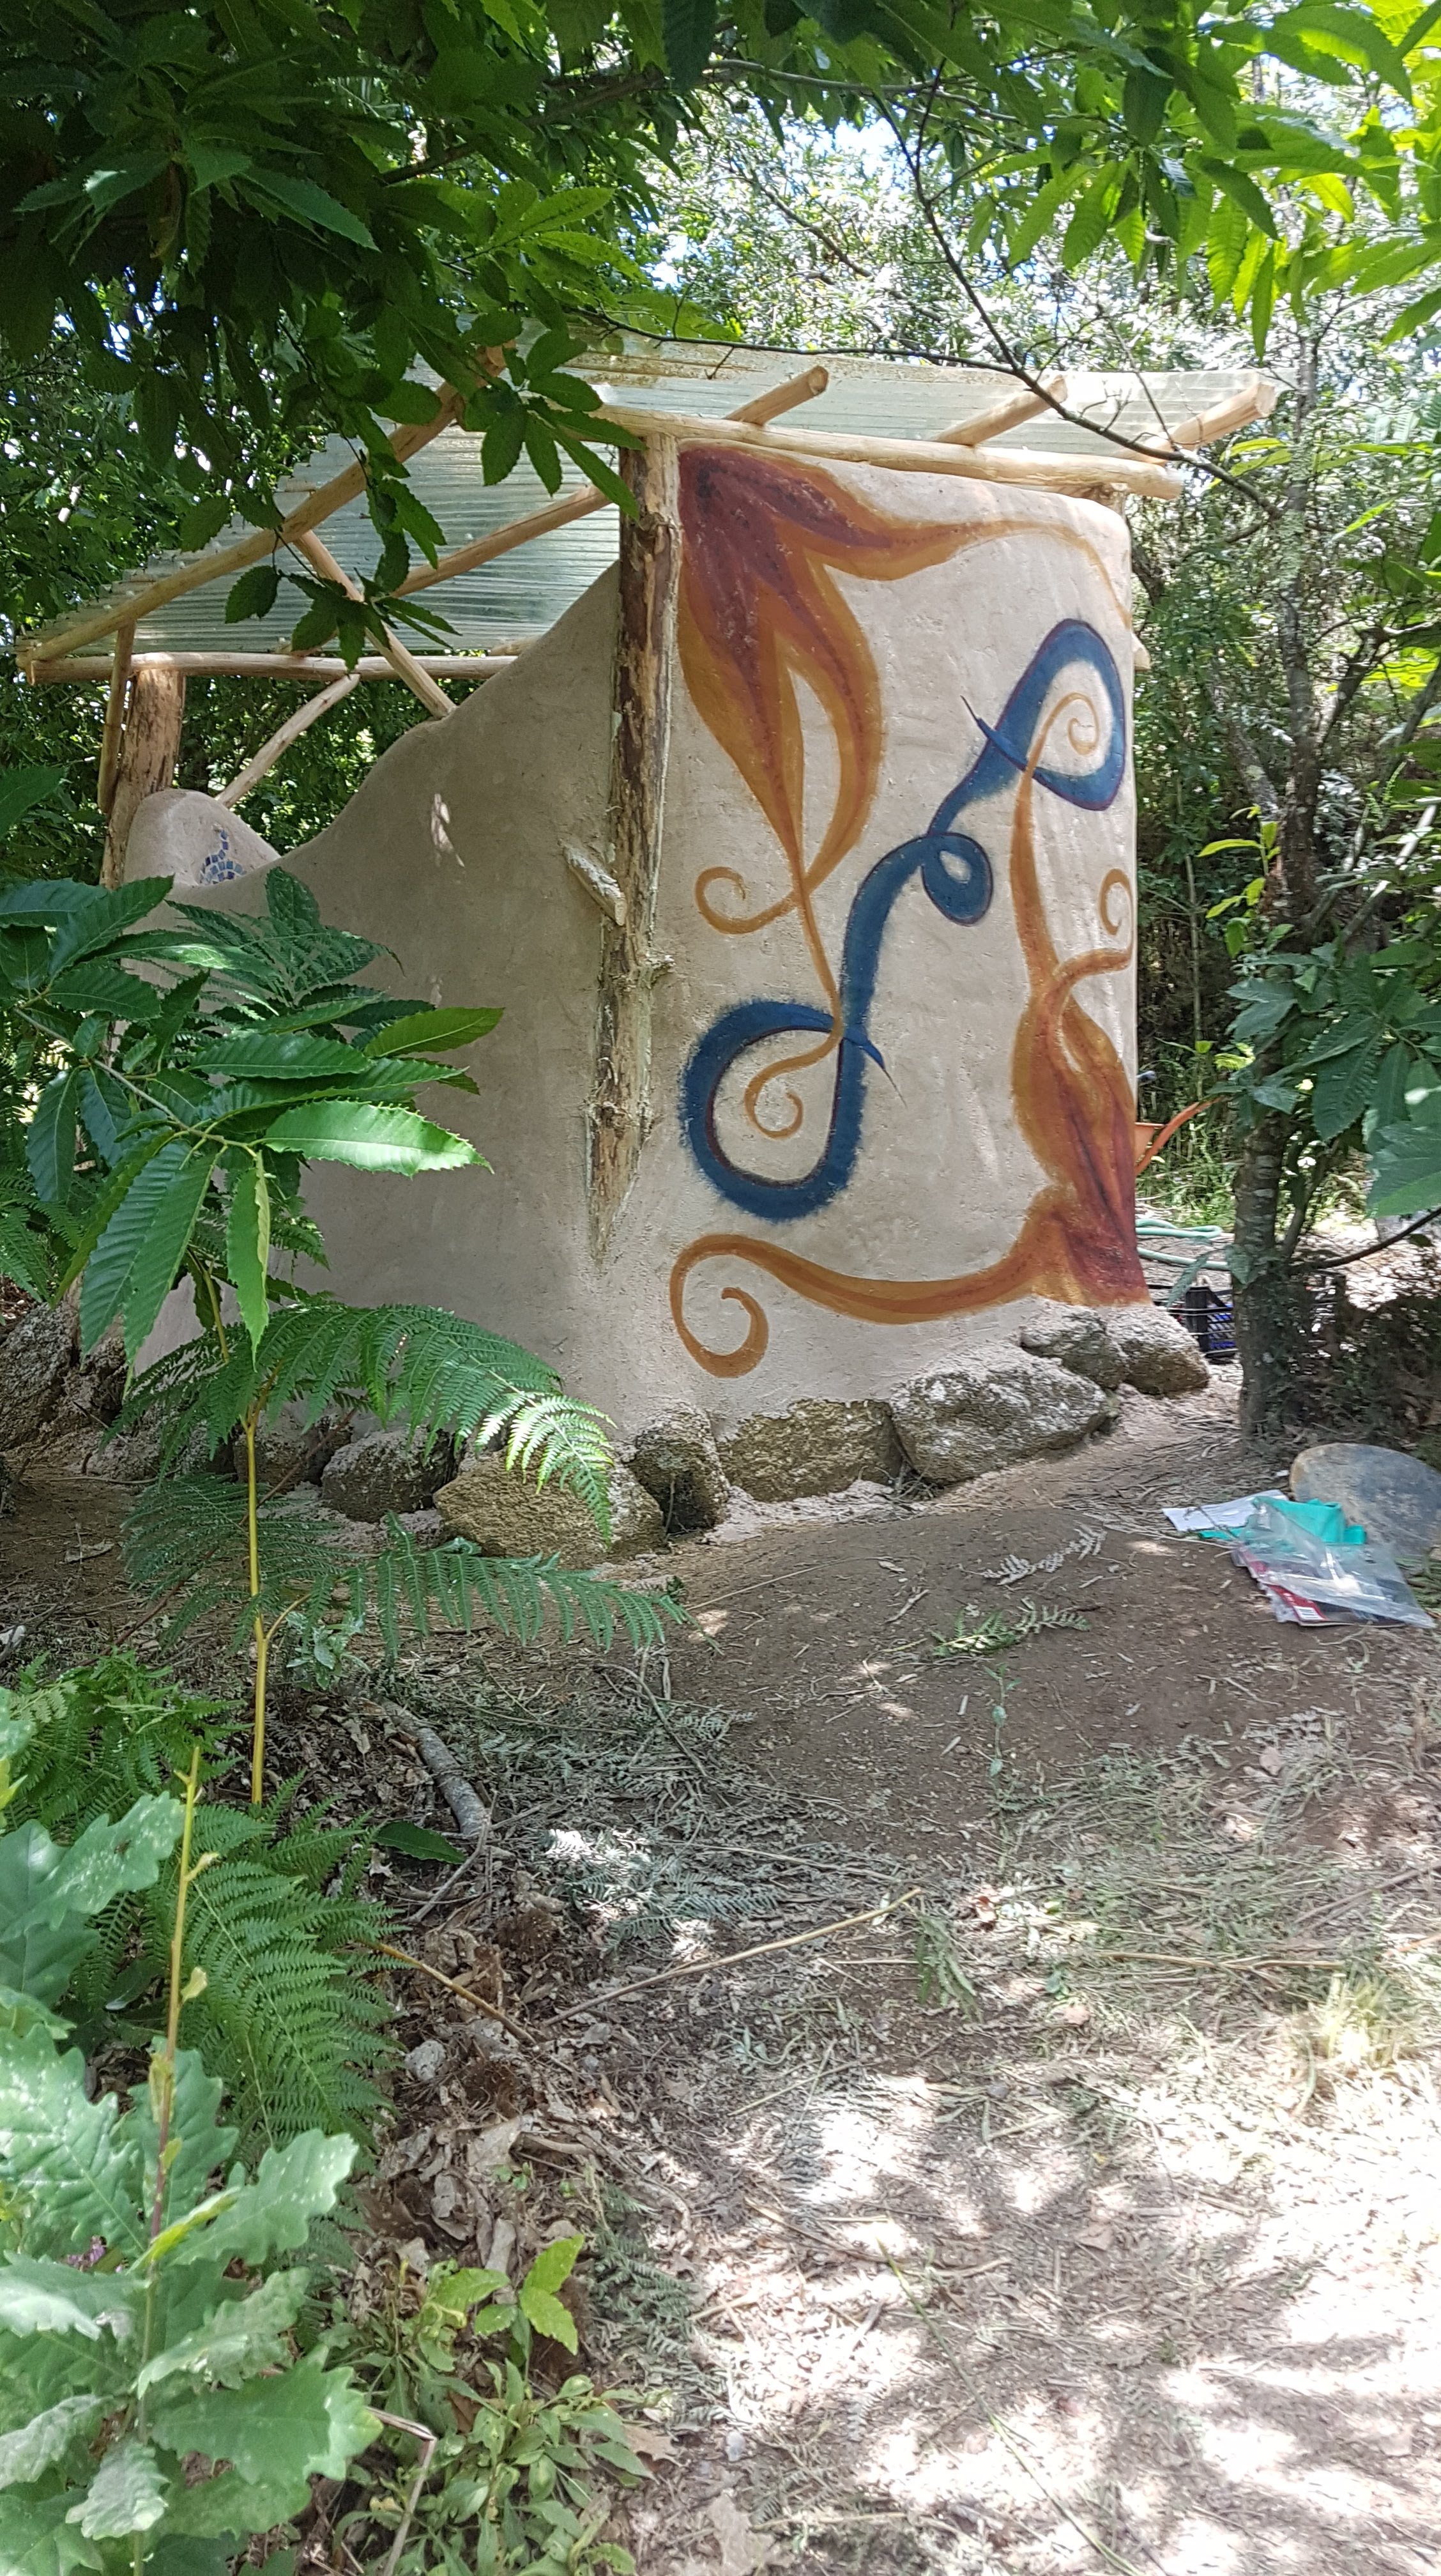
We completed our outdoor shower project at the end of last summer, with the Tadelakt plaster and Fresco mural.
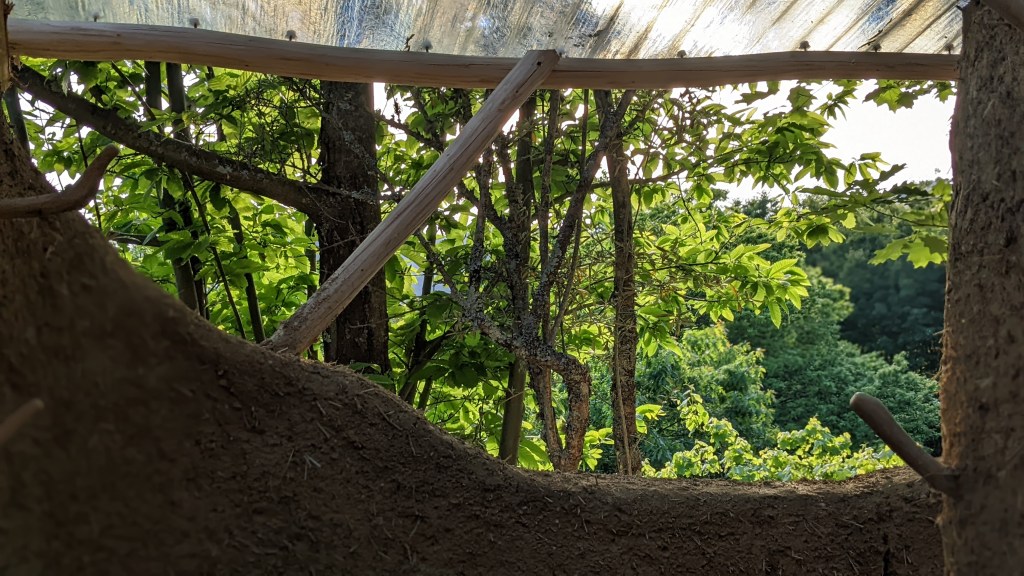
We decided to line the walls of the area that gets wet from the shower with Tadelakt. We happen to be lucky to have a subsoil made out of sharp granite sand and limestone, which is an excellent base for making our own Tadelakt. We used a 1:1 ratio hydrated lime powder to finely sieved subsoil. This was an experiment for future projects, and it turned out beautifully. Lining the walls with the plaster and the consequent stoning and soaping is quite time consuming, but worth it in the end. The finished Tadelakt looks gorgeous and we are very happy with it.


Finally, there was only the outside of the shower left for Tal’s finishing touches. For this we decided to experiment with Fresco lime paint–100% mineral paint composed of slaked lime and natural pigments, applied directly onto fresh lime plaster. As per her tradition, Tal incorporated the Hebrew word for “water,” “מים,” into her design.